("tasks", {
allowApiCrud: Allow.authenticated,
allowApiInsert: "admin",
allowApiDelete: "admin"
})
export class Task {
@Fields.id()
id!: string
@Fields.string({
validate: (task) => {
if (task.title.length < 3) throw "Too Short"
}
allowApiUpdate: "admin"
})
title = ""
@Fields.boolean()
completed = false
}
```
2. Let's give the user _"Jane"_ the `admin` role by modifying the `roles` array of her `validUsers` entry.
```ts{3,13}
// src/shared/AuthController.ts
const validUsers = [{ name: "Jane", admin: true }, { name: "Steve" }];
export class AuthController {
@BackendMethod({ allowed: true })
static async signIn(name: string) {
const user = validUsers.find((user) => user.name === name);
if (user) {
remult.user = {
id: user.name,
name: user.name,
roles: user.admin ? ["admin"] : [],
};
remult.context.request!.session!["user"] = remult.user;
return remult.user;
} else {
throw Error("Invalid user, try 'Steve' or 'Jane'");
}
}
```
**Sign in to the app as _"Steve"_ to test that the actions restricted to `admin` users are not allowed. :lock:**
## Role-based Authorization on the Frontend
From a user experience perspective it only makes sense that users that can't add or delete, would not see these buttons.
Let's reuse the same definitions on the Frontend.
We'll use the entity's metadata to only show the form if the user is allowed to insert
```vue{8,23}
// src/App.vue
```
This way we can keep the frontend consistent with the `api`'s Authorization rules
- Note We send the `task` to the `apiDeleteAllowed` method, because the `apiDeleteAllowed` option, can be sophisticated and can also be based on the specific item's values.
# vue - Tutorial - Database
# Database
Up until now the todo app has been using a plain JSON file to store the list of tasks. **In production, we'd like to use a `Postgres` database table instead.**
::: tip Learn more
See the [Quickstart](https://remult.dev/docs/quickstart.html#connecting-a-database) article for the (long) list of relational and non-relational databases Remult supports.
:::
::: warning Don't have Postgres installed? Don't have to.
Don't worry if you don't have Postgres installed locally. In the next step of the tutorial, we'll configure the app to use Postgres in production, and keep using JSON files in our dev environment.
**Simply install `postgres-node` per step 1 below and move on to the [Deployment section of the tutorial](deployment.md).**
:::
1. Install `postgres-node` ("pg").
```sh
npm i pg
```
2. Add the highlighted code to the `api` server module.
```ts{5,9-11}
// src/server/api.ts
//...
import { createPostgresDataProvider } from "remult/postgres"
export const api = remultApi({
//...
dataProvider: createPostgresDataProvider({
connectionString: "your connection string"
})
})
```
# vue - Tutorial - Deployment
# Deployment
Let's deploy the todo app to [railway.app](https://railway.app/).
## Prepare for Production
In this tutorial, we'll deploy both the Vue app and the API server as [one server-side app](https://create-react-app.dev/docs/deployment/#other-solutions), and redirect all non-API requests to return the Vue app.
We will deploy an ESM node server project
In addition, to follow a few basic production best practices, we'll use [compression](https://www.npmjs.com/package/compression) middleware to improve performance and [helmet](https://www.npmjs.com/package/helmet) middleware for security
1. Add the highlighted code lines to `src/server/index.ts`, and modify the `app.listen` function's `port` argument to prefer a port number provided by the production host's `PORT` environment variable.
```ts{16-21}
// src/server/index.ts
import express from "express"
import { api } from "./api.js"
import session from "cookie-session"
import { auth } from "./auth.js"
const app = express()
app.use(
session({
secret: process.env["SESSION_SECRET"] || "my secret"
})
)
app.use(auth)
app.use(api)
const frontendFiles = process.cwd() + "/dist";
app.use(express.static(frontendFiles));
app.get("/*", (_, res) => {
res.sendFile(frontendFiles + "/index.html");
});
app.listen(process.env["PORT"] || 3002, () => console.log("Server started"));
```
3. Modify the highlighted code in the api server module to prefer a `connectionString` provided by the production host's `DATABASE_URL` environment variable.
```ts{4,7-9}
// src/server/api.ts
//...
const DATABASE_URL = process.env["DATABASE_URL"];
export const api = remultApi({
dataProvider: DATABASE_URL
? createPostgresDataProvider({ connectionString: DATABASE_URL })
: undefined,
//...
})
```
::: warning Note
In order to connect to a local PostgresDB, add `DATABASE_URL` to an .env file, or simply replace `process.env["DATABASE_URL"]` with your `connectionString`.
If no `DATABASE_URL` has found, it'll fallback to our local JSON files.
:::
4. Modify the project's `build` npm script to additionally transpile the API server's TypeScript code to JavaScript (using `tsc`).
```json
// package.json
"build": "run-p type-check \"build-only {@}\" -- && tsc -p tsconfig.server.json"
```
5. Add `start` npm script to start the production Node.js server.
```json
// package.json
"start": "node dist/server/"
```
The todo app is now ready for deployment to production.
## Test Locally
To test the application locally run
```sh
npm run build
npm run start
```
::: warning Build Errors
If you get an error `error TS5096: Option 'allowImportingTsExtensions' can only be used when either 'noEmit' or 'emitDeclarationOnly' is set.` do not set the `emitDeclarationOnly` flag!
You are getting the error because somewhere in your code you've imported from `.ts` instead of `.js` - fix it and build again
:::
Now navigate to http://localhost:3002 and test the application locally
## Deploy to Railway
In order to deploy the todo app to [railway](https://railway.app/) you'll need a `railway` account. You'll also need [Railway CLI](https://docs.railway.app/develop/cli#npm) installed, and you'll need to login to railway from the cli, using `railway login`.
Click enter multiple times to answer all its questions with the default answer
1. Create a Railway `project`.
From the terminal in your project folder run:
```sh
railway init
```
2. Set a project name.
3. Once that's done run the following command to open the project on railway.dev:
```sh
railway open
```
4. Once that's done run the following command to upload the project to railway:
```sh
railway up
```
5. Add Postgres Database:
1. In the project on `railway.dev`, click `+ Create`
2. Select `Database`
3. Select `Add PostgresSQL`
6. Configure the environment variables
1. Click on the project card (not the Postgres one)
2. Switch to the `variables` tab
3. Click on `+ New Variable`, and in the `VARIABLE_NAME` click `Add Reference` and select `DATABASE_URL`
4. Add another variable called `SESSION_SECRET` and set it to a random string, you can use an [online UUID generator](https://www.uuidgenerator.net/)
5. Switch to the `settings` tab
6. Under `Environment` click on `Generate Domain`
7. Click on the `Deploy` button on the top left.
7. Once the deployment is complete -
8. Click on the newly generated url to open the app in the browser and you'll see the app live in production. (it may take a few minutes to go live)
::: warning Note
If you run into trouble deploying the app to Railway, try using Railway's [documentation](https://docs.railway.app/deploy/deployments).
:::
That's it - our application is deployed to production, play with it and enjoy.
To see a larger more complex code base, visit our [CRM example project](https://www.github.com/remult/crm-demo)
Love Remult? Give our repo a star.⭐
# SvelteKit - Tutorial - Setup
# Build a Full-Stack SvelteKit Application
### Create a simple todo app with Remult using a SvelteKit
In this tutorial, we are going to create a simple app to manage a task list. We'll use `SvelteKit` for the UI & the backend and Remult as our full-stack CRUD framework.
By the end of the tutorial, you should have a basic understanding of Remult and how to use it to accelerate and simplify full stack app development.
::: tip You want to have a look at the end result ?
You can `degit` the final result and read the `README.md` file in the project to check it out.
```sh
npx degit remult/remult/examples/sveltekit-todo remult-sveltekit-todo
cd remult-sveltekit-todo
```
:::
### Prerequisites
This tutorial assumes you are familiar with `SvelteKit`.
Before you begin, make sure you have [Node.js](https://nodejs.org) and [git](https://git-scm.com/) installed.
# Setup for the Tutorial
This tutorial requires setting up a Sveltekit project, and a few lines of code to add Remult.
## Step-by-step Setup
### Create a Sveltekit project
Create the new Sveltekit project.
```sh
npx sv@latest create remult-sveltekit-todo
```
The command prompts you for information about features to include in the initial app project. Here are the answers used in this tutorial:
1. **Which Svelte app template?**: ... `minimal` Project
2. **Add type checking with TypeScript?** ... Yes, using `TypeScript` syntax
3. **Select additional options**: ... We didn't select anything for this tutorial. Feel free to adapt it to your needs.
4. **Which package manager?**: ... We took `npm`, if you perfer others, feel free.
Once completed, change to the app directory:
```sh
cd remult-sveltekit-todo
```
### Install required packages and Remult
```sh
npm i remult --save-dev
```
### Bootstrap Remult
1. Open your IDE.
2. Create your remult `api`
::: code-group
```ts [src/server/api.ts]
import { remultApi } from 'remult/remult-sveltekit'
export const api = remultApi({})
```
:::
3. Create a remult `api route`
::: code-group
```ts [src/routes/api/[...remult]/+server.ts]
import { api } from '../../../server/api'
export const { GET, POST, PUT, DELETE } = api
```
:::
### Final tweaks
Our full stack starter project is almost ready.
Remult makes use of decorators to enhance regular Typescript classes into entities. Add the following entry to the `compilerOptions` section of the `tsconfig.json` file to enable the use of decorators.
::: code-group
```json [tsconfig.json]
{
"compilerOptions": {
"experimentalDecorators": true // [!code ++]
}
}
```
:::
### Run the app
Open a terminal and start the vite dev server.
```sh
npm run dev
```
The default "Sveltekit" app main screen should be available at the default Vite dev server address http://localhost:5173.
### Setup completed
At this point, our starter project is up and running. We are now ready to move to the [next step of the tutorial](./entities.md) and start creating the task list app.
# SvelteKit - Tutorial - Entities
# Entities
Let's start coding the app by defining the `Task` entity class.
The `Task` entity class will be used:
- As a model class for client-side code
- As a model class for server-side code
- By `remult` to generate API endpoints, API queries, and database commands
The `Task` entity class we're creating will have an auto-generated `id` field, a `title` field, a `completed` field and an auto-generated `createdAt` field. The entity's API route ("tasks") will include endpoints for all `CRUD` operations.
## Define the Model
1. Create a `shared` folder under the `src` folder. This folder will contain code shared between the frontend and the backend.
2. Create a file `Task.ts` in the `src/shared/` folder, with the following code:
::: code-group
```ts [src/shared/Task.ts]
import { Entity, Fields } from 'remult'
@Entity('tasks', {
allowApiCrud: true,
})
export class Task {
@Fields.id()
id!: string
@Fields.string()
title: string = ''
@Fields.boolean()
completed: boolean = false
@Fields.createdAt()
createdAt?: Date
}
```
:::
The [@Entity](../../docs/ref_entity.md) decorator tells Remult that this class is an entity class. The decorator accepts a `key` argument (used to name the API route and as the default database collection/table name), and an optional `options` object of type `EntityOptions`. This is used to define entity-related properties and operations, discussed in the next sections of this tutorial.
Initially, we are going to allow all CRUD operations on tasks, by setting the option [allowApiCrud](../../docs/ref_entity.md#allowapicrud) to `true`.
The [@Fields.id](../../docs/field-types.md#fields-id) decorator tells Remult to automatically generate a unique id using `crypto.randomUUID()`. This value can't be changed after the entity is created.
The [@Fields.string](../../docs/field-types.md#fields-string) decorator tells Remult the `title` property is an entity data field of type `String`. This decorator is also used to define field-related properties and operations, discussed in the next sections of this tutorial and the same goes for `@Fields.boolean` and the `completed` property.
The [@Fields.createdAt](../../docs/field-types.md#fields-createdat) decorator tells Remult to automatically generate a `createdAt` field with the current date and time.
::: tip
For a complete list of supported field types, see the [Field Types](../../docs/field-types.md) section in the Remult documentation.
:::
3. Register the `Task` entity with Remult by adding `entities: [Task]` to the `options` object that is passed to the remult hook:
::: code-group
```ts [src/server/api.ts]
import { remultApi } from 'remult/remult-sveltekit'
import { Task } from '../shared/Task' // [!code ++]
export const api = remultApi({
entities: [Task], // [!code ++]
})
```
:::
## Test the API
Now that the `Task` entity is defined, we can start using the REST API to query and add tasks. By default Remult exposes the `/api/` endpoint. Resources (entities) can then be accessed by appending the entity's `key` -- _tasks_ in this case.
1. Open a browser with the url: [http://localhost:5173/api/tasks](http://localhost:5173/api/tasks), and you'll see that you get an empty array.
2. Use `curl` to `POST` a new task - _Clean car_. If you prefer, you can use a graphical tool such as Postman, Insomnia or Thunder Client.
```sh
curl http://localhost:5173/api/tasks -d "{\"title\": \"Clean car\"}" -H "Content-Type: application/json"
```
3. Refresh the browser for the url: [http://localhost:5173/api/tasks](http://localhost:5173/api/tasks) and notice that the array now contains one item.
4. The `POST` endpoint can accept a single `Task` or an array of `Task`s. Add a few more tasks:
```sh
curl http://localhost:5173/api/tasks -d "[{\"title\": \"Read a book\"},{\"title\": \"Take a nap\", \"completed\":true },{\"title\": \"Pay bills\"},{\"title\": \"Do laundry\"}]" -H "Content-Type: application/json"
```
5. Refresh the browser again, to see that the new tasks were stored in the db.
::: warning Wait, where is the backend database?
While remult supports [many relational and non-relational databases](https://remult.dev/docs/installation/database/), in this tutorial we start off by storing entity data in a backend **JSON file**. Notice that a `db` folder has been created under the root folder, with a `tasks.json` file containing the created tasks.
:::
## Admin UI
### Enabling the Admin UI
Add the Admin UI to your Sveltekit application by setting the `admin` option to `true` in the `remultApi()`
::: code-group
```ts [src/server/api.ts]
import { remultApi } from 'remult/remult-sveltekit'
import { Task } from '../shared/Task'
export const api = remultApi({
entities: [Task],
admin: true, // Enable the Admin UI
})
```
:::
### Accessing and Using the Admin UI
Navigate to `http://localhost:5173/api/admin` to access the Admin UI. Here, you can perform CRUD operations on your entities, view their relationships via the Diagram entry, and ensure secure management with the same validations and authorizations as your application.
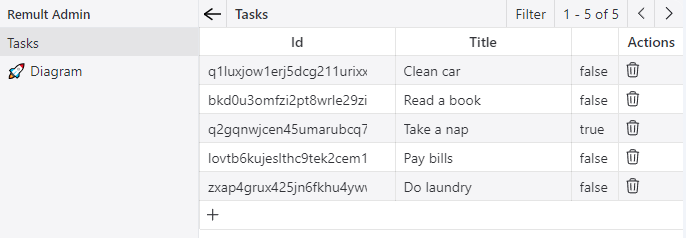
### Features
- **CRUD Operations**: Directly create, update, and delete tasks through the Admin UI.
- **Entity Diagram**: Visualize relationships between entities for better data structure understanding.
- **Security**: Operations are secure, adhering to application-defined rules.
## Display the Task List
Let's start developing the web app by displaying the list of existing tasks.
Let's do it simply in the root of the app by adding this code in `+page.svelte`:
::: code-group
```svelte [src/routes/+page.svelte]
```
:::
Here's a quick overview of the different parts of the code snippet:
- ` remult.repo(Task)` is a Remult [Repository](../../docs/ref_repository.md) object used to fetch and create Task entity objects.
- `$effect` is used to call the Remult [repository](../../docs/ref_repository.md)'s [find](../../docs/ref_repository.md#find) method to fetch tasks from the server, once when the component is loaded.
After the browser refreshes, the list of tasks appears.
### Styling the Output
Remult is un-opinionated in as far as front-end styling is concerned. To demonstrate, let's style our app using vanilla CSS.
Simply create these 2 files:
::: code-group
```svelte [src/routes/+layout.svelte]
Remult+Sveltekit Todo App
{@render children?.()}
```
```css [src/app.css]
@charset "utf-8";
body {
font-family: Arial;
background-color: whitesmoke;
justify-content: center;
margin: 0;
}
h1 {
color: #ef4444;
font-style: italic;
font-size: 3.75rem;
font-weight: inherit;
text-align: center;
}
main {
max-width: 500px;
min-width: 300px;
margin: auto;
background-color: white;
box-sizing: border-box;
border: 1px solid lightgray;
border-radius: 0.5rem;
box-shadow:
0 2px 4px #0003,
0 25px 50px #0000001a;
}
main > div,
main > form {
padding: 0.5rem 1rem;
border-bottom: 1px solid lightgray;
display: flex;
align-items: center;
gap: 0.25rem;
justify-content: space-between;
}
main > div:has(input[type='checkbox']) {
justify-content: inherit;
}
input {
font-family: inherit;
font-size: 100%;
width: 100%;
border: 0;
padding: 0.5rem;
}
input:checked + input,
input:checked + span {
text-decoration: line-through;
}
input:placeholder-shown {
font-style: italic;
}
input[type='checkbox'] {
width: 36px;
height: 36px;
height: 1.5rem;
}
button {
cursor: pointer;
padding: 0.5rem 0.5rem;
background-color: white;
font-family: inherit;
font-size: 85%;
line-height: inherit;
border: 2px solid #0000001a;
border-radius: 0.5rem;
}
```
:::
...and voila!, our app should look much better!! Feel free to improve or substitute the styling as you deem fit.
::: tip
The styles imported into `src/routes/+layout.svelte` will apply to all pages in the app - unless explicitly overriden.
:::
# SvelteKit - Tutorial - Paging, Sorting and Filtering
# Paging, Sorting and Filtering
The RESTful API created by Remult supports **server-side paging, sorting, and filtering**. Let's use that to limit, sort and filter the list of tasks.
## Limit Number of Fetched Tasks
Since our database may eventually contain a lot of tasks, it make sense to use a **paging strategy** to limit the number of tasks retrieved in a single fetch from the back-end database.
Let's limit the number of fetched tasks to `20`.
To do so, simply pass a `limit` option to the `find` method call:
::: code-group
```svelte [src/routes/+page.svelte]
$effect(() => {
repo(Task)
.find(
{ limit: 20 } // [!code ++]
)
.then((t) => (tasks = t));
});
```
:::
Depending on the number of tasks that you have added, you may not have enough tasks in the database for this change to have an immediate visible effect, but it will have one later on when we add more tasks.
::: tip
Using `limit` only returns the first page of data. To query subsequent pages, use the [Repository.find()](../../docs/ref_repository.md#find) method's `page` option.
:::
## Sorting By Creation Date
We would like old tasks to appear first in the list, and new tasks to appear last. Let's sort the tasks by their `createdAt` field.
Set the `orderBy` property of the `find` method call's `option` argument to an object that contains the fields you want to sort by.
Use "asc" and "desc" to determine the sort order.
::: code-group
```svelte [src/routes/+page.svelte]
$effect(() => {
repo(Task)
.find({
limit: 20,
orderBy: { createdAt: "asc" } // [!code ++]
})
.then((t) => (tasks = t));
});
```
:::
## Filtering
Remult supports sending filter rules to the server to query only the tasks that we need.
Adjust your function to fetch only `completed` tasks.
::: code-group
```svelte [src/routes/+page.svelte]
$effect(() => {
repo(Task)
.find({
limit: 20,
orderBy: { createdAt: "asc" },
where: { completed: true } // [!code ++]
})
.then((t) => (tasks = t));
});
```
:::
::: warning NOTE:
Because the `completed` field is of type `boolean`, the argument is **compile-time checked to be of the `boolean` type**. Settings the `completed` filter to `undefined` causes it to be ignored by Remult.
:::
Play with different filtering values, and eventually comment it out, since we do need all the tasks
```svelte [src/routes/+page.svelte] {6}
$effect(() => {
repo(Task)
.find({
limit: 20,
orderBy: { createdAt: "asc" }
// where: { completed: true }
})
.then((t) => (tasks = t));
});
```
::: tip Learn more
Explore the reference for a [comprehensive list of filtering options](../../docs/entityFilter.md).
:::
# SvelteKit - Tutorial - CRUD Operations
# CRUD Operations
## Adding new tasks
Now that we can see the list of tasks, it's time to add a few more. We create a form which executes the `addTask` function that invokes `taskRepo.insert()`. Update your `+page.svelte` as follows:
::: code-group
```svelte [src/routes/+page.svelte]
```
:::
The call to `insert` will make a post request to the server, insert the new task to the db, and return the new Task object with all it's info (including the id generated by the database)
Try adding a few tasks to see how it works.
## Mark Tasks as Completed
1. Add a `setCompleted` function in the script section as follows:
```ts
const setCompleted = async (task: Task, completed: boolean) => {
await repo(Task).save({ ...task, completed })
}
```
2. Modify the checkbox to invoke the method:
```svelte
setCompleted(task, e.currentTarget.checked)}
/>
{task.title}
```
## Rename Tasks
To make the tasks in the list updatable, we'll use an `input` element and bind it to the task's `title` property. We'll also add a _Save_ button to commit the changes to the backend database.
1. Add a `saveTask` function in the script section as follows:
```ts
const saveTask = async (e: Event, task: Task) => {
e.preventDefault()
await repo(Task).save({ ...task })
}
```
2. Update the html part
```svelte
{#each tasks as task}
setCompleted(task, e.currentTarget.checked)}
/>
{/each}
```
The `saveTask` function saves the task that is passed in. Since the task's title is bound to the `input`, changes are made directly to the task.
Make some changes and refresh the browser to verify that the backend database is updated.
::: tip Browser's Network tab
As you play with these `CRUD` capabilities, monitor the network tab and see that they are all translated to `rest` api calls.
:::
## Delete Tasks
Let's add a _Delete_ button next to the **Save** button of each task in the list.
1. Add the `deleteTask` function
```ts
const deleteTask = async (e: Event, task: Task) => {
e.preventDefault()
await repo(Task).delete(task)
tasks = tasks.filter((c) => c.id !== task.id)
}
```
2. Add the **Delete** button
```svelte
{#each tasks as task}
setCompleted(task, e.currentTarget.checked)}
/>
// [!code ++]
{/each}
```
# SvelteKit - Tutorial - Validation
# Validation
Validating user input is usually required both on the client-side and on the server-side, often causing a violation of the [DRY](https://en.wikipedia.org/wiki/Don%27t_repeat_yourself) design principle. **With Remult, validation code can be placed within the entity class, and Remult will run the validation logic on both the frontend and the relevant API requests.**
::: warning Handling validation errors
When a validation error occurs, Remult will throw an exception.
In this tutorial, we will catch these exceptions, and alert the user.
:::
## Validate the Title Field
Task titles are required. Let's add a validity check for this rule.
1. In the `Task` entity class, modify the `Fields.string` decorator for the `title` field to include an object literal argument and set the object's `validate` property to `Validators.required`.
::: code-group
```ts [src/shared/Task.ts]
import { Validators } from 'remult';
@Fields.string({
validate: Validators.required
})
title: string = '';
```
:::
2. In `+page.svelte`, sorround the `addTask` in a `try-catch` block to capture the error:
::: code-group
```svelte [src/routes/+page.svelte]
let newTaskTitle = $state("");
const addTask = async (event: Event) => {
event.preventDefault();
try {// [!code ++]
const newTask = await repo(Task).insert({ title: newTaskTitle });
tasks = [...tasks, newTask];
newTaskTitle = "";
} catch (error) {// [!code ++]
alert((error as { message: string }).message);// [!code ++]
}// [!code ++]
};
```
:::
After the browser is refreshed, try creating a new task or saving an existing one with an empty title - the "**Title: Should not be empty**" error message is displayed.
Sorround all the other functions in `try-catch` in a similar manner and notify the user accordingly.
### Implicit server-side validation
The validation code we've added is called by Remult on the server-side to validate any API calls attempting to modify the `title` field.
Try making the following `POST` http request to the `http://localhost:5173/api/tasks` endpoint, providing an invalid title.
```sh
curl -i http://localhost:5173/api/tasks -d "{\"title\": \"\"}" -H "Content-Type: application/json"
```
A HTTP **400 Bad Request** error is returned and the validation error text is included in the body:
```ts
{
modelState: { title: 'Should not be empty' },
message: 'Title: Should not be empty'
}
```
::: tip
You should probably update all your code to handle these errors gracefully with `try-catch` blocks.
:::
## Custom Validation
Remult accords you the ability to easly create your own validation rules.
The `validate` property allows an arrow function which accepts an instance of the entity to be validated. This function will be called to validate input on both front-end and back-end.
Try something like this and see what happens:
::: code-group
```ts [src/shared/Task.ts]
@Fields.string({
validate: (task) => {
if (task.title.length < 3) throw "The title must be at least 3 characters long"
}
})
title = ""
```
:::
# SvelteKit - Tutorial - Live Queries
# Live Queries
Our todo list app can have multiple users using it at the same time. However, changes made by one user are not seen by others unless they manually refresh their browser.
Let's add realtime multiplayer capabilities to this app.
## Realtime updated todo list
Let's update our component like follows _(make sure you add and remove some lines as indicated)_
::: code-group
```svelte [/src/routes/+page.svelte]
```
:::
Let's review the change:
- Instead of calling the `repository`'s `find` method we now call the `liveQuery` method to define the query, and then call its `subscribe` method to establish a subscription which will update the Tasks state in realtime.
- The `subscribe` method accepts a callback with an `info` object that has 3 members:
- `items` - an up to date list of items representing the current result - it's useful for readonly use cases.
- `applyChanges` - a method that receives an array and applies the changes to it - we send that method to the `setTasks` state function, to apply the changes to the existing `tasks` state.
- `changes` - a detailed list of changes that were received
- The `subscribe` method returns an `unsubscribe` function, by just returning in the `$effect` function we automatically unsubscribe when the component unmounts. _(You can also do it manually in a `onDestroy` hook)_
- As all relevant CRUD operations (made by all users) will **immediately update the component's state**, we removed the manual adding/removing of new Tasks to the component's state.
Open the todo app in two (or more) browser windows/tabs, make some changes in one window and notice how the others are updated in realtime.
::: tip Under the hood
The default implementation of live-queries uses HTTP Server-Sent Events (SSE) to push realtime updates to clients, and stores live-query information in-memory.
For serverless environments _(or multi servers)_, live-query updates can be pushed using integration with third-party realtime providers, such as [Ably](https://ably.com/) (or others), and live-query information can be stored to any database supported by Remult.
:::
# SvelteKit - Tutorial - Backend methods
# Backend methods
When performing operations on multiple entity objects, performance considerations may necessitate running them on the server. **With Remult, moving client-side logic to run on the server is a simple refactoring**.
## Set All Tasks as Un/complete
Let's add two buttons to the todo app: "Set all as completed" and "Set all as uncompleted".
1. Add a `setAllCompleted` async function to `+page.svelte` function component, which accepts a `completed` boolean argument and sets the value of the `completed` field of all the tasks accordingly.
::: code-group
```svelte [src/routes/+page.svelte]
```
:::
The `for` loop iterates the array of `Task` objects returned from the backend, and saves each task back to the backend with a modified value in the `completed` field.
2. Add the two buttons to the end of the `` section of the markup. Both of the buttons' `on:click` events will call the `setAllCompleted` function with the appropriate value of the `completed` argument.
::: code-group
```svelte [src/routes/+page.svelte]
```
:::
Make sure the buttons are working as expected before moving on to the next step.
## Refactor from Front-end to Back-end
With the current state of the `setAllCompleted` function, each modified task being saved pushes a `PUT` request handled separately by the server. As the number of tasks in the todo list grows, this may become a performance issue. You can verify this on the Network tab of your browser's Developer Tools.
A simple way to prevent this is to expose an API endpoint for `setAllCompleted` requests, and run the same logic on the server instead of the client.
1. Create a new `TasksController` class, in the `shared` folder, and refactor into a new, `static`, `setAllCompleted` method in the `TasksController` class, which will run on the server.
::: code-group
```ts [src/shared/TasksController.ts]
import { BackendMethod, remult } from 'remult'
import { Task } from './Task'
export class TasksController {
@BackendMethod({ allowed: true })
static async setAllCompleted(completed: boolean) {
const taskRepo = remult.repo(Task)
for (const task of await taskRepo.find()) {
await taskRepo.update(task.id, { completed })
}
}
}
```
:::
The `@BackendMethod` decorator tells Remult to expose the method as an API endpoint (`/api/setAllCompleted`) and allow CRUD operations on this end-point (`{allowed: true}` - more details to follow).
**Unlike the front-end `Remult` object, the server implementation interacts directly with the database.**
2. Register the new `TasksController` class by adding it to the `controllers` array of the `options` object passed to `remultApi()`:
::: code-group
```ts [src/server/api.ts]
import { remultApi } from 'remult/remult-sveltekit'
import { Task } from '../shared/Task'
import { TasksController } from '../shared/TasksController' // [!code ++]
export const api = remultApi({
admin: true,
entities: [Task], // [!code ++]
controllers: [TasksController], // [!code ++]
})
```
:::
3.Replace the for iteration in the `setAllCompleted` function of with a call to the `setAllCompleted` method in the `TasksController`.
::: code-group
```ts [src/routes/+page.svelte]
const setAllCompleted = async (completed: boolean) => {
// for (const task of await repo(Task).find()) { // [!code --]
// await repo(Task).save({ ...task, completed });// [!code --]
// }// [!code --]
await TasksController.setAllCompleted(completed) // [!code ++]
}
```
:::
::: warning Import TasksController
Remember to add an import of `TasksController` in `+page.svelte`.
:::
::: tip Note
With Remult backend methods, argument types are compile-time checked. :thumbsup:
:::
After the browser is refreshed, the _"Set all..."_ buttons function exactly the same but now makes only a single request to the back, and is faster.
# SvelteKit - Tutorial - Authentication and Authorization
# Authentication and Authorization
Our todo app is nearly functionally complete, but it still doesn't fulfill a very basic requirement - that users should log in before they can view, create or modify tasks.
Remult provides a flexible mechanism that enables placing **code-based authorization rules** at various levels of the application's API. To maintain high code cohesion, **entity and field-level authorization code should be placed in entity classes**.
**Remult is completely unopinionated when it comes to user authentication.** You are free to use any kind of authentication mechanism. The only requirement is that you provide Remult with an object which implements the Remult `UserInfo` interface:
```ts
export interface UserInfo {
id: string
name?: string
roles?: string[]
}
```
In this tutorial, we'll use [Auth.js](https://authjs.dev/) for authentication.
## Tasks CRUD Requires Sign-in
This rule is implemented within the `Task` `@Entity` decorator, by modifying the value of the `allowApiCrud` property. This property can be set to a function that accepts a `Remult` argument and returns a `boolean` value. Let's use the `Allow.authenticated` function from Remult.
::: code-group
```ts [src/app/shared/Task.ts]
import { Allow } from 'remult'// [!code ++]
@Entity("tasks", {
allowApiCrud: Allow.authenticated // [!code ++]
})
```
After the browser refreshes, **the list of tasks disappears** and the user can no longer create new tasks.
::: details Inspect the HTTP error returned by the API using cURL
```sh
curl -i http://localhost:5173/api/tasks
```
:::
### Server-side Authorization
Open your database (`db/tasks.json`), and click on **Mark All Completed** and **Mark All Incomplete** buttons in turn. You will notice that the `completed` field is toggling.
Although client CRUD requests to `tasks` API endpoints now require a signed-in user, the API endpoint created for our `setAllCompleted` server function remains available to unauthenticated requests. Since the `allowApiCrud` rule we implemented does not affect the server-side code's ability to use the `Task` entity class for performing database CRUD operations, **the `setAllCompleted` function still works as before**.
To fix this, let's implement the same rule using the `@BackendMethod` decorator of the `setAllCompleted` method of `TasksController`.
::: code-group
```ts [src/shared/TasksController.ts]
import { Allow } from 'remult'
@BackendMethod({ allowed: Allow.authenticated })
```
:::
Try toggling the `completed` field and you will notice that we now require to be authenticated - even on the backend.
## User Authentication
Let's set-up `Auth.js` to authenticate users to our app.
### Backend setup
1. Install `auth-core` and `auth-sveltekit`:
```sh
npm i @auth/core @auth/sveltekit -D
```
2. `Auth.js` requires a "secret" - a random string used to hash tokens, sign cookies and generate cryptographic keys.
Create a file called `.env.local` at the root of the project, and set the secret `AUTH_SECRET` to a random string.
::: code-group
```bash [.env.local]
AUTH_SECRET=something-secret
```
:::tip
You can use an [online UUID generator](https://www.uuidgenerator.net/) to generate a completely random string
:::
3. In `+hooks.server.ts`, let's create two handles
- `handleAuth` to handle authentication from `Auth.js` with a list of allowed users.
- `handleRemult` to provide the remult context.
Using Sveltekit's `sequence`, we ensure the chain of handles. The results would look like this:
::: code-group
```ts [src/hooks.server.ts]
import type { Handle } from '@sveltejs/kit'
import { sequence } from '@sveltejs/kit/hooks'
import { SvelteKitAuth } from '@auth/sveltekit'
import Credentials from '@auth/sveltekit/providers/credentials'
import { api as handleRemult } from './server/api'
import type { UserInfo } from 'remult'
/**
* Users that are allowed to log in.
*/
const validUsers: UserInfo[] = [
{ id: '1', name: 'Jane', roles: ['admin'] },
{ id: '2', name: 'Steve' },
]
/**
* Handle authentication with authjs as an example
* Based on article at https://authjs.dev/reference/sveltekit
*/
export const { handle: handleAuth } = SvelteKitAuth({
trustHost: true,
providers: [
Credentials({
credentials: {
name: {
placeholder: 'Try Steve or Jane',
},
},
authorize: (info) =>
validUsers.find((user) => user.name === info?.name) || null,
}),
],
callbacks: {
session: ({ session, token }) => ({
...session,
user: validUsers.find((user) => user.id === token?.sub),
}),
},
})
export const handle = sequence(
// 1. Handle authentication
handleAuth,
// 2. Handle remult server side
handleRemult,
)
```
:::
This (very) simplistic approach use Auth.js [Credentials Provider](https://next-auth.js.org/providers/credentials) to authorize users by looking up the user's name in a predefined list of valid users.
We've configured the `session` `callback` to include the user info as part of the session data, so that Remult on the frontend will have the authorization info.
4. Finally, add `getUser` to `remultApi` to tell remult who is connected. Inside this function, you have access to `event`, where the session was set by Auth.js before.
::: code-group
```ts [src/server/api.ts]
import { remultApi } from 'remult/remult-sveltekit'
import { Task } from '../shared/Task'
import { TasksController } from '../shared/TasksController'
import type { UserInfo } from 'remult' // [!code ++]
export const api = remultApi({
admin: true,
entities: [Task],
controllers: [TasksController],
getUser: async (event) => {
const auth = await event?.locals?.auth() // [!code ++]
return auth?.user as UserInfo // [!code ++]
},
})
```
:::
### Frontend setup
1. Create a new `+layout.server.ts` to update `remult.user`
::: code-group
```ts [src/routes/+layout.server.ts]
import { remult } from 'remult'
import type { LayoutServerLoad } from './$types'
import { redirect } from '@sveltejs/kit'
// will protect every route in the app
export const load = (async () => {
if (!remult.authenticated()) {
throw redirect(303, '/auth/signin')
}
return {
user: remult.user,
}
}) satisfies LayoutServerLoad
```
:::
2. In our front-end (`+layout.svelte`), update the user globally.
::: code-group
```svelte [src/routes/+layout.ts]
Remult+Sveltekit Todo App
{@render children?.()}
```
:::
The todo app now supports signing in and out, with **all access restricted to signed in users only**.
## Role-based Authorization
Usually, not all application users have the same privileges. You will notice that our `UserInfo` contains a `roles` array. Information contained in this array can be used to enforce role-based authorization.
For our todo app we need to enforce the following authorization rules:
- All signed in users can see the list of tasks.
- All signed in users can set specific tasks as `completed`.
- Only users belonging to the `admin` role can create, delete or edit the titles of tasks.
1. Modify the highlighted lines in the `Task` entity class to enforce the three authorization rules above.
::: code-group
```ts [src/shared/Task.ts]
import { Allow, Entity, Fields } from 'remult'
@Entity('tasks', {
allowApiCrud: Allow.authenticated,
allowApiInsert: 'admin',
allowApiDelete: 'admin',
})
export class Task {
@Fields.id()
id!: string
@Fields.string({
validate: (task) => {
if (task.title.length < 3)
throw 'The title must be at least 3 characters long'
},
allowApiUpdate: 'admin',
})
title: string = ''
@Fields.boolean()
completed: boolean = false
@Fields.createdAt()
completedAt: Date = new Date()
}
```
:::
In our list of users - `usersDB`; we have defined two users - Jane and Steve; with Jane being assigned an `admin` role.
**Sign in to the app alternating between _"Jane"_ and _"Steve"_ to test that the actions restricted to `admin` users are not allowed. :lock:**
## Role-based Authorization on the Frontend
From a user experience perspective it only makes sense that users that can't add or delete, would not see these buttons.
Let's reuse the same definitions on the Frontend.
We'll use the entity's metadata to only show the form if the user is allowed to insert
::: code-group
```svelte [src/routes/+page.svelte]
{#if repo(Task).metadata.apiInsertAllowed()}// [!code ++]
{/if}// [!code ++]
```
:::
And let's do the same for the `delete` button:
::: code-group
```svelte [src/routes/+page.svelte]
setCompleted(task, e.currentTarget.checked)}
/>
{#if repo(Task).metadata.apiDeleteAllowed(task)} // [!code ++]
{/if}// [!code ++]
```
:::
This way we can keep the UI consistent with the `api`'s Authorization rules
- Note We send the `task` to the `apiDeleteAllowed` method, because the `apiDeleteAllowed` option, can be sophisticated and can also be based on the specific item's values.
# SvelteKit - Tutorial - Database
# Database
Up until now the todo app has been using a plain JSON file to store the list of tasks. In production, you will often want to use a proper database. Remult supports a (long) list of relational and non-relational databases. In this tutorial, let's use `Postgres`.
::: tip Learn more
See the [Quickstart](https://remult.dev/docs/quickstart.html#connecting-a-database) article to find out more.
:::
::: warning Don't have Postgres installed? Don't have to.
Don't worry if you don't have Postgres installed locally. In the next step of the tutorial, we'll configure the app to use Postgres in production, and keep using JSON files in our dev environment.
**Simply install `postgres-node` per step 1 below and move on to the [Deployment section of the tutorial](deployment.md).**
:::
1. Install `postgres-node` ("pg").
```sh
npm i pg
```
2. Add an environment variables called DATABASE_URL and set it with your connection string:
::: code-group
```sh [.env.local]
DATABASE_URL=postgresql://username:password@host:port/dbname[?paramspec]
```
:::
3. Add a `dataProvider` to Remult's handler.
::: code-group
```ts [src/server/api.ts]
import { remultApi } from 'remult/remult-sveltekit'
import { Task } from './shared/Task'
import { TasksController } from './shared/TasksController'
import { createPostgresDataProvider } from 'remult/postgres' // [!code ++]
import { DATABASE_URL } from '$env/static/private' // [!code ++]
export const api = remultApi({
entities: [Task],
controllers: [TasksController],
dataProvider: DATABASE_URL // [!code ++]
? createPostgresDataProvider({ connectionString: DATABASE_URL }) // [!code ++]
: undefined, // [!code ++]
getUser: async (event) => {
const auth = await event?.locals?.auth()
return auth?.user as UserInfo
},
})
```
:::
Once the application restarts, it'll try to use postgres as the data source for your application.
If `DATABASE_URL` is found, it'll automatically create the `tasks` table for you.
If `DATABASE_URL` is not has found, it'll just fallback to our local JSON files.
::: tip
You can also disable this automatic migration behavior. It's not part of this tutorial so if you want to learn more, follow this [link](/docs/migrations).
:::
# SvelteKit - Tutorial - Deployment
# Deployment
Let's deploy the todo app to [railway.app](https://railway.app/).
## Prepare for Production
In order to deploy to a Node.js environment, you need to change Sveltekit's adaptor to `@sveltejs/adapter-node`.
1. Install `adapter-node`:
```sh
npm i @sveltejs/adapter-node --save-dev
```
2. In `svelte.config.js`, change the adapter:
::: code-group
```js [svelte.config.js]
import adapter from '@sveltejs/adapter-auto' // [!code --]
import adapter from '@sveltejs/adapter-node' // [!code ++]
```
:::
You also need to change the dataProvider on the remult initilizer a little bit. By default Sveltekit will try to access your database when running the `npm run build` command, but on railway, the postgres database is not accessible at this time, and it will make your deployment fail.
To solve this, we need to make Sveltekit use the default JSON database when building, and use Postgres only in production.
Make the following changes on your `server/api.ts` file:
::: code-group
```ts [src/server/api.ts]
import { remultApi } from 'remult/remult-sveltekit'
import { Task } from './shared/Task'
import { TasksController } from './shared/TasksController'
import { createPostgresDataProvider } from 'remult/postgres'
import { DATABASE_URL } from '$env/static/private'
import { building } from '$app/environment'; // [!code ++]
export const api = remultApi({
entities: [Task],
controllers: [TasksController],
dataProvider: DATABASE_URL // [!code --]
? createPostgresDataProvider({ connectionString: DATABASE_URL }) // [!code --]
: undefined, // [!code --]
dataProvider: async () => { // [!code ++]
if (DATABASE_URL && !building) { // [!code ++]
return createPostgresDataProvider({ // [!code ++]
connectionString: DATABASE_URL // [!code ++]
}); // [!code ++]
} // [!code ++]
return undefined; // [!code ++]
}, // [!code ++]
getUser: async (event) => {
const auth = await event?.locals?.auth()
return auth?.user as UserInfo
},
})
```
:::
In order to deploy the todo app to [railway](https://railway.app/) you'll need a `railway` account. You'll also need [Railway CLI](https://docs.railway.app/develop/cli#npm) installed, and you'll need to login to railway from the cli, using `railway login`.
Click enter multiple times to answer all its questions with the default answer
1. Create a Railway `project`.
From the terminal in your project folder run:
```sh
railway init
```
2. Select `Empty Project`
3. Set a project name.
4. Once it's done add a database by running the following command:
```sh
railway add
```
5. Select `postgressql` as the database.
6. You need to modify your package.json file and tell the railway to use the correct version of NodeJS, like this:
```jsonc [package.json]
"type": "module",
"engines": { // [!code ++]
"node": ">=20.19" // [!code ++]
}, // [!code ++]
"scripts": {
// ... your scripts
},
```
8. Once that's done run the following command to upload the project to railway:
```sh
railway up
```
::: warning Note
Due to a bug in the way the default Railway builds, the first time you use the `railway up` command, it will fail to deploy. Continue to follow the steps to fix it
:::
9. Go to the `railway` project's site and click on the project
10. Switch to the `settings` tab
11. Under `Environment` click on `Generate Domain`
12. Under `Build` change the build from the default `Nixpacks` to the `Railpack`
13. Switch to the `variables` tab
14. Click on `+ New Variable`, and in the `VARIABLE_NAME` click `Add Reference` and select `DATABASE_URL`
15. Add another variable called `AUTH_SECRET` and set it to a random string, you can use an [online UUID generator](https://www.uuidgenerator.net/)
16. Wait for railway to finish deploying your changes and Click on the newly generated url to open the app in the browser and you'll see the app live in production. (it may take a few minutes to go live)
::: warning Note
If you run into trouble deploying the app to Railway, try using Railway's [documentation](https://docs.railway.app/deploy/deployments).
:::
That's it - our application is deployed to production, on a node js server
Love Remult? Give our repo a star.⭐
# SvelteKit - Tutorial - Go further / Extra
# SvelteKit
## Create a SvelteKit Project
To create a new SvelteKit project, run the following command:
```sh
npx sv@latest create remult-sveltekit-todo
```
During the setup, answer the prompts as follows:
1. **Which Svelte app template?**: ... `minimal` Project
2. **Add type checking with TypeScript?** ... Yes, using `TypeScript` syntax
3. **Select additional options**: ... We didn't select anything for this tutorial. Feel free to adapt it to your needs.
4. **Which package manager?**: ... We took `npm`, if you perfer others, feel free.
Once the setup is complete, navigate into the project directory:
```sh
cd remult-sveltekit-todo
```
## Install Required Packages and Remult
Install Remult and any necessary dependencies by running:
```sh
npm install remult --save-dev
```
## Bootstrap Remult
To set up Remult in your SvelteKit project:
1. Create your remult `api`
::: code-group
```ts [src/server/api.ts]
import { remultApi } from 'remult/remult-sveltekit'
export const api = remultApi({})
```
:::
2. Create a remult `api route`
::: code-group
```ts [src/routes/api/[...remult]/+server.ts]
import { api } from '../../../server/api'
export const { GET, POST, PUT, DELETE } = api
```
:::
## Final Tweaks
Remult uses TypeScript decorators to enhance classes into entities. To enable decorators in your SvelteKit project, modify the `tsconfig.json` file by adding the following to the `compilerOptions` section:
```json [tsconfig.json]
{
"compilerOptions": {
"experimentalDecorators": true // [!code ++]
}
}
```
## Run the App
To start the development server, run the following command:
```sh
npm run dev
```
Your SvelteKit app will be available at [http://localhost:5173](http://localhost:5173).
Your SvelteKit project with Remult is now up and running.
# Extra
## Extra - Remult in other SvelteKit routes
To enable remult across all sveltekit route
::: code-group
```ts [src/hooks.server.ts]
import { sequence } from '@sveltejs/kit/hooks'
import { api as handleRemult } from './server/api'
export const handle = sequence(
// Manage your sequence of handlers here
handleRemult,
)
```
:::
## Extra - Universal load & SSR
To Use remult in ssr `PageLoad` - this will leverage the `event`'s fetch to load data on the server
without reloading it on the frontend, and abiding to all api rules even when it runs on the server
::: code-group
```ts [src/routes/+page.ts]
import { remult } from 'remult'
import type { PageLoad } from './$types'
export const load = (async (event) => {
// Instruct remult to use the special svelte fetch
// Like this univeral load will work in SSR & CSR
remult.useFetch(event.fetch)
return repo(Task).find()
}) satisfies PageLoad
```
:::
::: tip
You can add this in `+layout.ts` as well and all routes **under** will have the correct fetch out of the box.
:::
## Extra - Server load
If you return a remult entity from the `load` function of a `+page.server.ts`,
SvelteKit will complain and show this error:
```bash
Error: Data returned from `load` while rendering / is not serializable:
Cannot stringify arbitrary non-POJOs (data.tasks[0])
```
To fix this, you can use `repo(Entity).toJson()` in the server load function and `repo(Entity).fromJson()` in the .svelte file
to serialize and deserialize well the entity.
::: code-group
```ts [src/routes/+page.server.ts]
import { repo } from 'remult'
import type { PageServerLoad } from './$types'
import { Task } from '../demo/todo/Task'
export const load = (async () => {
const tasks = repo(Task).toJson(await repo(Task).find())
return {
tasks,
}
}) satisfies PageServerLoad
```
```svelte [src/routes/+page.svelte]
```
:::
---
#### Since `@sveltejs/kit@2.11.0`, there is a new feature: [Universal-hooks-transport](https://svelte.dev/docs/kit/hooks#Universal-hooks-transport)
With this new feature, you can get rid of `repo(Entity).toJson()` and `repo(Entity).fromJson()` thanks to this file: `hooks.ts`.
::: code-group
```ts [src/hooks.ts]
import { repo, type ClassType } from 'remult'
import { Task } from './demo/todo/Task'
import type { Transport } from '@sveltejs/kit'
import { api } from './server/api'
// You can have:
// A/ a local entity array to work only these ones (like here)
// or
// B/ import a global entity array that will be
// shared between backend and frontend (not in ./server/api.ts)
const entities = [Task]
export const transport: Transport = {
remultTransport: {
encode: (value: any) => {
for (let index = 0; index < entities.length; index++) {
const element = entities[index] as ClassType
if (value instanceof element) {
return {
...repo(element).toJson(value),
entity_key: repo(element).metadata.key,
}
}
}
},
decode: (value: any) => {
for (let index = 0; index < entities.length; index++) {
const element = entities[index] as ClassType
if (value.entity_key === repo(element).metadata.key) {
return repo(element).fromJson(value)
}
}
},
},
}
```
```ts [src/routes/+page.server.ts]
import { repo } from 'remult'
import type { PageServerLoad } from './$types'
import { Task } from '../demo/todo/Task'
export const load = (async () => {
// const tasks = repo(Task).toJson(await repo(Task).find()) // [!code --]
const tasks = await repo(Task).find()
return {
tasks,
}
}) satisfies PageServerLoad
```
```svelte [src/routes/+page.svelte]
```
:::
## Extra - Svelte 5 & Reactivity
Remult is fully compatible with Svelte 5, Rune, and Reactivity.
To take full advantage of it, add this snippet:
::: code-group
```html [src/routes/+layout.svelte]
```
:::
Then you can use `$state`, `$derived` like any other places
::: code-group
```html [src/routes/+page.svelte]
```
:::
### Focus on auth reactivity
Anywhere in your frontend code you can set `remult.user = xxx` and all remult auth reactivity will work (remult.user, remult.authenticated(), ...)
```ts
const logout = async () => {
try {
remult.user = await AuthController.signOut()
} catch (error) {
alert(error.message)
}
}
```
If you want `remult.user` to be filled in SSR, here is the code:
::: code-group
```svelte [src/routes/+layout.svelte]
{@render children?.()}
```
```ts [src/routes/+layout.server.ts]
import { remult } from 'remult'
import type { LayoutServerLoad } from './$types'
export const load = (async () => {
return { user: remult.user }
}) satisfies LayoutServerLoad
```
:::
And you can trigger this with :
```ts
import { invalidateAll } from '$app/navigation'
const logout = async () => {
try {
await AuthController.signOut()
invalidateAll() // [!code ++] // This will trigger the layout.server.ts load function
} catch (error) {
alert(error.message)
}
}
```
## Extra - Remote Functions
SvelteKit is introducing a new feature called [Remote Functions](https://svelte.dev/docs/kit/remote-functions). It's early, but we want to see how it integrates with Remult.
Here is the default doc example (zod & drizzle or valibot & prisma, ...):
```ts
import { error } from '@sveltejs/kit'
import { query } from '$app/server'
import * as v from 'valibot' // or zod, ... any standard schema library
import * as db from '$lib/server/database' // with drizzle, prisma, pg, ... any database library
export const getPost = query(
z.string(), // Standard Schema
async (slug) => {
const [post] = await db.sql`SELECT * FROM post WHERE slug = ${slug}`
if (!post) error(404, 'Not found')
return post
},
)
```
With remult library, you have both:
- the database layer
- the standard schema layer
So you can replace the previous code with this:
```ts
import { error } from '@sveltejs/kit'
import { query } from '$app/server'
import { standardSchema, repo } from 'remult'
import { Post } from '$lib/entities'
export const getPost = query(
standardSchema(repo(Post), 'slug'), // Standard Schema
async ({ slug }) => {
const post = await repo(Post).findFirst({ slug })
if (!post) error(404, 'Not found')
return post
},
)
```
We are excited to see how you will use it 🚀
::: tip
More info about [remult standard schema](/docs/standard-schema)
:::
# Next.js - Tutorial - Setup
# Build a Full-Stack Next.js Application
### Create a simple todo app with Remult using Next.js
In this tutorial, we are going to create a simple app to manage a task list. We'll use `Next.js`, and Remult as our full-stack CRUD framework. For deployment to production, we'll use [Vercel](https://vercel.com/) and a `PostgreSQL` database.
By the end of the tutorial, you should have a basic understanding of Remult and how to use it to accelerate and simplify full stack app development.
### Prerequisites
This tutorial assumes you are familiar with `TypeScript`, `React` and `Next.js`.
Before you begin, make sure you have [Node.js](https://nodejs.org) and [git](https://git-scm.com/) installed.
# Setup for the Tutorial
This tutorial requires setting up a Next.js project and a few lines of code to add Remult.
You can either **use a starter project** to speed things up, or go through the **step-by-step setup**.
## Option 1: Clone the Starter Project
1. Clone the _remult-nextjs-todo_ repository from GitHub and install its dependencies.
```sh
git clone https://github.com/remult/nextjs-app-starter.git remult-nextjs-todo
cd remult-nextjs-todo
npm install
```
2. Open your IDE.
3. Open a terminal and run the `dev` npm script.
```sh
npm run dev
```
The default Next.js app main screen should be displayed (except for the styles which were modified for the tutorial).
At this point, our starter project is up and running. We are now ready to move to the [next step of the tutorial](./entities.md) and start creating the task list app.
## Option 2: Step-by-step Setup
### Create a Next.js project
1. Create the new Next.js project.
```sh
npx -y create-next-app@latest remult-nextjs-todo
```
Answer the questions as follows:
```sh
✔ Would you like to use TypeScript? ... Yes
✔ Would you like to use ESLint? ... No
✔ Would you like to use Tailwind CSS? ... No
✔ Would you like to use `src/` directory? ... Yes
✔ Would you like to use App Router? (recommended) ... Yes
✔ Would you like to customize the default import alias? ... No
```
2. Go to the created folder.
```sh
cd remult-nextjs-todo
```
### Install Remult
```sh
npm i remult
```
### Bootstrap Remult in the back-end
Remult is bootstrapped in a `Next.js` using a [catch all dynamic API route](https://nextjs.org/docs/app/building-your-application/routing/dynamic-routes#catch-all-segments), that passes the handling of requests to an object created using the `remultApi` function.
1. Open your IDE.
2. In the `src` directory, create a file called `api.ts` with the following code:
```ts
// src/api.ts
import { remultApi } from 'remult/remult-next'
export const api = remultApi({})
```
3. Create an `api` directory within the app folder, and inside it, create a `[...remult]` subdirectory. Inside the `app/api/[...remult]` directory, craft a `route.ts` file with the following code. This file functions as a catch all route for the Next.js API route, effectively managing all incoming API requests.
```ts
// src/app/api/[...remult]/route.ts
import { api } from '../../../api'
export const { POST, PUT, DELETE, GET } = api
```
### Enable TypeScript decorators
Add the following entry to the `compilerOptions` section of the `tsconfig.json` file to enable the use of decorators in the React app.
```json{7}
// tsconfig.json
{
...
"compilerOptions": {
...
"experimentalDecorators": true // add this
...
}
...
}
```
### Run the app
Open a terminal and start the app.
```sh
npm run dev
```
The default `Next.js` main screen should be displayed.
### Remove Next.js default styles
The Next.js default styles won't fit our todo app. If you'd like a nice-looking app, replace the contents of `app/globals.css` with [this CSS file](https://raw.githubusercontent.com/remult/nextjs-app-starter/main/src/app/globals.css). Otherwise, you can simply **delete the contents of `app/globals.css`**.
### Setup completed
At this point, our starter project is up and running. We are now ready to move to the [next step of the tutorial](./entities.md) and start creating the task list app.
# Next.js - Tutorial - Entities
# Entities
Let's start coding the app by defining the `Task` entity class.
The `Task` entity class will be used:
- As a model class for client-side code
- As a model class for server-side code
- By `remult` to generate API endpoints, API queries, and database commands
The `Task` entity class we're creating will have an auto-generated `id` field, a `title` field, a `completed` field and an auto-generated `createdAt` field. The entity's API route ("tasks") will include endpoints for all `CRUD` operations.
## Define the Model
1. Create a `shared` folder under the `src` folder. This folder will contain code shared between frontend and backend.
2. Create a file `Task.ts` in the `shared/` folder, with the following code:
```ts
// src/shared/Task.ts
import { Entity, Fields } from 'remult'
@Entity('tasks', {
allowApiCrud: true,
})
export class Task {
@Fields.id()
id = ''
@Fields.string()
title = ''
@Fields.boolean()
completed = false
@Fields.createdAt()
createdAt?: Date
}
```
3. In the `src/api.ts` api route, register the `Task` entity with Remult by adding `entities: [Task]` to an `options` object you pass to the `remultApi()` function:
```ts{4,7}
// src/api.ts
import { remultApi } from "remult/remult-next"
import { Task } from "./shared/Task"
const api = remultApi({
entities: [Task]
})
export const { POST, PUT, DELETE, GET } = api
```
The [@Entity](../../docs/ref_entity.md) decorator tells Remult this class is an entity class. The decorator accepts a `key` argument (used to name the API route and as a default database collection/table name), and an `options` argument used to define entity-related properties and operations, discussed in the next sections of this tutorial.
To initially allow all CRUD operations for tasks, we set the option [allowApiCrud](../../docs/ref_entity.md#allowapicrud) to `true`.
The [@Fields.id](../../docs/field-types.md#fields-id) decorator tells Remult to automatically generate a unique id using `crypto.randomUUID()`. This value can't be changed after the entity is created.
The [@Fields.string](../../docs/field-types.md#fields-string) decorator tells Remult the `title` property is an entity data field of type `String`. This decorator is also used to define field-related properties and operations, discussed in the next sections of this tutorial and the same goes for `@Fields.boolean` and the `completed` property.
The [@Fields.createdAt](../../docs/field-types.md#fields-createdat) decorator tells Remult to automatically generate a `createdAt` field with the current date and time.
::: tip
For a complete list of supported field types, see the [Field Types](../../docs/field-types.md) section in the Remult documentation.
:::
## Test the API
Now that the `Task` entity is defined, we can start using the REST API to query and add a tasks.
1. Open a browser with the url: [http://localhost:3000/api/tasks](http://localhost:3000/api/tasks), and you'll see that you get an empty array.
2. Use `curl` to `POST` a new task - _Clean car_.
```sh
curl http://localhost:3000/api/tasks -d "{\"title\": \"Clean car\"}" -H "Content-Type: application/json"
```
3. Refresh the browser for the url: [http://localhost:3000/api/tasks](http://localhost:3000/api/tasks) and see that the array now contains one item.
4. Use `curl` to `POST` a few more tasks:
```sh
curl http://localhost:3000/api/tasks -d "[{\"title\": \"Read a book\"},{\"title\": \"Take a nap\", \"completed\":true },{\"title\": \"Pay bills\"},{\"title\": \"Do laundry\"}]" -H "Content-Type: application/json"
```
- Note that the `POST` endpoint can accept a single `Task` or an array of `Task`s.
5. Refresh the browser again, to see that the tasks were stored in the db.
::: warning Wait, where is the backend database?
While remult supports [many relational and non-relational databases](https://remult.dev/docs/installation/database/), in this tutorial we start by storing entity data in a backend **JSON file**. Notice that a `db` folder has been created under the root folder, with a `tasks.json` file containing the created tasks.
:::
## Admin UI
### Enabling the Admin UI
Add the Admin UI to your Next.js application by setting the `admin` option to `true` in the `remultApi()`
::: code-group
```ts [src/api.ts]
import { remultApi } from 'remult/remult-next'
import { Task } from './shared/Task'
const api = remultApi({
entities: [Task],
admin: true,
})
export const { POST, PUT, DELETE, GET } = api
```
:::
### Accessing and Using the Admin UI
Navigate to `http://localhost:3000/api/admin` to access the Admin UI. Here, you can perform CRUD operations on your entities, view their relationships via the Diagram entry, and ensure secure management with the same validations and authorizations as your application.

### Features
- **CRUD Operations**: Directly create, update, and delete tasks through the Admin UI.
- **Entity Diagram**: Visualize relationships between entities for better data structure understanding.
- **Security**: Operations are secure, adhering to application-defined rules.
## Display the Task List
Let's start developing the web app by displaying the list of existing tasks in a React component.
In the `src` folder create a `components` folder and in it create a `todo.tsx` file and place the following code in it:
```tsx
// src/components/todo.tsx
'use client'
import { useEffect, useState } from 'react'
import { remult } from 'remult'
import { Task } from '../shared/Task'
const taskRepo = remult.repo(Task)
export default function Todo() {
const [tasks, setTasks] = useState([])
useEffect(() => {
taskRepo.find().then(setTasks)
}, [])
return (
)
}
```
Here's a quick overview of the different parts of the code snippet:
- `taskRepo` is a Remult [Repository](../../docs/ref_repository.md) object used to fetch and create Task entity objects.
- `tasks` is a Task array React state to hold the list of tasks.
- React's useEffect hook is used to call the Remult [repository](../../docs/ref_repository.md)'s [find](../../docs/ref_repository.md#find) method to fetch tasks from the server once when the React component is loaded.
### Display the todo Component
Replace the contents of `src/app/page.tsx` with the following code:
```tsx
// src/app/page.tsx
import Todo from '../components/todo'
export default function Home() {
return
}
```
After the browser refreshes, the list of tasks appears.
# Next.js - Tutorial - Paging, Sorting and Filtering
# Paging, Sorting and Filtering
The RESTful API created by Remult supports **server-side paging, sorting, and filtering**. Let's use that to limit, sort and filter the list of tasks.
## Limit Number of Fetched Tasks
Since our database may eventually contain a lot of tasks, it make sense to use a **paging strategy** to limit the number of tasks retrieved in a single fetch from the back-end database.
Let's limit the number of fetched tasks to `20`.
In the `useEffect` hook defined in the `Todo` component, pass an `options` argument to the `find` method call and set its `limit` property to 20.
```ts{9-13}
// src/components/todo.tsx
//...
export default function Todo() {
//...
useEffect(() => {
taskRepo
.find({
limit: 20
})
.then(setTasks)
}, [])
//...
}
```
There aren't enough tasks in the database for this change to have an immediate effect, but it will have one later on when we'll add more tasks.
::: tip
To query subsequent pages, use the [Repository.find()](../../docs/ref_repository.md#find) method's `page` option.
:::
## Sorting By Creation Date
We would like old tasks to appear first in the list, and new tasks to appear last. Let's sort the tasks by their `createdAt` field.
In the `useEffect` hook, set the `orderBy` property of the `find` method call's `option` argument to an object that contains the fields you want to sort by.
Use "asc" and "desc" to determine the sort order.
```ts{7}
// src/components/todo.tsx
useEffect(() => {
taskRepo
.find({
limit: 20,
orderBy: { createdAt: "asc" }
})
.then(setTasks)
}, [])
```
## Server Side Filtering
Remult supports sending filter rules to the server to query only the tasks that we need.
Adjust the `useEffect` hook to fetch only `completed` tasks.
```ts{8}
// src/components/todo.tsx
useEffect(() => {
taskRepo
.find({
limit: 20,
orderBy: { createdAt: "asc" },
where: { completed: true }
})
.then(setTasks)
}, [])
```
::: warning Note
Because the `completed` field is of type `boolean`, the argument is **compile-time checked to be of the `boolean` type**. Setting the `completed` filter to `undefined` causes it to be ignored by Remult.
:::
Play with different filtering values, and eventually comment it out, since we do need all the tasks
```ts{6}
useEffect(() => {
taskRepo
.find({
limit: 20,
orderBy: { createdAt: "asc" },
//where: { completed: true },
})
.then(setTasks);
}, []);
```
::: tip Learn more
Explore the reference for a [comprehensive list of filtering options](../../docs/entityFilter.md).
:::
# Next.js - Tutorial - CRUD Operations
# CRUD Operations
## Adding new tasks
Now that we can see the list of tasks, it's time to add a few more.
Add the highlighted `newTaskTitle` state and `addTask` function the Home Component
```ts{5-16}
// src/components/todo.tsx
export default function Todo() {
const [tasks, setTasks] = useState([])
const [newTaskTitle, setNewTaskTitle] = useState("")
const addTask = async (e: FormEvent) => {
e.preventDefault()
try {
const newTask = await taskRepo.insert({ title: newTaskTitle })
setTasks([...tasks, newTask])
setNewTaskTitle("")
} catch (error: unknown) {
alert((error as { message: string }).message)
}
}
//...
```
- the call to `taskRepo.insert` will make a post request to the server, insert the new task to the `db`, and return the new `Task` object with all it's info (including the id generated by the database)
::: warning Import FormEvent
This code requires adding an import of `FormEvent` from `react`.
:::
Next let's adjust the `tsx` to display a form to add new tasks
```tsx{7-14}
// src/components/todo.tsx
return (
)
```
Try adding a few tasks to see how it works
## Mark Tasks as completed
Modify the contents of the `tasks.map` iteration within the `Todo` component to include the following `setCompleted` function and call it in the input's `onChange` event.
```tsx{5-6,8-9,16}
// src/components/todo.tsx
{
tasks.map(task => {
const setTask = (value: Task) =>
setTasks(tasks => tasks.map(t => (t === task ? value : t)))
const setCompleted = async (completed: boolean) =>
setTask(await taskRepo.save({ ...task, completed }))
return (
setCompleted(e.target.checked)}
/>
{task.title}
)
})
}
```
- The `setTask` function is used to replace the state of the changed task in the `tasks` array
- The `taskRepo.save` method update the `task` to the server and returns the updated value
## Rename Tasks and Save them
To make the tasks in the list updatable, we'll bind the `tasks` React state to `input` elements and add a _Save_ button to save the changes to the backend database.
Modify the contents of the `tasks.map` iteration within the `Todo` component to include the following `setTitle` and `saveTask` functions and add an `input` and a save `button`.
```tsx{11,13-19,28-29}
// src/components/todo.tsx
{
tasks.map(task => {
const setTask = (value: Task) =>
setTasks(tasks => tasks.map(t => (t === task ? value : t)))
const setCompleted = async (completed: boolean) =>
setTask(await taskRepo.save({ ...task, completed }))
const setTitle = (title: string) => setTask({ ...task, title })
const saveTask = async () => {
try {
setTask(await taskRepo.save(task))
} catch (error: unknown) {
alert((error as { message: string }).message)
}
}
return (
setCompleted(e.target.checked)}
/>
setTitle(e.target.value)} />
)
})
}
```
- The `setTitle` function, called from the `input`'s `onChange` event, saves the value from the `input` to the `tasks` state.
- The `saveTask` function, called from the `button`'s' `onClick`event , saves the `task` object to the backend.
Make some changes and refresh the browser to verify the backend database is updated.
::: tip Browser's Network tab
As you play with these `CRUD` capabilities, monitor the network tab and see that they are all translated to `rest` api calls.
:::
## Delete Tasks
Let's add a _Delete_ button next to the _Save_ button of each task in the list.
Add the highlighted `deleteTask` function and _Delete_ `button` Within the `tasks.map` iteration in the `return` section of the `Todo` component.
```tsx{21-28,39}
// src/components/todo.tsx
{
tasks.map(task => {
const setTask = (value: Task) =>
setTasks(tasks => tasks.map(t => (t === task ? value : t)))
const setCompleted = async (completed: boolean) =>
setTask(await taskRepo.save({ ...task, completed }))
const setTitle = (title: string) => setTask({ ...task, title })
const saveTask = async () => {
try {
setTask(await taskRepo.save(task))
} catch (error: unknown) {
alert((error as { message: string }).message)
}
}
const deleteTask = async () => {
try {
await taskRepo.delete(task)
setTasks(tasks.filter(t => t !== task))
} catch (error: unknown) {
alert((error as { message: string }).message)
}
}
return (
setCompleted(e.target.checked)}
/>
setTitle(e.target.value)} />
)
})
}
```
# Next.js - Tutorial - Validation
# Validation
Validating user entered data is usually required both on the client-side and on the server-side, often causing a violation of the [DRY](https://en.wikipedia.org/wiki/Don%27t_repeat_yourself) design principle. **With Remult, validation code can be placed within the entity class, and Remult will run the validation logic on both the frontend and the relevant API requests.**
::: warning Handling validation errors
When a validation error occurs, Remult will throw an exception.
In this tutorial, [CRUD operations](crud.md) catch these exceptions, and alert the user.
We leave it to you to decide how to handle validation errors in your application.
:::
## Validate the Title Field
Task titles are required. Let's add a validity check for this rule.
1. In the `Task` entity class, modify the `Fields.string` decorator for the `title` field to include an object literal argument and set the object's `validate` property to `Validators.required`.
```ts{3-5}
// src/shared/Task.ts
@Fields.string({
validate: Validators.required
})
title = ""
```
::: warning Import Validators
This code requires adding an import of `Validators` from `remult`.
:::
::: warning Manual browser refresh required
For this change to take effect, you **must manually refresh the browser**.
:::
After the browser is refreshed, try creating a new `task` or saving an existing one with an empty title - the _"Should not be empty"_ error message is displayed.
### Implicit server-side validation
The validation code we've added is called by Remult on the server-side to validate any API calls attempting to modify the `title` field.
Try making the following `POST` http request to the `http://localhost:3000/api/tasks` API route, providing an invalid title.
```sh
curl -i http://localhost:3000/api/tasks -d "{\"title\": \"\"}" -H "Content-Type: application/json"
```
An http error is returned and the validation error text is included in the response body,
## Custom Validation
The `validate` property of the first argument of `Remult` field decorators can be set to an arrow function which will be called to validate input on both front-end and back-end.
Try something like this and see what happens:
```ts
// src/shared/Task.ts
@Fields.string({
validate: (task) => {
if (task.title.length < 3) throw "Too Short"
}
})
title = ""
```
# Next.js - Tutorial - Live Queries
# Live Queries :rocket:
::: tip New Feature
Live queries are a new feature introduced in version 0.18.
:::
Our todo list app can have multiple users using it at the same time. However, changes made by one user are not seen by others unless they manually refresh the browser.
Let's add realtime multiplayer capabilities to this app.
## Realtime updated todo list
Let's switch from fetching Tasks once when the React component is loaded, and manually maintaining state for CRUD operations, to using a realtime updated live query subscription **for both initial data fetching and subsequent state changes**.
1. Modify the contents of the `useEffect` hook in the `src/components/todo.tsx` file
```ts{4-5,10}
// src/components/todo.tsx
useEffect(() => {
return taskRepo
.liveQuery({
limit: 20,
orderBy: { createdAt: "asc" }
//where: { completed: true },
})
.subscribe(info => setTasks(info.applyChanges))
}, [])
```
Let's review the change:
- Instead of calling the `repository`'s `find` method we now call the `liveQuery` method to define the query, and then call its `subscribe` method to establish a subscription which will update the Tasks state in realtime.
- The `subscribe` method accepts a callback with an `info` object that has 3 members:
- `items` - an up to date list of items representing the current result - it's useful for readonly use cases.
- `applyChanges` - a method that receives an array and applies the changes to it - we send that method to the `setTasks` state function, to apply the changes to the existing `tasks` state.
- `changes` - a detailed list of changes that were received
- The `subscribe` method returns an `unsubscribe` function which we use as a return value for the `useEffect` hook, so that it'll be called when the component unmounts.
2. As all relevant CRUD operations (made by all users) will **immediately update the component's state**, we should remove the manual adding of new Tasks to the component's state:
```ts{7}
// src/components/todo.tsx
const addTask = async (e: FormEvent) => {
e.preventDefault()
try {
await taskRepo.insert({ title: newTaskTitle })
// ^ this no longer needs to be a variable as we are not using it to set the state.
// setTasks([...tasks, newTask]) <-- this line is no longer needed
setNewTaskTitle("")
} catch (error: unknown) {
alert((error as { message: string }).message)
}
}
```
3. Optionally remove other redundant state changing code:
```tsx{11-12,18-19,28}
// src/components/todo.tsx
//...
{
tasks.map(task => {
const setTask = (value: Task) =>
setTasks(tasks => tasks.map(t => (t === task ? value : t)))
const setCompleted = async (completed: boolean) =>
// setTask(await taskRepo.save({ ...task, completed })) <- Delete this line
await taskRepo.save({ ...task, completed }) // <- replace with this line
const setTitle = (title: string) => setTask({ ...task, title })
const saveTask = async () => {
try {
// setTask(await taskRepo.save(task)) <- Delete this line
await taskRepo.save(task) // <- replace with this line
} catch (error: unknown) {
alert((error as { message: string }).message)
}
}
const deleteTask = async () => {
try {
await taskRepo.delete(task)
// setTasks(tasks.filter(t => t !== task)) <- Delete this line
} catch (error: unknown) {
alert((error as { message: string }).message)
}
}
//...
})
}
```
Open the todo app in two (or more) browser windows/tabs, make some changes in one window and notice how the others are updated in realtime.
::: tip Under the hood
The default implementation of live-queries uses HTTP Server-Sent Events (SSE) to push realtime updates to clients, and stores live-query information in-memory.
Check the browser's network tab, you'll see a call to the `/api/stream` route which receives messages on every update.
For serverless environments _(or multi servers)_, live-query updates can be pushed using integration with third-party realtime providers, such as [Ably](https://ably.com/) (or others), and live-query information can be stored to any database supported by Remult.
:::
# Next.js - Tutorial - Backend methods
# Backend methods
When performing operations on multiple entity objects, performance considerations may necessitate running them on the server. **With Remult, moving client-side logic to run on the server is a simple refactoring**.
## Set All Tasks as Un/completed
Let's add two buttons to the todo app: "Set all as completed" and "Set all as uncompleted".
1. Add a `setAllCompleted` async function to the `Todo` function component, which accepts a `completed` boolean argument and sets the value of the `completed` field of all the tasks accordingly.
```ts
// src/components/todo.tsx
const setAllCompleted = async (completed: boolean) => {
for (const task of await taskRepo.find()) {
await taskRepo.save({ ...task, completed })
}
}
```
The `for` loop iterates the array of `Task` objects returned from the backend, and saves each task back to the backend with a modified value in the `completed` field.
2. Add the two buttons to the return section of the `Todo` component, just before the closing `` tag. Both of the buttons' `onClick` events will call the `setAllCompleted` method with the appropriate value of the `completed` argument.
```tsx
// src/components/todo.tsx
```
Make sure the buttons are working as expected before moving on to the next step.
## Refactor from Front-end to Back-end
With the current state of the `setAllCompleted` function, each modified task being saved causes an API `PUT` request handled separately by the server. As the number of tasks in the todo list grows, this may become a performance issue.
A simple way to prevent this is to expose an API endpoint for `setAllCompleted` requests, and run the same logic on the server instead of the client.
1. Create a new `TasksController` class, in the `shared` folder, and refactor the `for` loop from the `setAllCompleted` function of the `Todo` function component into a new, `static`, `setAllCompleted` method in the `TasksController` class, which will run on the server.
```ts
// src/shared/TasksController.ts
import { BackendMethod, remult } from 'remult'
import { Task } from './Task'
export class TasksController {
@BackendMethod({ allowed: true })
static async setAllCompleted(completed: boolean) {
const taskRepo = remult.repo(Task)
for (const task of await taskRepo.find()) {
await taskRepo.save({ ...task, completed })
}
}
}
```
The `@BackendMethod` decorator tells Remult to expose the method as an API endpoint (the `allowed` property will be discussed later on in this tutorial).
**Unlike the front-end `Remult` object, the server implementation interacts directly with the database.**
2. Register `TasksController` by adding it to the `controllers` array of the `options` object passed to `createRemultServer()`, in the server's `api` module:
```ts{4,8}
// src/api.ts
//...
import { TasksController } from "./shared/TaskController"
export const api = remultApi({
//...
controllers: [TasksController]
})
```
3. Replace the `for` iteration in the `setAllCompleted` function of the `Todo` component with a call to the `setAllCompleted` method in the `TasksController`.
```tsx{4}
// src/components/todo.tsx
const setAllCompleted = async (completed: boolean) => {
await TasksController.setAllCompleted(completed)
}
```
::: warning Import TasksController
Remember to add an import of `TasksController` in `src/components/todo.tsx`.
:::
::: tip Note
With Remult backend methods, argument types are compile-time checked. :thumbsup:
:::
After the browser refreshed, the _"Set all..."_ buttons function exactly the same, but much faster.
# Next.js - Tutorial - Authentication and Authorization
# Authentication and Authorization
Our todo app is nearly functionally complete, but it still doesn't fulfill a very basic requirement - that users should log in before they can view, create or modify tasks.
Remult provides a flexible mechanism that enables placing **code-based authorization rules** at various levels of the application's API. To maintain high code cohesion, **entity and field-level authorization code should be placed in entity classes**.
**Remult is completely unopinionated when it comes to user authentication.** You are free to use any kind of authentication mechanism, and only required to provide Remult with an object which implements the Remult `UserInfo` interface.
In this tutorial, we'll use [NextAuth.js](https://next-auth.js.org/) for authentication.
## Tasks CRUD Requires Sign-in
This rule is implemented within the `Task` `@Entity` decorator, by modifying the value of the `allowApiCrud` property.
This property can be set to a function that accepts a `Remult` argument and returns a `boolean` value. Let's use the `Allow.authenticated` function from Remult.
```ts{4}
// src/app/shared/Task.ts
@Entity("tasks", {
allowApiCrud: Allow.authenticated
})
```
::: warning Import Allow
This code requires adding an import of `Allow` from `remult`.
:::
After the browser refreshes, **the list of tasks disappeared** and the user can no longer create new tasks.
::: details Inspect the HTTP error returned by the API using cURL
```sh
curl -i http://localhost:3000/api/tasks
```
:::
::: danger Authorized server-side code can still modify tasks
Although client CRUD requests to `tasks` API endpoints now require a signed-in user, the API endpoint created for our `setAllCompleted` server function remains available to unauthenticated requests. Since the `allowApiCrud` rule we implemented does not affect the server-side code's ability to use the `Task` entity class for performing database CRUD operations, **the `setAllCompleted` function still works as before**.
To fix this, let's implement the same rule using the `@BackendMethod` decorator of the `setAllCompleted` method of `TasksController`.
```ts
// src/shared/TasksController.ts
@BackendMethod({ allowed: Allow.authenticated })
```
**This code requires adding an import of `Allow` from `remult`.**
:::
## User Authentication
Let's set-up `NextAuth.js` to authenticate users to our app.
### Backend setup
1. Install `next-auth`:
```sh
npm i next-auth
```
2. `NextAuth` requires a "secret" used to encrypt the NextAuth.js JWT, see [Options | NextAuth.js](https://next-auth.js.org/configuration/options#nextauth_secret) for more info.
Create a file called `.env.local` and set the `NEXTAUTH_SECRET` to a random string.
```
// .env.local
NEXTAUTH_SECRET=something-secret
```
:::tip
you can use an [online UUID generator](https://www.uuidgenerator.net/) to generate a completely random string
:::
3. Inside the `src` folder, create an `auth.ts` file with the following code.
```ts
// src/auth.ts
import NextAuth, { getServerSession } from 'next-auth/next'
import Credentials from 'next-auth/providers/credentials'
import { UserInfo } from 'remult'
const validUsers: UserInfo[] = [
{ id: '1', name: 'Jane' },
{ id: '2', name: 'Steve' },
]
function findUser(name?: string | null) {
return validUsers.find((user) => user.name === name)
}
export const auth = NextAuth({
providers: [
Credentials({
credentials: {
name: {
placeholder: 'Try Steve or Jane',
},
},
authorize: (credentials) => findUser(credentials?.name) || null,
}),
],
callbacks: {
session: ({ session }) => ({
...session,
user: findUser(session.user?.name),
}),
},
})
export async function getUserOnServer() {
const session = await getServerSession()
return findUser(session?.user?.name)
}
```
This (very) simplistic NextAuth.js [Credentials](https://next-auth.js.org/providers/credentials) authorizes users by looking up the user's name in a predefined list of valid users.
We've configured the `session` `callback` to include the user info as part of the session info, so that remult on the frontend will have the authorization info.
4. Create an `auth` folder within the 'api' folder, and inside it, create a `[...nextauth]` subdirectory. Inside the `src/app/api/auth/[...nextauth]` directory, craft a `route.ts` file with the following code.
```ts
// src/app/api/auth/[...nextauth]/route.ts
import { auth } from '../../../../auth'
export { auth as GET, auth as POST }
```
### Frontend setup
1. Create a `src/components/auth.tsx` file, and place the following code to it:
```tsx
// src/components/auth.tsx
import { signIn, signOut, useSession } from 'next-auth/react'
import { useEffect } from 'react'
import { UserInfo, remult } from 'remult'
import Todo from './todo'
export default function Auth() {
const session = useSession()
remult.user = session.data?.user as UserInfo
useEffect(() => {
if (session.status === 'unauthenticated') signIn()
}, [session])
if (session.status !== 'authenticated') return <>
return (
Hello {remult.user?.name}{' '}
)
}
```
2. Update the `src/app/page.tsx` with the highlighted changes:
```tsx{3-5,9-11}
// src/app/page.tsx
"use client"
import { SessionProvider } from "next-auth/react"
import Auth from "../components/auth"
export default function Home() {
return (
)
}
```
### Connect Remult-Next On the Backend
Once an authentication flow is established, integrating it with Remult in the backend is as simple as providing Remult with a `getUser` function that uses the `getUserOnServer` function we've created in `src/auth.ts`
```ts{3,7}
// src/api.ts
import { getUserOnServer } from "./auth"
const api = remultApi({
//...
getUser: getUserOnServer,
})
//...
```
The todo app now supports signing in and out, with **all access restricted to signed in users only**.
## Role-based Authorization
Usually, not all application users have the same privileges. Let's define an `admin` role for our todo app, and enforce the following authorization rules:
- All signed in users can see the list of tasks.
- All signed in users can set specific tasks as `completed`.
- Only users belonging to the `admin` role can create, delete or edit the titles of tasks.
1. Modify the highlighted lines in the `Task` entity class to reflect the top three authorization rules.
```ts{7-8,18}
// src/shared/Task.ts
import { Allow, Entity, Fields } from "remult"
@Entity("tasks", {
allowApiCrud: Allow.authenticated,
allowApiInsert: "admin",
allowApiDelete: "admin"
})
export class Task {
@Fields.id()
id!: string
@Fields.string({
validate: (task) => {
if (task.title.length < 3) throw "Too Short"
}
allowApiUpdate: "admin"
})
title = ""
@Fields.boolean()
completed = false
}
```
2. Let's give the user _"Jane"_ the `admin` role by modifying the `roles` array of her `validUsers` entry.
```ts{4}
// src/auth.ts
const validUsers = [
{ id: "1", name: "Jane", roles: ["admin"] },
{ id: "2", name: "Steve" }
]
```
**Sign in to the app as _"Steve"_ to test that the actions restricted to `admin` users are not allowed. :lock:**
## Role-based Authorization on the Frontend
From a user experience perspective it only makes sense that users that can't add or delete, would not see these buttons.
Let's reuse the same definitions on the Frontend.
We'll use the entity's metadata to only show the form if the user is allowed to insert
```tsx{4,13}
// src/components/todo.tsx
{taskRepo.metadata.apiInsertAllowed() && (
)}
...
```
And let's do the same for the `delete` button:
```tsx{12,14}
// src/components/todo.tsx
return (
setCompleted(e.target.checked)}
/>
setTitle(e.target.value)} />
{taskRepo.metadata.apiDeleteAllowed(task) && (
)}
)
```
This way we can keep the frontend consistent with the `api`'s Authorization rules
- Note We send the `task` to the `apiDeleteAllowed` method, because the `apiDeleteAllowed` option, can be sophisticated and can also be based on the specific item's values.
# Next.js - Tutorial - Database
# Database
Up until now the todo app has been using a plain JSON file to store the list of tasks. **In production, we'd like to use a `Postgres` database table instead.**
::: tip Learn more
See the [Quickstart](https://remult.dev/docs/quickstart.html#connecting-a-database) article for the (long) list of relational and non-relational databases Remult supports.
:::
::: warning Don't have Postgres installed? Don't have to.
Don't worry if you don't have Postgres installed locally. In the next step of the tutorial, we'll configure the app to use Postgres in production, and keep using JSON files in our dev environment.
**Simply install `postgres-node` per step 1 below and move on to the [Deployment section of the tutorial](deployment.md).**
:::
1. Install `postgres-node` ("pg").
```sh
npm i pg
```
2. Add an environment variables called `DATABASE_URL` and set it with your connection string
```
// .env.local
...
DATABASE_URL=your connection string
```
3. Add the highlighted code to the `api` server module.
```ts{5,7,11-13}
// src/api.ts
//...
import { createPostgresDataProvider } from "remult/postgres"
const DATABASE_URL = process.env["DATABASE_URL"]
const api = remultApi({
//...
dataProvider: DATABASE_URL
? createPostgresDataProvider({ connectionString: DATABASE_URL })
: undefined,
})
```
Once the application restarts, it'll try to use postgres as the data source for your application.
If `DATABASE_URL` env variable has found, it'll automatically create the `tasks` table for you - as you'll see in the `terminal` window.
If no `DATABASE_URL` has found, it'll just fallback to our local JSON files.
::: tip Database configurations
You can set more options using the `configuration` property, for example `ssl` and others.
```ts
createPostgresDataProvider({
configuration: {
ssl: true,
},
})
```
:::
# Next.js - Tutorial - Deployment
# Deployment
You can deploy the application to a standard node.js server, or a server-less server.
We'll review both options.
## Deploy to a node.js server
Let's deploy the todo app to [railway.app](https://railway.app/).
In order to deploy the todo app to [railway](https://railway.app/) you'll need a `railway` account. You'll also need [Railway CLI](https://docs.railway.app/develop/cli#npm) installed, and you'll need to login to railway from the cli, using `railway login`.
Click enter multiple times to answer all its questions with the default answer
1. Create a Railway `project`.
From the terminal in your project folder run:
```sh
railway init
```
2. Select `Empty Project`
3. Set a project name.
4. Once it's done add a database by running the following command:
```sh
railway add
```
5. Select `postgressql` as the database.
6. Once that's done run the following command to upload the project to railway:
```sh
railway up
```
7. got to the `railway` project's site and click on the project
8. Switch to the `settings` tab
9. Under `Environment` click on `Generate Domain`
10. Copy the `generated url`, you'll need it for [NEXTAUTH_URL](https://next-auth.js.org/configuration/options#nextauth_url) on step 14
11. Switch to the `variables` tab
12. Click on `+ New Variable`, and in the `VARIABLE_NAME` click `Add Reference` and select `DATABASE_URL`
13. Add another variable called `SESSION_SECRET` and set it to a random string, you can use an [online UUID generator](https://www.uuidgenerator.net/)
14. Add another variable called `NEXTAUTH_URL` and set it to the `generated url` which was created on step 10.
15. Wait for railway to finish deploying your changes and Click on the newly generated url to open the app in the browser and you'll see the app live in production. (it may take a few minutes to go live)
::: warning Note
If you run into trouble deploying the app to Railway, try using Railway's [documentation](https://docs.railway.app/deploy/deployments).
:::
That's it - our application is deployed to production, on a node js server
Next we'll explore deployment to a server-less environment.
## Deploying to a serverless environment
### LiveQuery Serverless Support
Any `serverless` platform can't be used to maintain an active subscription channel for our live query, we'll need to use a 3rd party provider for that.
If you're not using `liveQuery` you can skip to the next step.
In this demo, we'll use [ably.com](https://ably.com/)
Follow these steps only if you want to use `liveQuery` in the app
1. ```sh
npm i ably
```
2. Goto [ably.com](https://ably.com/) create a user and click on the "Create new app" button
3. Select a name and click `create app`
4. Click on the `API Keys` button on top.
5. Copy the first api key (with the many capabilities), create an entry in the `.env.local` file, name it `ABLY_API_KEY` and paste the api key there.
6. Configure `ably` as the `subscriptionServer`
```ts{4-5,8-10}
// src/api.ts
//...
import ably from "ably"
import { AblySubscriptionServer } from "remult/ably"
const api = remultApi({
subscriptionServer: new AblySubscriptionServer(
new ably.Rest(process.env["ABLY_API_KEY"]!)
)
//...
})
```
7. Next, we'll need to create a route that `ably`'s client on the front-end will use to get a `token` for a user that wants to subscribe to a channel - in the `src/app/api` folder, createa folder called `getAblyToken` and in it create a file called `route.ts`
```ts
// src/app/api/getAblyToken/route.ts
import ably from 'ably'
import { NextResponse } from 'next/server'
export async function POST() {
const token = await new ably.Rest(
process.env['ABLY_API_KEY']!,
).auth.createTokenRequest({ capability: { '*': ['subscribe'] } })
return NextResponse.json(token)
}
```
8) Configure the `front-end` to use ably as it's `subscriptionClient` by adding a new `useEffect` hook and configure `ably` to use the `api/getAblyToken` route we've created as it's `authUrl` - we'll that in the `Auth` component
```tsx{3-4,12-15}
// src/components/auth.tsx
import ably from "ably"
import { AblySubscriptionClient } from "remult/ably"
export default function Auth() {
const session = useSession()
remult.user = session.data?.user as UserInfo
useEffect(() => {
if (session.status === "unauthenticated") signIn()
else if (session.status === "authenticated")
remult.apiClient.subscriptionClient = new AblySubscriptionClient(
new ably.Realtime({ authUrl: "/api/getAblyToken", authMethod: "POST" })
)
}, [session])
```
9) Configure `remultApi` to store live-queries in the `dataProvider`
```ts{4,6,8-9}
// src/api.ts
//...
import { DataProviderLiveQueryStorage } from "remult/server"
const dataProvider = createPostgresDataProvider()
const api = remultApi({
dataProvider,
liveQueryStorage: new DataProviderLiveQueryStorage(dataProvider)
//...
})
```
Let's deploy the todo app to [vercel](https://vercel.com/).
### Postgres
We'll use vercel's postgres as out database, and that requires the following changes to the `createPostgresDataProvider` options.
```ts{4-7}
// src/api.ts
const dataProvider = createPostgresDataProvider({
connectionString: process.env["POSTGRES_URL"] || process.env["DATABASE_URL"],
configuration: {
ssl: Boolean(process.env["POSTGRES_URL"]),
},
})
```
- Vercel sends the connection string using the `POSTGRES_URL` environment variable, other providers use the `DATABASE_URL` - this code supports them both.
- Ssl is required with vercel - by my local pg doesn't, so we condition ssl based on the environment variable.
### Create a github repo
Vercel deploys automatically whenever you push to github, so the first step of deployment is to create a github repo and push all your changes to it.
### Create a vercel project
1. Create a vercel account if you don't already have one.
2. Goto [https://vercel.com/new](https://vercel.com/new)
3. Select your `github` repo and click `import`
4. Configure the project's name and in the `> Environment Variables` section, `NEXTAUTH_SECRET` and `ABLY_API_KEY` environment variables
5. Click `Deploy`
6. Now we need to define the postgres database.
7. Wait for vercel to complete it's deployment
8. Click on `Continue to Dashboard`
9. Select the `Storage` tab
10. Create new Database and select Postgres
11. Accept the terms
12. Select region and click Create & continue
13. Click Connect
14. Click on Settings, Environment Variables and see that the `POSTGRES_URL` and other environment variables were added.
15. At the time of this article, vercel did not yet automatically redeploy once you configure a database, so in order to redeploy, click on the `Deployments` tab
16. 3 dots at the end of the deployment line and select `Redeploy` and click `Redeploy`
17. Once completed click on 'Visit'.
That's it - our application is deployed to production on vercel, play with it and enjoy.
[Code at this stage](https://github.com/noam-honig/remult-nextjs-app-router-todo)
To see a larger more complex code base, visit our [CRM example project](https://www.github.com/remult/crm-demo)
Love Remult? Give our repo a star.⭐
# SolidStart - Tutorial - Setup
# Build a Full-Stack SolidStart Application
### Create a simple todo app with Remult using SolidStart
In this tutorial, we are going to create a simple app to manage a task list. We'll use `SolidStart`, and Remult as our full-stack CRUD framework. For deployment to production, we'll use [railway.app](https://railway.app/) and a `PostgreSQL` database.
By the end of the tutorial, you should have a basic understanding of Remult and how to use it to accelerate and simplify full stack app development.
::: tip You want to have a look at the end result ?
You can `degit` the final result and read the `README.md` file in the project to check it out.
```sh
npx degit remult/remult/examples/solid-start-todo remult-solid-start-todo
cd remult-solid-start-todo
```
:::
### Prerequisites
This tutorial assumes you are familiar with `TypeScript`, `Solid` and `SolidStart`.
Before you begin, make sure you have [Node.js](https://nodejs.org) and [git](https://git-scm.com/) installed.
# Setup for the Tutorial
This tutorial requires setting up a SolidStart project and a few lines of code to add Remult.
You can either **use a starter project** to speed things up, or go through the **step-by-step setup**.
## Option 1: Clone the Starter Project
1. Clone the _remult-solid-start-todo_ repository from GitHub and install its dependencies.
```sh
git clone https://github.com/remult/solid-start-app-starter.git remult-solid-start-todo
cd remult-solid-start-todo
npm install
```
2. Open your IDE.
3. Open a terminal and run the `dev` npm script.
```sh
npm run dev
```
The default SolidStart app main screen should be displayed (except for the styles which were modified for the tutorial).
At this point, our starter project is up and running. We are now ready to move to the [next step of the tutorial](./entities.md) and start creating the task list app.
## Option 2: Step-by-step Setup
### Create a SolidStart project
1. Create the new SolidStart project.
```sh
npm init solid@latest remult-solid-start-todo
```
Answer the questions as follows:
```sh
o Is this a Solid-Start project?
| Yes
|
o Which template would you like to use?
| basic
|
o Use Typescript?
| Yes
```
2. Go to the created folder.
```sh
cd remult-solid-start-todo
```
### Install Remult
```sh
npm i remult
```
### Bootstrap Remult in the back-end
Remult is bootstrapped in a `SolidStart` using a [catch all dynamic API route](https://start.solidjs.com/core-concepts/routing#catch-all-routes), that passes the handling of requests to an object created using the `remultApi` function.
1. Open your IDE.
2. Create an `api.ts` file in the `src` folder with the following code - which will have the remult's api configuration.
```ts
// src/api.ts
import { remultApi } from 'remult/remult-solid-start'
export const api = remultApi({})
```
3. In the `routes` directory within the `src` folder, create an `api` directory. Inside the `src/routes/api/` directory, craft a `[...remult].ts` file with the following code. This file functions as a catch all route for the SolidStart API route, effectively managing all incoming API requests.
```ts
// src/routes/api/[...remult].ts
import { api } from '../../api.js'
export const { POST, PUT, DELETE, GET } = api
```
### Enable TypeScript decorators
To enable TypeScript decorators:
1. Install the required plugin
```sh
npm i -D @babel/plugin-proposal-decorators @babel/plugin-transform-class-properties
```
2. Add the following entry to the `app.config.ts` file to enable the use of decorators in the solid start app.
```ts{6-14}
// app.config.ts
import { defineConfig } from "@solidjs/start/config"
export default defineConfig({
//@ts-ignore
solid: {
babel: {
plugins: [
["@babel/plugin-proposal-decorators", { version: "legacy" }],
["@babel/plugin-transform-class-properties"],
],
},
},
})
```
### Run the app
Open a terminal and start the app.
```sh
npm run dev
```
The default `SolidStart` main screen should be displayed.
### Cleanup SolidStart basic example
1. Replace the content of `src/app.tsx` with the following code:
```tsx
//src/app.tsx
import { MetaProvider, Title } from '@solidjs/meta'
import { Router } from '@solidjs/router'
import { FileRoutes } from '@solidjs/start/router'
import { Suspense } from 'solid-js'
import './app.css'
export default function App() {
return (
(
SolidStart - Basic
{props.children}
)}
>
)
}
```
### Remove SolidStart default styles
The SolidStart default styles won't fit our todo app. If you'd like a nice-looking app, replace the contents of `src/app.css` with [this CSS file](https://raw.githubusercontent.com/remult/solid-start-app-starter/main/src/app.css). Otherwise, you can simply **delete the contents of `src/app.css`**.
### Setup completed
At this point, our starter project is up and running. We are now ready to move to the [next step of the tutorial](./entities.md) and start creating the task list app.
# SolidStart - Tutorial - Entities
# Entities
Let's start coding the app by defining the `Task` entity class.
The `Task` entity class will be used:
- As a model class for client-side code
- As a model class for server-side code
- By `remult` to generate API endpoints, API queries, and database commands
The `Task` entity class we're creating will have an auto-generated `id` field, a `title` field, a `completed` field and an auto-generated `createdAt` field. The entity's API route ("tasks") will include endpoints for all `CRUD` operations.
## Define the Model
1. Create a `shared` folder under the `src` folder. This folder will contain code shared between frontend and backend.
2. Create a file `Task.ts` in the `shared/` folder, with the following code:
```ts
// src/shared/Task.ts
import { Entity, Fields } from 'remult'
@Entity('tasks', {
allowApiCrud: true,
})
export class Task {
@Fields.id()
id = ''
@Fields.string()
title = ''
@Fields.boolean()
completed = false
@Fields.createdAt()
createdAt?: Date
}
```
3. In the `src/api.ts` file, register the `Task` entity with Remult by adding `entities: [Task]` to an `options` object you pass to the `remultApi()` function:
```ts{4,7}
// src/api.ts
import { remultApi } from "remult/remult-solid-start"
import { Task } from "./shared/Task"
export const api = remultApi({
entities: [Task]
})
```
The [@Entity](../../docs/ref_entity.md) decorator tells Remult this class is an entity class. The decorator accepts a `key` argument (used to name the API route and as a default database collection/table name), and an `options` argument used to define entity-related properties and operations, discussed in the next sections of this tutorial.
To initially allow all CRUD operations for tasks, we set the option [allowApiCrud](../../docs/ref_entity.md#allowapicrud) to `true`.
The [@Fields.id](../../docs/field-types.md#fields-id) decorator tells Remult to automatically generate a unique id using `crypto.randomUUID()`. This value can't be changed after the entity is created.
The [@Fields.string](../../docs/field-types.md#fields-string) decorator tells Remult the `title` property is an entity data field of type `String`. This decorator is also used to define field-related properties and operations, discussed in the next sections of this tutorial and the same goes for `@Fields.boolean` and the `completed` property.
The [@Fields.createdAt](../../docs/field-types.md#fields-createdat) decorator tells Remult to automatically generate a `createdAt` field with the current date and time.
::: tip
For a complete list of supported field types, see the [Field Types](../../docs/field-types.md) section in the Remult documentation.
:::
## Test the API
Now that the `Task` entity is defined, we can start using the REST API to query and add a tasks.
1. Open a browser with the url: [http://localhost:3000/api/tasks](http://localhost:3000/api/tasks), and you'll see that you get an empty array.
2. Use `curl` to `POST` a new task - _Clean car_.
```sh
curl http://localhost:3000/api/tasks -d "{\"title\": \"Clean car\"}" -H "Content-Type: application/json"
```
3. Refresh the browser for the url: [http://localhost:3000/api/tasks](http://localhost:3000/api/tasks) and see that the array now contains one item.
4. Use `curl` to `POST` a few more tasks:
```sh
curl http://localhost:3000/api/tasks -d "[{\"title\": \"Read a book\"},{\"title\": \"Take a nap\", \"completed\":true },{\"title\": \"Pay bills\"},{\"title\": \"Do laundry\"}]" -H "Content-Type: application/json"
```
- Note that the `POST` endpoint can accept a single `Task` or an array of `Task`s.
5. Refresh the browser again, to see that the tasks were stored in the db.
::: warning Wait, where is the backend database?
While remult supports [many relational and non-relational databases](https://remult.dev/docs/installation/database/), in this tutorial we start by storing entity data in a backend **JSON file**. Notice that a `db` folder has been created under the root folder, with a `tasks.json` file containing the created tasks.
:::
## Admin UI
### Enabling the Admin UI
Add the Admin UI to your Solid Start application by setting the `admin` option to `true` in the `remultApi()`
::: code-group
```ts [src/api.ts]
import { remultApi } from 'remult/remult-next'
import { Task } from './shared/Task'
export const api = remultApi({
entities: [Task],
admin: true, // Enable the Admin UI
})
```
:::
### Accessing and Using the Admin UI
Navigate to `http://localhost:3000/api/admin` to access the Admin UI. Here, you can perform CRUD operations on your entities, view their relationships via the Diagram entry, and ensure secure management with the same validations and authorizations as your application.

### Features
- **CRUD Operations**: Directly create, update, and delete tasks through the Admin UI.
- **Entity Diagram**: Visualize relationships between entities for better data structure understanding.
- **Security**: Operations are secure, adhering to application-defined rules.
## Display the Task List
Let's start developing the web app by displaying the list of existing tasks in a solid component.
In the `src/components` folder create a `Todo.tsx` file and place the following code in it:
Edit the `src/components/Todo.tsx` file
```tsx
// src/components/Todo.tsx
import { repo } from 'remult'
import { createStore } from 'solid-js/store'
import { For, onMount } from 'solid-js'
import { Task } from '../shared/Task.js'
const taskRepo = repo(Task)
export default function Todo() {
const [tasks, setTasks] = createStore([])
onMount(() => taskRepo.find().then(setTasks))
return (
{(task) => {
return (
{task.title}
)
}}
)
}
```
Here's a quick overview of the different parts of the code snippet:
- `taskRepo` is a Remult [Repository](../../docs/ref_repository.md) object used to fetch and create Task entity objects.
- `tasks` is a Task array solid store to hold the list of tasks.
- solid's onMount hook is used to call the Remult [repository](../../docs/ref_repository.md)'s [find](../../docs/ref_repository.md#find) method to fetch tasks from the server once when the solid component is loaded.
### Display the todo Component
Replace the contents of `src/routes/index.tsx` with the following code:
```tsx
// src/routes/index.tsx
import Todo from '../components/Todo.jsx'
export default function Home() {
return (
Todos
)
}
```
After the browser refreshes, the list of tasks appears.
# SolidStart - Tutorial - Paging, Sorting and Filtering
# Paging, Sorting and Filtering
The RESTful API created by Remult supports **server-side paging, sorting, and filtering**. Let's use that to limit, sort and filter the list of tasks.
## Limit Number of Fetched Tasks
Since our database may eventually contain a lot of tasks, it make sense to use a **paging strategy** to limit the number of tasks retrieved in a single fetch from the back-end database.
Let's limit the number of fetched tasks to `20`.
In the `onMount` hook defined in the `Todo` component, pass an `options` argument to the `find` method call and set its `limit` property to 20.
```ts{11}
// src/components/Todo.tsx
//...
export default function Todo() {
//...
onMount(() =>
taskRepo
.find({
limit: 20,
})
.then(setTasks)
)
//...
}
```
There aren't enough tasks in the database for this change to have an immediate effect, but it will have one later on when we'll add more tasks.
::: tip
To query subsequent pages, use the [Repository.find()](../../docs/ref_repository.md#find) method's `page` option.
:::
## Sorting By Creation Date
We would like old tasks to appear first in the list, and new tasks to appear last. Let's sort the tasks by their `createdAt` field.
In the `onMount` hook, set the `orderBy` property of the `find` method call's `option` argument to an object that contains the fields you want to sort by.
Use "asc" and "desc" to determine the sort order.
```ts{7}
// src/components/Todo.tsx
onMount(() =>
taskRepo
.find({
limit: 20,
orderBy: { createdAt: "asc" }
})
.then(setTasks)
)
```
## Server Side Filtering
Remult supports sending filter rules to the server to query only the tasks that we need.
Adjust the `onMount` hook to fetch only `completed` tasks.
```ts{8}
// src/components/Todo.tsx
onMount(() =>
taskRepo
.find({
limit: 20,
orderBy: { createdAt: "asc" },
where: { completed: true }
})
.then(setTasks)
)
```
::: warning Note
Because the `completed` field is of type `boolean`, the argument is **compile-time checked to be of the `boolean` type**. Setting the `completed` filter to `undefined` causes it to be ignored by Remult.
:::
Play with different filtering values, and eventually comment it out, since we do need all the tasks
```ts{6}
onMount(() =>
taskRepo
.find({
limit: 20,
orderBy: { createdAt: "asc" },
//where: { completed: true },
})
.then(setTasks);
);
```
::: tip Learn more
Explore the reference for a [comprehensive list of filtering options](../../docs/entityFilter.md).
:::
# SolidStart - Tutorial - CRUD Operations
# CRUD Operations
## Adding new tasks
Now that we can see the list of tasks, it's time to add a few more.
Add the highlighted `newTaskTitle` state and `addTask` function the Home Component
```ts{5-16}
// src/components/Todo.tsx
export default function Todo() {
const [tasks, setTasks] = createStore([])
const [newTaskTitle, setNewTaskTitle] = createSignal("")
async function addTask(e: Event) {
e.preventDefault()
try {
const newTask = await taskRepo.insert({ title: newTaskTitle() })
setTasks([...tasks, newTask])
setNewTaskTitle("")
} catch (error) {
alert((error as { message: string }).message)
}
}
//...
```
::: warning Import createSignal
This code requires adding an import of `createSignal` from `solid-js`.
:::
- the call to `taskRepo.insert` will make a post request to the server, insert the new task to the `db`, and return the new `Task` object with all it's info (including the id generated by the database)
Next let's adjust the `tsx` to display a form to add new tasks
```tsx{5-12}
// src/components/Todo.tsx
return (
{(task) => {
return (
{task.title}
)
}}
)
```
Try adding a few tasks to see how it works
## Mark Tasks as completed
Modify the contents of the `For` iteration within the `Todo`component to include the following `setCompleted` function and call it in the input's`onInput` event.
```tsx{4-8,14}
// src/components/Todo.tsx
{(task, i) => {
async function setCompleted(completed: boolean) {
const updatedTask = await taskRepo.update(task, { completed })
setTasks(i(), updatedTask)
}
return (
setCompleted(e.target.checked)}
/>
{task.title}
)
}}
```
- The `taskRepo.update` method updates the `task` to the server and returns the updated value
## Rename Tasks and Save them
To make the tasks in the list updatable, we'll bind the `tasks` solid state to `input` elements and add a _Save_ button to save the changes to the backend database.
Modify the contents of the `For` iteration within the `Todo`component to include the following`setTitle`and`saveTask`functions and add an`input`and a save`button`.
```tsx{9-15,24-28}
// src/components/Todo.tsx
{(task, i) => {
async function setCompleted(completed: boolean) {
const updatedTask = await taskRepo.update(task, { completed })
setTasks(i(), updatedTask)
}
async function saveTask() {
try {
await taskRepo.save(task)
} catch (error) {
alert((error as { message: string }).message)
}
}
return (
setCompleted(e.target.checked)}
/>
setTasks(i(), "title", e.target.value)}
/>
)
}}
```
- The `saveTask` function, called from the `button`'s' `onClick`event , saves the `task` object to the backend.
Make some changes and refresh the browser to verify the backend database is updated.
::: tip Browser's Network tab
As you play with these `CRUD` capabilities, monitor the network tab and see that they are all translated to `rest` api calls.
:::
## Delete Tasks
Let's add a _Delete_ button next to the _Save_ button of each task in the list.
Add the highlighted `deleteTask` function and _Delete_ `button` Within the `For` iteration in the `return` section of the `Todo` component.
```tsx{16-23,36}
// src/components/Todo.tsx
{(task, i) => {
async function setCompleted(completed: boolean) {
const updatedTask = await taskRepo.update(task, { completed })
setTasks(i(), updatedTask)
}
async function saveTask() {
try {
await taskRepo.save(task)
} catch (error) {
alert((error as { message: string }).message)
}
}
async function deleteTask() {
try {
await taskRepo.delete(task)
setTasks(tasks.filter((t) => t !== task))
} catch (error) {
alert((error as { message: string }).message)
}
}
return (
setCompleted(e.target.checked)}
/>
setTasks(i(), "title", e.target.value)}
/>
)
}}
```
# SolidStart - Tutorial - Validation
# Validation
Validating user entered data is usually required both on the client-side and on the server-side, often causing a violation of the [DRY](https://en.wikipedia.org/wiki/Don%27t_repeat_yourself) design principle. **With Remult, validation code can be placed within the entity class, and Remult will run the validation logic on both the frontend and the relevant API requests.**
::: warning Handling validation errors
When a validation error occurs, Remult will throw an exception.
In this tutorial, [CRUD operations](crud.md) catch these exceptions, and alert the user.
We leave it to you to decide how to handle validation errors in your application.
:::
## Validate the Title Field
Task titles are required. Let's add a validity check for this rule.
1. In the `Task` entity class, modify the `Fields.string` decorator for the `title` field to include an object literal argument and set the object's `validate` property to `Validators.required`.
```ts{3-5}
// src/shared/Task.ts
@Fields.string({
validate: Validators.required
})
title = ""
```
::: warning Import Validators
This code requires adding an import of `Validators` from `remult`.
:::
After the browser is refreshed, try creating a new `task` or saving an existing one with an empty title - the _"Should not be empty"_ error message is displayed.
### Implicit server-side validation
The validation code we've added is called by Remult on the server-side to validate any API calls attempting to modify the `title` field.
Try making the following `POST` http request to the `http://localhost:3000/api/tasks` API route, providing an invalid title.
```sh
curl -i http://localhost:3000/api/tasks -d "{\"title\": \"\"}" -H "Content-Type: application/json"
```
An http error is returned and the validation error text is included in the response body,
## Custom Validation
The `validate` property of the first argument of `Remult` field decorators can be set to an arrow function which will be called to validate input on both front-end and back-end.
Try something like this and see what happens:
```ts
// src/shared/Task.ts
@Fields.string({
validate: (task) => task.title.length > 2 || "Too Short",
})
title = ""
```
# SolidStart - Tutorial - Live Queries
# Live Queries :rocket:
Our todo list app can have multiple users using it at the same time. However, changes made by one user are not seen by others unless they manually refresh the browser.
Let's add realtime multiplayer capabilities to this app.
## Realtime updated todo list
Let's switch from fetching Tasks once when the solid component is loaded, and manually maintaining state for CRUD operations, to using a realtime updated live query subscription **for both initial data fetching and subsequent state changes**.
1. Modify the contents of the `onMount` hook in the `src/components/Todo.tsx` file
```ts{4,6,11}
// src/components/Todo.tsx
onMount(() =>
onCleanup(
taskRepo
.liveQuery({
limit: 20,
orderBy: { createdAt: "asc" },
//where: { completed: true },
})
.subscribe((info) => setTasks(info.applyChanges))
)
)
```
Let's review the change:
- Instead of calling the `repository`'s `find` method we now call the `liveQuery` method to define the query, and then call its `subscribe` method to establish a subscription which will update the Tasks state in realtime.
- The `subscribe` method accepts a callback with an `info` object that has 3 members:
- `items` - an up to date list of items representing the current result - it's useful for readonly use cases.
- `applyChanges` - a method that receives an array and applies the changes to it - we send that method to the `setTasks` state function, to apply the changes to the existing `tasks` state.
- `changes` - a detailed list of changes that were received
- The `subscribe` method returns an `unsubscribe` function which we send to the `onCleanup` function, so that it'll be called when the component unmounts.
::: warning Import onCleanup
This code requires adding an import of `onCleanup` from `solid-js`.
:::
2. As all relevant CRUD operations (made by all users) will **immediately update the component's state**, we should remove the manual adding of new Tasks to the component's state:
```ts{7}
// src/components/Todo.tsx
async function addTask(e: Event) {
e.preventDefault()
try {
await taskRepo.insert({ title: newTaskTitle() })
// ^ this no longer needs to be a variable as we are not using it to set the state.
// setTasks([...tasks, newTask]) <-- this line is no longer needed
setNewTaskTitle("")
} catch (error) {
alert((error as { message: string }).message)
}
}
```
3. Optionally remove other redundant state changing code:
```tsx{7-9,21}
// src/components/Todo.tsx
//...
{(task, i) => {
async function setCompleted(completed: boolean) {
//const updatedTask = await taskRepo.update(task, { completed }) <- Delete this line
//setTasks(i(), updatedTask) <- Delete this line
await taskRepo.update(task, { completed }) // <- replace with this line
}
async function saveTask() {
try {
await taskRepo.save(task)
} catch (error) {
alert((error as { message: string }).message)
}
}
async function deleteTask() {
try {
await taskRepo.delete(task)
// setTasks(tasks.filter((t) => t !== task)) <- Delete this line
} catch (error) {
alert((error as { message: string }).message)
}
}
```
Open the todo app in two (or more) browser windows/tabs, make some changes in one window and notice how the others are updated in realtime.
::: tip Under the hood
The default implementation of live-queries uses HTTP Server-Sent Events (SSE) to push realtime updates to clients, and stores live-query information in-memory.
Check the browser's network tab, you'll see a call to the `/api/stream` route which receives messages on every update.
For serverless environments _(or multi servers)_, live-query updates can be pushed using integration with third-party realtime providers, such as [Ably](https://ably.com/) (or others), and live-query information can be stored to any database supported by Remult.
:::
# SolidStart - Tutorial - Backend methods
# Backend methods
When performing operations on multiple entity objects, performance considerations may necessitate running them on the server. **With Remult, moving client-side logic to run on the server is a simple refactoring**.
## Set All Tasks as Un/completed
Let's add two buttons to the todo app: "Set all as completed" and "Set all as uncompleted".
1. Add a `setAllCompleted` async function to the `Todo` function component, which accepts a `completed` boolean argument and sets the value of the `completed` field of all the tasks accordingly.
```ts
// src/components/Todo.tsx
async function setAllCompleted(completed: boolean) {
for (const task of await taskRepo.find()) {
await taskRepo.save({ ...task, completed })
}
}
```
The `for` loop iterates the array of `Task` objects returned from the backend, and saves each task back to the backend with a modified value in the `completed` field.
2. Add the two buttons to the return section of the `Todo` component, just before the closing `` tag. Both of the buttons' `onClick` events will call the `setAllCompleted` method with the appropriate value of the `completed` argument.
```tsx
// src/components/Todo.tsx
```
Make sure the buttons are working as expected before moving on to the next step.
## Refactor from Front-end to Back-end
With the current state of the `setAllCompleted` function, each modified task being saved causes an API `PUT` request handled separately by the server. As the number of tasks in the todo list grows, this may become a performance issue.
A simple way to prevent this is to expose an API endpoint for `setAllCompleted` requests, and run the same logic on the server instead of the client.
1. Create a new `TasksController` class, in the `shared` folder, and refactor the `for` loop from the `setAllCompleted` function of the `Todo`function component into a new,`static`, `setAllCompleted`method in the`TasksController` class, which will run on the server.
```ts
// src/shared/TasksController.ts
import { BackendMethod, repo } from 'remult'
import { Task } from './Task'
export class TasksController {
@BackendMethod({ allowed: true })
static async setAllCompleted(completed: boolean) {
const taskRepo = repo(Task)
for (const task of await taskRepo.find()) {
await taskRepo.save({ ...task, completed })
}
}
}
```
The `@BackendMethod` decorator tells Remult to expose the method as an API endpoint (the `allowed` property will be discussed later on in this tutorial).
**Unlike the front-end `Remult` object, the server implementation interacts directly with the database.**
2. Register `TasksController` by adding it to the `controllers` array of the `options` object passed to `createRemultServer()`, in the server's `api` module:
```ts{4,8}
// src/api.ts
//...
import { TasksController } from "./shared/TasksController.js"
export const api = remultApi({
//...
controllers: [TasksController]
})
```
3. Replace the `for` iteration in the `setAllCompleted` function of the `Todo`component with a call to the`setAllCompleted`method in the`TasksController`.
```tsx{4}
// src/components/Todo.tsx
async function setAllCompleted(completed: boolean) {
await TasksController.setAllCompleted(completed)
}
```
::: warning Import TasksController
Remember to add an import of `TasksController` in `src/components/Todo.tsx`.
:::
::: tip Note
With Remult backend methods, argument types are compile-time checked. :thumbsup:
:::
After the browser refreshed, the _"Set all..."_ buttons function exactly the same, but much faster.
# SolidStart - Tutorial - Authentication and Authorization
# Authentication and Authorization
Our todo app is nearly functionally complete, but it still doesn't fulfill a very basic requirement - that users should log in before they can view, create or modify tasks.
Remult provides a flexible mechanism that enables placing **code-based authorization rules** at various levels of the application's API. To maintain high code cohesion, **entity and field-level authorization code should be placed in entity classes**.
**Remult is completely unopinionated when it comes to user authentication.** You are free to use any kind of authentication mechanism, and only required to provide Remult with an object which implements the Remult `UserInfo` interface.
In this tutorial, we'll use method outlined in the [Authentication](https://start.solidjs.com/advanced/session/) article of `SolidStart`
## Tasks CRUD Requires Sign-in
This rule is implemented within the `Task` `@Entity` decorator, by modifying the value of the `allowApiCrud` property.
This property can be set to a function that accepts a `Remult` argument and returns a `boolean` value. Let's use the `Allow.authenticated` function from Remult.
```ts{4}
// src/app/shared/Task.ts
@Entity("tasks", {
allowApiCrud: Allow.authenticated
})
```
::: warning Import Allow
This code requires adding an import of `Allow` from `remult`.
:::
After the browser refreshes, **the list of tasks disappeared** and the user can no longer create new tasks.
::: details Inspect the HTTP error returned by the API using cURL
```sh
curl -i http://localhost:3000/api/tasks
```
:::
::: danger Authorized server-side code can still modify tasks
Although client CRUD requests to `tasks` API endpoints now require a signed-in user, the API endpoint created for our `setAllCompleted` server function remains available to unauthenticated requests. Since the `allowApiCrud` rule we implemented does not affect the server-side code's ability to use the `Task` entity class for performing database CRUD operations, **the `setAllCompleted` function still works as before**.
To fix this, let's implement the same rule using the `@BackendMethod` decorator of the `setAllCompleted` method of `TasksController`.
```ts
// src/shared/TasksController.ts
@BackendMethod({ allowed: Allow.authenticated })
```
**This code requires adding an import of `Allow` from `remult`.**
:::
## User Authentication
Let's set-up `SolidStart` authentication to authenticate users to our app.
### Backend setup
1. Create an `auth.ts` file in the `src` folder with the following code.
```ts
// src/auth.ts
import { action, redirect } from '@solidjs/router'
import { useSession } from 'vinxi/http'
import { type UserInfo } from 'remult'
const validUsers: UserInfo[] = [
{ id: '1', name: 'Jane' },
{ id: '2', name: 'Steve' },
]
export async function getSession() {
'use server'
return await useSession<{ user?: UserInfo }>({
password:
process.env['SESSION_SECRET'] ||
'Something secret used for development only',
})
}
export const loginAction = action(async (formData: FormData) => {
'use server'
const username = String(formData.get('username'))
try {
const session = await getSession()
const user = validUsers.find((x) => x.name === username)
if (!user) throw Error("Invalid user, try 'Steve' or 'Jane'")
await session.update({ user })
} catch (err) {
return err as Error
}
throw redirect('/')
}, 'login')
export async function logout() {
'use server'
const session = await getSession()
await session.update({ user: null! })
}
export async function getUser() {
'use server'
const session = await getSession()
return session?.data?.user
}
```
- The (very) simplistic `loginAction` endpoint accepts a `FormData` with a `username` property, looks it up in a predefined dictionary of valid users and, if found, sets the user's information to the `user` property of the request's `session`.
- The `logout` function clears the `user` value from the current session.
- The `getUser` function extracts the value of the current user from the session and returns it.
2. Create a `src/routes/login.tsx` file, and place the following code to it:
```tsx
// src/routes/login.tsx
import { useSubmission } from '@solidjs/router'
import { loginAction } from '../auth.js'
import { Show } from 'solid-js'
export default function Home() {
const sub = useSubmission(loginAction)
return (
<>
Login
{sub.result?.message}
)
}
```
3. Replace the content of the `src/routes/index.tsx` file with the following code:
```tsx
// src/routes/index.tsx
import { getUser, logout } from '../auth.js'
import { useNavigate } from '@solidjs/router'
import { Show, createSignal, onMount } from 'solid-js'
import { remult } from 'remult'
import Todo from '../components/Todo.jsx'
export default function Home() {
const [authenticated, setAuthenticated] = createSignal(false)
const navigate = useNavigate()
onMount(async () => {
remult.user = await getUser()
if (remult.authenticated()) setAuthenticated(true)
else navigate('/login')
})
return (
Todos
Hello {remult.user?.name}
)
}
```
- We use the `onMount` hook the update the `remult.user` in the `frontend`, based on the user from the current session. That user info can then be used in the front-end for user roles based content
::: warning Solid Hydration error or page not found
As we were working on this tutorial with the rc version of solid start we got this error - we found that **hard refreshing the site (Ctrl F5) solves it**.
:::
### Connect remult-solid-start On the Backend
Once an authentication flow is established, integrating it with Remult in the backend is as simple as providing Remult with a `getUser` function from the `src/auth.ts`
```ts{3,7}
// src/api.ts
import { getUser } from "./auth.js"
export const api = remultApi({
//...
getUser,
})
//...
```
The todo app now supports signing in and out, with **all access restricted to signed in users only**.
## Role-based Authorization
Usually, not all application users have the same privileges. Let's define an `admin` role for our todo app, and enforce the following authorization rules:
- All signed in users can see the list of tasks.
- All signed in users can set specific tasks as `completed`.
- Only users belonging to the `admin` role can create, delete or edit the titles of tasks.
1. Modify the highlighted lines in the `Task` entity class to reflect the top three authorization rules.
```ts{7-8,18}
// src/shared/Task.ts
import { Allow, Entity, Fields } from "remult"
@Entity("tasks", {
allowApiCrud: Allow.authenticated,
allowApiInsert: "admin",
allowApiDelete: "admin"
})
export class Task {
@Fields.id()
id!: string
@Fields.string({
validate: (task) => task.title.length > 2 || "Too Short",
allowApiUpdate: "admin"
})
title = ""
@Fields.boolean()
completed = false
}
```
2. Let's give the user _"Jane"_ the `admin` role by modifying the `roles` array of her `validUsers` entry.
```ts{4}
// src/auth.ts
const validUsers = [
{ id: "1", name: "Jane", roles: ["admin"] },
{ id: "2", name: "Steve" }
]
```
**Sign in to the app as _"Steve"_ to test that the actions restricted to `admin` users are not allowed. :lock:**
## Role-based Authorization on the Frontend
From a user experience perspective it only makes sense that users that can't add or delete, would not see these buttons.
Let's reuse the same definitions on the Frontend.
We'll use the entity's metadata to only show the form if the user is allowed to insert
```tsx{4,13}
// src/components/Todo.tsx
...
```
::: warning Import Show
This code requires adding an import of `Show` from `solid-js`.
:::
And let's do the same for the `delete` button:
```tsx{15,17}
// src/components/Todo.tsx
return (
setCompleted(e.target.checked)}
/>
setTasks(i(), "title", e.target.value)}
/>
```
This way we can keep the frontend consistent with the `api`'s Authorization rules
- Note We send the `task` to the `apiDeleteAllowed` method, because the `apiDeleteAllowed` option, can be sophisticated and can also be based on the specific item's values.
# SolidStart - Tutorial - Database
# Database
Up until now the todo app has been using a plain JSON file to store the list of tasks. **In production, we'd like to use a `Postgres` database table instead.**
::: tip Learn more
See the [Quickstart](https://remult.dev/docs/quickstart.html#connecting-a-database) article for the (long) list of relational and non-relational databases Remult supports.
:::
::: warning Don't have Postgres installed? Don't have to.
Don't worry if you don't have Postgres installed locally. In the next step of the tutorial, we'll configure the app to use Postgres in production, and keep using JSON files in our dev environment.
**Simply install `postgres-node` per step 1 below and move on to the [Deployment section of the tutorial](deployment.md).**
:::
1. Install `postgres-node` ("pg").
```sh
npm i pg
```
2. Add the highlighted code to the `api` server module.
```ts{5,9-11}
// src/api.ts
//...
import { createPostgresDataProvider } from "remult/postgres"
export const api = remultApi({
//...
dataProvider: createPostgresDataProvider({
connectionString: "your connection string"
})
})
```
# SolidStart - Tutorial - Deployment
# Deployment
Let's deploy the todo app to [railway.app](https://railway.app/).
## Prepare for Production
Modify the highlighted code in the `src/api.ts` to prefer a `connectionString` provided by the production host's `DATABASE_URL` environment variable.
```ts{4,6-8}
// src/api.ts
//...
const DATABASE_URL = process.env["DATABASE_URL"];
export const api = remultApi({
dataProvider: DATABASE_URL
? createPostgresDataProvider({ connectionString: DATABASE_URL })
: undefined,
//...
})
```
::: warning Note
In order to connect to a local PostgresDB, add `DATABASE_URL` to an .env file, or simply replace `process.env["DATABASE_URL"]` with your `connectionString`.
If no `DATABASE_URL` has found, it'll fallback to our local JSON files.
:::
## Test Locally
To test the application locally run
```sh
npm run build
npm run start
```
Now navigate to http://localhost:3000 and test the application locally
## Deploy to Railway
In order to deploy the todo app to [railway](https://railway.app/) you'll need a `railway` account. You'll also need [Railway CLI](https://docs.railway.app/develop/cli#npm) installed, and you'll need to login to railway from the cli, using `railway login`.
Click enter multiple times to answer all its questions with the default answer
1. Create a Railway `project`.
From the terminal in your project folder run:
```sh
railway init
```
2. Select `Empty Project`
3. Set a project name.
4. Open the project on `railway` using:
```sh
railway open
```
5. Click the `Add Service` and add:
- a Postgres Database
- an Empty service
6. Once that's done run the following command to upload the project to railway:
```sh
railway up
```
And select the empty service name that was just created to upload the source code to it.
7. Once completed, go back to the railway UI in the browser and select the created service (not the database)
8. Switch to the `variables` tab
9. Click on `+ New Variable`, and in the `VARIABLE_NAME` click `Add Reference` and select `DATABASE_URL`
10. Add another variable called `SESSION_SECRET` and set it to a random string, you can use an [online UUID generator](https://www.uuidgenerator.net/)
11. Switch to the `settings` tab
12. Under `Environment` click on `Generate Domain`
13. Click the `deploy` button to deploy the changes, and wait for the deployment to complete
14. Click on the newly generated url to open the app in the browser and you'll see the app live in production. (it may take a few minutes to go live)
::: warning Note
If you run into trouble deploying the app to Railway, try using Railway's [documentation](https://docs.railway.app/deploy/deployments).
:::
That's it - our application is deployed to production, play with it and enjoy.
To see a larger more complex code base, visit our [CRM example project](https://www.github.com/remult/crm-demo)
Love Remult? Give our repo a star.⭐
# Interactive Tutorial - Basics - Introduction - Welcome to the Remult Tutorial
# Welcome to the Remult Tutorial
Hey there, and welcome to the Remult Tutorial! 👋
Remult is a full-stack JavaScript library designed to simplify the development of data-driven applications. It provides:
- A powerful Backend ORM
- Zero-boilerplate CRUD REST & Realtime APIs
- A type-safe API client for the Frontend
- TypeScript entities as a single source of truth (SSO) for:
- Authorization
- Validation
- Entity-related business logic
By embracing the principles of SSO, Remult streamlines the process of building CRUD applications, making your development experience smoother and more efficient.
## The Tutorial
In this tutorial, we'll guide you through the creation of a full-stack todo app, similar to the one you see in the `preview` window on the right.
We'll cover:
- Setting up a REST API
- Integrating with the Frontend
- Implementing paging, sorting, and filtering
- Performing insert, update, and delete operations
- Enabling realtime updates
- Adding validation
- Writing backend methods
- Implementing authentication & authorization
- Configuring a database
Ready to dive in? Click on the next lesson to start building your app with Remult.
Happy coding! 🎉
# Interactive Tutorial - Basics - Introduction - Entity
# The Entity
In Remult, the core element is an `entity`. An entity represents a business object, such as an order or customer. In our tutorial, we'll use a `Task` entity for our todo application.
Here's the code for the entity we'll use:
```ts title="shared/Task.ts" add={3-5,7,10,13,16,19}
import { Entity, Fields } from 'remult'
@Entity('tasks', {
allowApiCrud: true,
})
export class Task {
@Fields.id()
id = ''
@Fields.string()
title = ''
@Fields.boolean()
completed = false
@Fields.createdAt()
createdAt?: Date
}
```
### Code Explanation
- `@Entity('tasks', { allowApiCrud: true })` defines the `Task` entity and configures it to allow all CRUD operations - later we'll restrict that using authorization.
- `@Fields.id()` generates a unique ID for each task.
- `@Fields.string()` and `@Fields.boolean()` define the `title` and `completed` fields, respectively.
- `@Fields.createdAt()` automatically sets the creation date.
This entity will be used to define the database, API, frontend query language, validation, authorization, and any other definition that revolves around the `task`.
We've placed the entity's source code in the `shared` folder to indicate that it's shared between the frontend and the backend.
# Interactive Tutorial - Basics - Introduction - Rest Api
## The Rest Api
For this tutorial, we'll use Express (Remult works with many JavaScript web frameworks including Express, Fastify, Next.js, Sveltekit, nuxt.js, Hapi, Hono, Nest, and Koa).
Open `backend/index.ts` and add the following lines to include the `Task` in the REST API:
```ts title="backend/index.ts" add={2,3,6-9}
import express from 'express'
import { remultApi } from 'remult/remult-express'
import { Task } from '../shared/Task.js'
export const app = express()
export const api = remultApi({
entities: [Task],
})
app.use(api)
```
### Code Explanation
- We import the necessary `remultApi` module for integrating Remult with Express.
- We import the `Task` entity from the `shared` folder.
- We use the `remultApi` function to set up the Remult REST API and register the `Task` entity in its `entities` array.
- Finally, we tell Express to use the API with `app.use(api)`.
### See that it works
Click on the `Test the Api` button in the preview window, you should see an empty JSON array in the result.
> You can also open the `network` tab in the developer tools and see the requests that are being sent to the nodejs server
:::tip
If you right click on the `preview` window, and select `inspect`, you'll be able to run the api call directly from the developer tools console (at least on chrome)
```js
await fetch('/api/tasks').then((result) => result.json())
```
:::
# Interactive Tutorial - Basics - Introduction - Insert Data on the Backend
## Insert Data on the Backend
Next, we'll add some tasks on the backend so we can use them later.
```ts title="backend/index.ts" add={4,9-21}
import express from 'express'
import { remultApi } from 'remult/remult-express'
import { Task } from '../shared/Task.js'
import { repo } from 'remult'
export const app = express()
export const api = remultApi({
entities: [Task],
initApi: async () => {
const taskRepo = repo(Task)
if ((await taskRepo.count()) === 0) {
await taskRepo.insert([
{ title: 'Clean car' },
{ title: 'Read a book' },
{ title: 'Buy groceries', completed: true },
{ title: 'Do laundry' },
{ title: 'Cook dinner', completed: true },
{ title: 'Walk the dog' },
])
}
},
})
app.use(api)
```
### Code Explanation
- We added the `initApi` option to the `remultApi` configuration.
- `initApi` is an asynchronous function that runs once when the server is loaded and the API is ready. It allows us to perform initial setup tasks for the API.
- We use the `repo` function to get the repository for the `Task` entity. The line `const taskRepo = repo(Task)` gets a Repository of type `Task` that we'll use to perform all CRUD operations relevant to `Task`.
- The `if ((await taskRepo.count()) === 0)` check ensures that if there are no tasks in the database, we insert a few default tasks to get started.
- The `taskRepo.insert([...])` operation inserts an array of tasks into the database if it's initially empty, providing some sample data to work with.
### See That It Works
Click on the `Test the API` button in the preview window. You should see a JSON array with the tasks we defined in the result.
> **Note:** While Remult supports [many relational and non-relational databases](https://remult.dev/docs/installation/database/), in this tutorial we start by storing entity data in a backend **JSON file** stored in the `db` folder for the project. Later in this tutorial, we'll switch to using SQLite.
# Interactive Tutorial - Basics - Introduction - Display the Task List
## Display the Task List
Next, we'll use the tasks from the backend and display them in the frontend. We've prepared a `Todo` React component that displays an array of `Task`. Note that we're using the same "shared" `Task` type that we previously used in the backend.
Let's add the following code to display the tasks:
```ts title="frontend/Todo.tsx" add={3,5,9-11}
import { useEffect, useState } from 'react'
import { Task } from '../shared/Task.js'
import { repo } from 'remult'
const taskRepo = repo(Task)
export function Todo() {
const [tasks, setTasks] = useState([])
useEffect(() => {
taskRepo.find({}).then(setTasks)
}, [])
return (
)
}
```
### Code Explanation
- We ask Remult for a `Repository` of type `Task` and store it in `taskRepo`. The repository is used to perform all CRUD operations for our tasks.
- Previously, we used a Repository in the `initApi` on the backend to create rows directly in our database. Now, we use the same Repository abstraction on the frontend. When it runs in the frontend, the same methods will perform REST API calls to the backend to get and manipulate the data.
- We use the `find` method of the repository in the `useEffect` hook to get the tasks from the backend and set them in the state.
This code makes a REST API call to the backend at the `/api/tasks` URL to get the tasks and display them.
You can see the tasks in the preview window below.
# Interactive Tutorial - Basics - Querying Data - Paging
# Paging
The RESTful API created by Remult supports server-side paging, sorting, and filtering. Let's use these features to limit, sort, and filter the list of tasks.
```ts title="frontend/Todo.tsx" add={4,5}
useEffect(() => {
taskRepo
.find({
limit: 2,
page: 2,
})
.then(setTasks)
}, [])
```
### Code Explanation
- We update the `useEffect` hook to use the `find` method with paging options.
- The `limit` option specifies the number of tasks to retrieve.
- The `page` option specifies which page of results to retrieve.
This code results in the following REST API request:
`/api/tasks?_limit=2&_page=2`
Try playing with different values for `limit` and `page` to see the results in the preview window.
# Interactive Tutorial - Basics - Querying Data - Sorting
# Sorting
Remult's RESTful API also supports server-side sorting. Let's sort the list of tasks by their title.
```tsx title="frontend/Todo.tsx" add={4-6}
useEffect(() => {
taskRepo
.find({
orderBy: {
title: 'asc',
},
})
.then(setTasks)
}, [])
```
### Code Explanation
- We update the `useEffect` hook to use the `find` method with sorting options.
- The `orderBy` option specifies the field to sort by and the sort direction (`asc` for ascending, `desc` for descending).
- The sorting is performed on the server, which means the server sorts the data before sending it back to the client.
This code results in the following REST API request:
`/api/tasks?_sort=createdAt&_order=asc`
Try changing the sort direction and sorting by different fields to see the results in the preview window.
# Interactive Tutorial - Basics - Querying Data - Filtering
# Filtering
Remult's RESTful API also supports server-side filtering. Let's filter the list of tasks to show only the completed ones.
```tsx title="frontend/Todo.tsx" add={4-6}
useEffect(() => {
taskRepo
.find({
where: {
completed: true,
},
})
.then(setTasks)
}, [])
```
### Code Explanation
- We update the `useEffect` hook to use the `find` method with filtering options.
- The `where` option specifies the condition to filter by. In this case, we're filtering tasks to show only those that are completed (`completed: true`).
- The filtering is performed on the server, which means the server filters the data before sending it back to the client.
This code results in the following REST API request:
`/api/tasks?completed=true`
You can experiment with other types of conditions like `$contains`, `$startsWith`, `$and`, `$not`, and `$or`. All these are detailed in the [Remult documentation](https://remult.dev/docs/entityFilter).
Try changing the filter condition to see the results in the preview window.
# Interactive Tutorial - Basics - Manipulating Data - Insert
# Inserting Data
First, let's add the React code for adding a new task.
```tsx title="frontend/Todo.tsx" add={3-6}
export function Todo() {
const [tasks, setTasks] = useState([]);
const [newTaskTitle, setNewTaskTitle] = useState('');
async function addTask(e: FormEvent) {
e.preventDefault();
}
useEffect(() => {
taskRepo.find().then(setTasks);
}, []);
```
### Code Explanation
- We added a state variable `newTaskTitle` to store the title of the new task being added.
- We defined the `addTask` function, which will handle the form submission. For now, it just prevents the default form submission behavior with `e.preventDefault()`.
Next, let's add the JSX for the form to input new tasks.
```tsx title="frontend/Todo.tsx" add={5-12}
return (
)
```
### Code Explanation
- We added a form element with an `onSubmit` handler that calls the `addTask` function when the form is submitted.
- Inside the form, we added an input element bound to the `newTaskTitle` state variable. The `onChange` handler updates the `newTaskTitle` state as the user types.
- We added a button to submit the form.
Now let's call Remult to insert the new task.
```tsx title="frontend/Todo.tsx" add={3-9}
async function addTask(e: FormEvent) {
e.preventDefault()
try {
const newTask = await taskRepo.insert({ title: newTaskTitle })
setTasks([...tasks, newTask])
setNewTaskTitle('')
} catch (error: any) {
alert((error as { message: string }).message)
}
}
```
### Code Explanation
- We used the `taskRepo.insert` method to insert a new task with the title stored in `newTaskTitle`. This makes a REST API `POST` call to the backend to insert the new task into the database.
- If the task is successfully inserted, we update the `tasks` state with the new task and clear the `newTaskTitle` input field.
- If there's an error, we display an alert with the error message.
This code results in the following REST API request to insert the new task:
`POST /api/tasks`
Try adding new tasks using the form in the preview window below.
# Interactive Tutorial - Basics - Manipulating Data - Update
# Updating Data
Let's add the functionality to update a task's completion status. We'll start by defining a function to handle the update.
```tsx title="frontend/Todo.tsx" add={1-4}
async function setCompleted(task: Task, completed: boolean) {
const updatedTask = await taskRepo.update(task, { completed })
setTasks(tasks.map((t) => (t.id === updatedTask.id ? updatedTask : t)))
}
useEffect(() => {
taskRepo.find().then(setTasks)
}, [])
```
### Code Explanation
- Before the `useEffect` hook we added the `setCompleted` function, which takes a `task` and a `completed` status as arguments.
- The `taskRepo.update` method updates the `completed` status of the given task. This makes a REST API call to the backend to update the task in the database.
- After updating the task, we update the `tasks` state with the updated task, replacing the old task in the list.
Next, let's modify the JSX to call the `setCompleted` function when the checkbox is toggled.
```tsx title="frontend/Todo.tsx" add={7}
{
tasks.map((task) => {
return (
setCompleted(task, e.target.checked)}
/>
{task.title}
)
})
}
```
### Code Explanation
- We added an `onChange` handler to the checkbox input that calls the `setCompleted` function when the checkbox is toggled.
- The `onChange` handler passes the `task` and the new `checked` status of the checkbox to the `setCompleted` function.
This code results in the following REST API request to update the task:
`PUT /api/tasks/{taskId}`
Try toggling the completion status of tasks using the checkboxes in the preview window below.
# Interactive Tutorial - Basics - Manipulating Data - Delete
# Deleting Data
Let's add the functionality to delete a task. We'll start by defining a function to handle the deletion.
```tsx title="frontend/Todo.tsx" add={1-8}
async function deleteTask(task: Task) {
try {
await taskRepo.delete(task)
setTasks(tasks.filter((t) => t.id !== task.id))
} catch (error: any) {
alert((error as { message: string }).message)
}
}
useEffect(() => {
taskRepo.find().then(setTasks)
}, [])
```
### Code Explanation
- Before the `useEffect` hook we added the `deleteTask` function, which takes a `task` as an argument.
- The `taskRepo.delete` method deletes the given task. This makes a REST API call to the backend to delete the task from the database.
- After deleting the task, we update the `tasks` state by filtering out the deleted task from the list.
- If there's an error, we display an alert with the error message.
- We kept the existing `useEffect` hook to fetch the tasks when the component mounts.
Next, let's modify the JSX to call the `deleteTask` function when the delete button is clicked.
```tsx title="frontend/Todo.tsx" add={10-12}
{
tasks.map((task) => {
return (
setCompleted(task, e.target.checked)}
/>
{task.title}
)
})
}
```
### Code Explanation
- We added a button with an `onClick` handler that calls the `deleteTask` function when the button is clicked.
- The `onClick` handler passes the `task` to the `deleteTask` function.
This code results in the following REST API request to delete the task:
`DELETE /api/tasks/{taskId}`
Try deleting tasks using the delete buttons in the preview window below.
# Interactive Tutorial - Basics - Validation - Required
# Validation Introduction
In most web applications, validation code is spread and duplicated across multiple places. You need frontend validation, and you need API validation, all in various forms, controllers, routes, and services.
It's very hard to get validations right across the entire application, and often you'll run into validation errors on the API that do not display gracefully on the frontend. Even worse, validation that is done only on the frontend can be bypassed by calling the API directly.
Remult handles that concern with the SSO (Single Source of Truth) approach, where you define your validation once—in your entity—and that validation code runs both on the frontend and the API, ensuring consistent validation across the stack.
## Required Validation
Let's start with a simple `required` validation.
Adjust the `title` field to be `required`:
```ts title="shared/Task.ts" add={5-7}
export class Task {
@Fields.id()
id = ''
@Fields.string({
required: true,
})
title = ''
//....
}
```
### Code Explanation
- We added the `required: true` option to the `title` field using the `@Fields.string` decorator.
- This ensures that the `title` field is required and cannot be empty.
### Validation Behavior
- This validation will be first checked on the frontend, without making an API call (frontend validation).
- The same validation will also be executed on the API, ensuring consistency across the stack.
Try adding a task with no title to see the validation in action.
Also - checkout the browser's network tab, and see that there is no network call to the backend - the validation is performed in the frontend.
> **Note:** In this tutorial, the errors appear in the browser's alert dialog as specified in the code in our `Todo.tsx` component:
>
> ```tsx title="frontend/Todo.tsx" add={8}
> async function addTask(e: FormEvent) {
> e.preventDefault()
> try {
> const newTask = await taskRepo.insert({ title: newTaskTitle })
> setTasks([...tasks, newTask])
> setNewTaskTitle('')
> } catch (error: any) {
> alert((error as { message: string }).message)
> }
> }
> ```
---
When an error occurs, it returns an error of type `ErrorInfo` that specifies the error for each field, allowing you to create a great UI where the error for a field is displayed next to its input.
Here's an example of the error response:
```json
{
"message": "Title: Should not be empty",
"modelState": {
"title": "Should not be empty"
}
}
```
This ensures that the validation error is clear and can be displayed appropriately in the UI.
### Validation on the Api
The same validation code that runs in the frontend, is also used to validate the api - if anyone tries to send an invalid request to the api they'll fail.
:::tip
You can try and bypass the frontend validation, by making a post call directly from the browser's console.
Right click on the `preview` window, and select `inspect`, you'll be able to run the api call directly from the developer tools console (at least on chrome)
```js
await fetch('/api/tasks', { method: 'POST', body: '' }).then((r) => r.json())
```
See the result error object that's returned
:::
# Interactive Tutorial - Basics - Validation - Built-In Validations
# Built-In Validations
Remult comes with a set of built-in validations that you can easily choose from. These validations are defined in the `Validators` class.
## Minimum Length Validation
For example, let's use the `minLength` validation:
```ts title="shared/Task.ts" add={5-7}
export class Task {
@Fields.id()
id = ''
@Fields.string({
validate: Validators.minLength(2),
})
title = ''
//....
}
```
### Code Explanation
- We added the `validate` option to the `title` field using the `Validators.minLength(2)` validation.
- This ensures that the `title` field must have at least 2 characters.
## Chaining Multiple Validators
You can also chain multiple validators:
```ts title="shared/Task.ts" add={5-7}
export class Task {
@Fields.id()
id = ''
@Fields.string({
validate: [Validators.minLength(2), Validators.maxLength(5)],
})
title = ''
//....
}
```
### Code Explanation
- We chained the `Validators.minLength(2)` and `Validators.maxLength(5)` validations.
- This ensures that the `title` field must have at least 2 characters and at most 5 characters.
## Customizing Validation Messages
You can also customize the validation message:
```ts title="shared/Task.ts" add={5-10}
export class Task {
@Fields.id()
id = ''
@Fields.string({
validate: [
Validators.minLength(2),
Validators.maxLength(5, (length) => `maximum ${length} characters`),
],
})
title = ''
//....
}
```
### Code Explanation
- We customized the validation message for the `Validators.maxLength(5)` validation.
- The custom message function `(length) => 'maximum ${length} characters'` will be used if the validation fails.
### Try It Out
Try adding tasks with titles that do not meet these validation requirements to see the validation in action. The errors returned will include the validation messages specified.
# Interactive Tutorial - Basics - Validation - Custom Validations
# Custom Validations
You can also define custom validation logic for your fields. Let's add a custom validation to the `title` field to ensure it is longer than 2 characters.
```ts title="shared/Task.ts" add={5-7}
export class Task {
@Fields.id()
id = ''
@Fields.string({
validate: (task) => task.title.length > 2 || 'too short',
})
title = ''
//....
}
```
### Code Explanation
- We added a custom validation function to the `title` field using the `validate` option.
- The custom validation function checks if the `title` field's length is greater than 2. If the condition is not met, it returns the error message `'too short'`.
- We specified the `Task` type in the generic definition of `Fields.string`, which provides type safety and ensures the custom validation function receives the correct type.
- This arrow function will run both on the frontend as frontend validation and on the backend as API validation, ensuring consistent validation across the stack.
### Try It Out
Try adding tasks with titles shorter than 3 characters to see the custom validation in action. The error message `'too short'` will be returned if the validation fails.
# Interactive Tutorial - Basics - Live Query - Live Query
# Introduction
Our todo list app can have multiple users using it at the same time. However, changes made by one user are not seen by others unless they manually refresh the browser.
## Try it Out
In the preview window below, we can see `user-a` and `user-b`. Try making changes to data as `user-a` and see how `user-b` needs to click `reload page` to see these changes.
# Interactive Tutorial - Basics - Live Query - Realtime Updates
# Realtime Updates
To enable real-time updates, we'll modify the `useEffect` hook to use `liveQuery`.
```tsx title="frontend/Todo.tsx" add={2-6}
useEffect(() => {
return taskRepo.liveQuery().subscribe((info) => setTasks(info.applyChanges))
}, [])
```
### Code Explanation
- We use the `liveQuery` method from `taskRepo` to subscribe to real-time updates for tasks.
- The `subscribe` method listens for changes and updates the state with `info.applyChanges`.
- We return the result of `subscribe` from the `useEffect` hook, so that once the component unmounts, it will automatically unsubscribe from the updates.
### Try It Out
Try making changes as `user-a` in the preview and see the effect on `user-b`. You'll notice that changes made by one user are immediately reflected for the other user without the need to reload the page.
### Implementation Details
- The real-time updates implementation is adapter-based. The default implementation used for development and up to several hundreds of users uses Server-Sent Events (SSE).
- There are multiple adapters available to use other technologies, including third-party providers such as Ably.
### Simplifying State Management
Now that we can rely on `liveQuery`, we no longer need to manually update the `tasks` state, as `liveQuery` will handle that for us.
```tsx title="frontend/Todo.tsx" add={7,16,22}
async function addTask(e: FormEvent) {
e.preventDefault()
try {
const newTask = await taskRepo.insert({
title: newTaskTitle,
})
// setTasks([...tasks, newTask]); <-- this line is no longer needed
setNewTaskTitle('')
} catch (error: any) {
alert((error as { message: string }).message)
}
}
async function setCompleted(task: Task, completed: boolean) {
const updatedTask = await taskRepo.update(task, { completed })
// setTasks(tasks.map((t) => t.id === updatedTask.id ? updatedTask : t)); <-- these lines are no longer needed
}
async function deleteTask(task: Task) {
try {
await taskRepo.delete(task)
// setTasks(tasks.filter((t) => t.id !== task.id)); <-- these lines are no longer needed
} catch (error: any) {
alert((error as { message: string }).message)
}
}
```
### Code Explanation
- In the `addTask`, `setCompleted`, and `deleteTask` functions, we removed the lines that manually update the `tasks` state.
- With `liveQuery`, the state updates automatically whenever there are changes to the tasks, simplifying our state management.
# Interactive Tutorial - Basics - Backend Methods - Updating Multiple Tasks
# Backend Methods
When performing operations on multiple entity objects, performance considerations may necessitate running them on the server. **With Remult, moving client-side logic to run on the server is a simple refactoring.**
## Set All Tasks as Completed or Uncompleted
Let's add two buttons to the todo app: "Set All Completed" and "Set All Uncompleted".
### Step 1: Add the `setAllCompleted` Function
Add a `setAllCompleted` async function to the `Todo` function component, which accepts a `completed` boolean argument and sets the value of the `completed` field of all the tasks accordingly.
```tsx title="frontend/Todo.tsx" add={1-6}
async function setAllCompleted(completed: boolean) {
for (const task of await taskRepo.find()) {
await taskRepo.update(task, {completed });
}
}
useEffect(...)
```
### Code Explanation
- The `setAllCompleted` function iterates through the array of `Task` objects returned from the backend and saves each task back to the backend with a modified value in the `completed` field.
### Step 2: Add Buttons to the `Todo` Component
Add the two buttons to the return section of the `Todo` component, just before the closing `` tag. Both of the buttons' `onClick` events will call the `setAllCompleted` method with the appropriate value of the `completed` argument.
```tsx title="frontend/Todo.tsx" add={1-4}
```
### Code Explanation
- We added two buttons with `onClick` handlers that call the `setAllCompleted` function with `true` or `false`, respectively, to set all tasks as completed or uncompleted.
### Try It Out
Make sure the buttons are working as expected before moving on to the next step. Click the "Set All Completed" button to mark all tasks as completed and the "Set All Uncompleted" button to mark all tasks as uncompleted.
### Performance Considerations
With the current state of the `setAllCompleted` function, each modified task being saved causes an API `PUT` request handled separately by the server. As the number of tasks in the todo list grows, this may become a performance issue.
In the next lesson, we'll refactor this code to address these performance challenges by moving the logic to the server.
# Interactive Tutorial - Basics - Backend Methods - Refactor to Backend
# Refactor from Frontend to Backend
To improve performance, let's refactor the frontend code and move it to the backend.
## Step 1: Create the Backend Method
We'll add a `shared/TasksController.ts` file with the following code:
```ts title="shared/TasksController.ts" add={5-11}
import { BackendMethod, remult } from 'remult'
import { Task } from './Task.js'
export class TasksController {
@BackendMethod({ allowed: true })
static async setAllCompleted(completed: boolean) {
const taskRepo = remult.repo(Task)
for (const task of await taskRepo.find()) {
await taskRepo.update(task, { completed })
}
}
}
```
### Code Explanation
- We created a `TasksController` class to contain backend methods.
- The `setAllCompleted` method is decorated with `@BackendMethod({ allowed: true })`, making it accessible from the frontend.
- Inside `setAllCompleted`, we get the repository for `Task` using `remult.repo(Task)`.
- We iterate through the tasks and update each one with the new `completed` status.
- Previously, in the frontend, the `taskRepo` repository performed HTTP calls to the backend. Now that we're on the backend, the `taskRepo` repository makes direct API calls to the database.
- An advantage of this approach is that using the `taskRepo` repository allows us to use the same coding style for both the frontend and backend, making it easier for us as developers to switch back and forth.
## Step 2: Register the Controller
Head over to the `backend/index.ts` file and register the controller:
```ts title="backend/index.ts" add={3}
export const api = remultApi({
entities: [Task],
controllers: [TasksController],
initApi: async () => {
//...
},
})
```
### Code Explanation
- By adding `controllers: [TasksController]`, we make the `TasksController` available for API calls from the frontend.
## Step 3: Adjust the Frontend
Adjust the `frontend/Todo.tsx` component to call the backend method:
```tsx title="frontend/Todo.tsx" add={4}
async function setAllCompleted(completed: boolean) {
await TasksController.setAllCompleted(completed)
}
```
### Code Explanation
- We removed the `for` loop and the direct update calls from the frontend.
- We now call `TasksController.setAllCompleted(completed)` to perform the updates on the backend.
- After the backend method completes, we refresh the task list by calling `taskRepo.find().then(setTasks)`.
- An advantage of this approach is that the call to `setAllCompleted` is strongly typed, protecting us from spelling or typing mistakes using TypeScript.
### Try It Out
Click the "Set All Completed" and "Set All Uncompleted" buttons to see the improved performance with the backend method handling the updates.
# Interactive Tutorial - Basics - Authentication & Authorization - Authentication and Authorization
# Authentication and Authorization
Our todo app is nearly functionally complete, but it still doesn't fulfill a very basic requirement - that users should log in before they can view, create, or modify tasks.
Remult provides a flexible mechanism that enables placing **code-based authorization rules** at various levels of the application's API. To maintain high code cohesion, **entity and field-level authorization code should be placed in entity classes**.
**Remult is completely unopinionated when it comes to user authentication.** You are free to use any kind of authentication mechanism and are only required to provide Remult with an object which implements the Remult `UserInfo` interface.
In this tutorial, we'll use `Express`'s [cookie-session](https://expressjs.com/en/resources/middleware/cookie-session.html) middleware to store an authenticated user's session within a cookie. The `user` property of the session will be set by the API server upon a successful simplistic sign-in (based on username without password).
## Tasks CRUD Requires Sign-in
This rule is implemented within the `Task` `@Entity` decorator by modifying the value of the `allowApiCrud` property. This property can be set to a function that accepts a `Remult` argument and returns a `boolean` value. Let's use the `Allow.authenticated` function from Remult.
```ts title="shared/Task.ts" add={2}
@Entity("tasks", {
allowApiCrud: remult.authenticated
})
```
### Code Explanation
- We updated the `allowApiCrud` property in the `Task` entity to use `remult.authenticated`, which ensures that CRUD operations on tasks require an authenticated user.
## Try It Out
Try it out and see that once you make this change, no data will appear below since you are not signed in, and therefore not authenticated.
### Authorized Server-side Code Can Still Modify Tasks
Although client CRUD requests to `tasks` API endpoints now require a signed-in user, the API endpoint created for our `setAllCompleted` server function remains available to unauthenticated requests. Since the `allowApiCrud` rule we implemented does not affect the server-side code's ability to use the `Task` entity class for performing database CRUD operations, **the `setAllCompleted` function still works as before**.
To fix this, let's implement the same rule using the `@BackendMethod` decorator of the `setAllCompleted` method of `TasksController`.
```ts title="shared/TasksController.ts" add={2}
export class TasksController {
@BackendMethod({ allowed: remult.authenticated })
static async setAllCompleted(completed: boolean) {
```
### Code Explanation
- We updated the `allowed` property in the `@BackendMethod` decorator to use `remult.authenticated`, ensuring that the `setAllCompleted` function requires an authenticated user to execute.
# Interactive Tutorial - Basics - Authentication & Authorization - Authentication
## Authentication
In this lesson, we'll implement a basic sign-in mechanism using cookie session.
Let's add a `shared/AuthController.ts` file and include the following code:
```ts title="shared/AuthController.ts" add={2-3,5-9}
import { BackendMethod, remult } from 'remult'
import type express from 'express'
import type from 'cookie-session'
declare module 'remult' {
export interface RemultContext {
request?: express.Request
}
}
export class AuthController {
//
}
```
### Code Explanation
- We import the necessary modules from `remult` and types for `express` and `cookie-session`.
- We extend the `RemultContext` interface to include an optional `request` property of type `express.Request`.
- Remult will automatically set the `request` with the current request. Since Remult works with any server framework, we need to type it to the correct server, which in this case is Express. This typing gives us access to the request object and its session, managed by `cookie-session`.
- This `request` can be accessed using `remult.context.request`.
Next, we'll add a static list of users and a sign-in method. (In a real application, you would use a database, but for this tutorial, a static list will suffice.)
```ts title="shared/AuthController.ts" add={1,4-17}
const validUsers = [{ name: 'Jane' }, { name: 'Alex' }]
export class AuthController {
@BackendMethod({ allowed: true })
static async signIn(name: string) {
const user = validUsers.find((user) => user.name === name)
if (user) {
remult.user = {
id: user.name,
name: user.name,
}
remult.context.request!.session!['user'] = remult.user
return remult.user
} else {
throw Error("Invalid user, try 'Alex' or 'Jane'")
}
}
}
```
### Code Explanation
- We define a static list of valid users.
- The `signIn` method is decorated with `@BackendMethod({ allowed: true })`, making it accessible from the frontend.
- The method checks if the provided `name` exists in the `validUsers` list. If it does, it sets `remult.user` to an object that conforms to the `UserInfo` type from Remult and stores this user in the request session.
- If the user is not found, it throws an error.
Next, we'll add the sign-out method:
```ts title="shared/AuthController.ts" add={7-11}
export class AuthController {
@BackendMethod({ allowed: true })
static async signIn(name: string) {
//...
}
@BackendMethod({ allowed: true })
static async signOut() {
remult.context.request!.session!['user'] = undefined
return undefined
}
}
```
### Code Explanation
- The `signOut` method clears the user session, making the user unauthenticated.
Next, we'll adjust the `backend/index.ts` file:
```ts title="backend/index.ts" add={2-3,9-14,19-20}
import express from 'express'
import session from 'cookie-session'
import { AuthController } from '../shared/AuthController'
//...
export const app = express()
app.enable('trust proxy') // required for stackblitz and other reverse proxy scenarios
app.use(
session({
signed: false, // only for dev on stackblitz, use secret in production
// secret: process.env['SESSION_SECRET'] || 'my secret',
}),
)
export const api = remultApi({
entities: [Task],
controllers: [TasksController, AuthController],
getUser: (request) => request.session?.['user'],
//...
})
```
### Code Explanation
- The `signOut` method clears the user session, making the user unauthenticated.
- We import `session` from `cookie-session` and `AuthController`.
- We enable `trust proxy` for reverse proxy scenarios like StackBlitz.
- **We've set `signed: false` in the session configuration** due to an issue in StackBlitz that causes problems with signed cookies. This is for development purposes only and **in production**, you should **remove `signed: false`** and **encrypt the cookie using a secret** by setting the `secret` option (e.g., `secret: process.env['SESSION_SECRET'] || 'my secret'`).
- We register `AuthController` in the `controllers` array.
- We add `getUser: (request) => request.session?.['user']` to extract the user from the session.
### Frontend Authentication
In `frontend/Auth.tsx`, we'll call the `AuthController` to sign in, sign out, etc.
```tsx title="frontend/Auth.tsx" add={3-7,11,15}
async function signIn(f: FormEvent) {
f.preventDefault()
try {
setCurrentUser((remult.user = await AuthController.signIn(name)))
} catch (error) {
alert((error as ErrorInfo).message)
}
}
async function signOut() {
setCurrentUser(await AuthController.signOut())
}
useEffect(() => {
remult.initUser().then(setCurrentUser)
}, [])
```
### Code Explanation
- The `signIn` function calls `AuthController.signIn` and sets the current user if successful.
- The `signOut` function calls `AuthController.signOut` to clear the current user.
- The `useEffect` hook uses the `initUser` method to fetch the current user when the component mounts.
### Try It Out
Try signing in as `Alex` or `Jane` and verify that you can perform CRUD operations on tasks. Sign out and ensure that you can no longer access the tasks.
# Interactive Tutorial - Basics - Authentication & Authorization - Role-based Authorization
## Role-based Authorization
In most applications, different users have different levels of access. Let's define an `admin` role for our todo app and enforce the following authorization rules:
- All signed-in users can see the list of tasks.
- All signed-in users can mark specific tasks as `completed`.
- Only users with the `admin` role can create or delete tasks.
### Step 1: Modify the Task Entity Class
1. Modify the highlighted lines in the `Task` entity class to reflect the top three authorization rules.
```ts title="shared/Task.ts" add={3-4}
@Entity('tasks', {
allowApiCrud: remult.authenticated,
allowApiInsert: 'admin',
allowApiDelete: 'admin',
})
export class Task {
//...
}
```
### Code Explanation
- `allowApiCrud: remult.authenticated`: Ensures that only authenticated users can perform basic CRUD operations.
- `allowApiInsert: 'admin'`: Restricts the creation of tasks to users with the `admin` role.
- `allowApiDelete: 'admin'`: Restricts the deletion of tasks to users with the `admin` role.
### Step 2: Assign Roles in the AuthController
2. Let's make _"Jane"_ an admin and use it to determine her roles in the `signIn` method.
```ts title="shared/AuthController.ts" add={4,17}
const validUsers = [
{
name: 'Jane',
admin: true,
},
{ name: 'Alex' },
]
export class AuthController {
@BackendMethod({ allowed: true })
static async signIn(name: string) {
const user = validUsers.find((user) => user.name === name)
if (user) {
remult.user = {
id: user.name,
name: user.name,
roles: user.admin ? ['admin'] : [],
}
remult.context.request!.session!['user'] = remult.user
return remult.user
} else {
throw Error("Invalid user, try 'Alex' or 'Jane'")
}
}
//...
}
```
### Code Explanation
- We added an `admin` property to the `Jane` user object in the `validUsers` array.
- In the `signIn` method, we assign the `admin` role to `remult.user.roles` if the user is an admin. If the user is not an admin, `roles` is set to an empty array.
- The user's role is stored in the session, allowing Remult to enforce authorization rules based on the user's role in subsequent requests.
### Try It Out
Sign in to the app as _"Alex"_ to test that actions restricted to `admin` users, such as creating or deleting tasks, are not allowed.
Then, sign in as _"Jane"_ to confirm that these actions are permitted for admin users.
# Interactive Tutorial - Basics - Authentication & Authorization - Role-based Authorization on the Frontend
## Role-based Authorization on the Frontend
From a user experience perspective, it only makes sense that users who can't add or delete tasks shouldn't see the buttons for those actions. Let's reuse the same authorization definitions on the frontend.
We'll use the entity's metadata to only show the form if the user is allowed to insert tasks.
### Step 1: Hide the Add Task Form
```tsx title="frontend/Todo.tsx" add={5,14}
return (
Todos
{taskRepo.metadata.apiInsertAllowed() && (
)}
{error && (
Error: {error.message}
)}
```
### Code Explanation
- We use `taskRepo.metadata.apiInsertAllowed()` to check if the current user is allowed to insert tasks. If the user has the required permissions, the form to add a new task is displayed; otherwise, it's hidden.
### Step 2: Hide the Delete Button
Let's apply the same logic to the `delete` button:
```tsx title="frontend/Todo.tsx" add={11,18}
{
tasks.map((task) => {
return (
setCompleted(task, e.target.checked)}
/>
{task.title}
{taskRepo.metadata.apiDeleteAllowed(task) && (
)}
)
})
}
```
### Code Explanation
- We use `taskRepo.metadata.apiDeleteAllowed(task)` to check if the current user is allowed to delete the specific task. The delete button is only displayed if the user has the necessary permissions.
- We pass the `task` object to the `apiDeleteAllowed` method because this authorization check can be more sophisticated and might depend on the specific values of the task.
### Keeping the Frontend Consistent
By using these methods, we ensure that the frontend stays consistent with the API's authorization rules. Users only see the actions they are allowed to perform, creating a seamless and secure user experience.
### Try It Out
Test the app by signing in as different users (e.g., as an admin and a regular user) and verify that the add and delete buttons appear or disappear based on the user's role.
# Interactive Tutorial - Basics - Database - Database
# Database
Up until now the todo app has been using a plain JSON file to store the list of tasks. In this lesson we'll demontstrate how easy it is to switch to one of the many databases that are supported by remult, in this case Sqlite.
> ##### Learn more
>
> See the [Quickstart](https://remult.dev/docs/quickstart.html#connecting-a-database) article for the (long) list of relational and non-relational databases Remult supports.
In the `backend/index.ts` file, set the `dataProvider` to use `sqlite`
```ts title="backend/index.ts" add={4-6}
export const api = remultApi({
entities: [Task],
controllers: [TasksController],
dataProvider: new SqlDatabase(
new Sqlite3DataProvider(new sqlite3.Database('.database.sqlite')),
),
//...
})
```
And that's it, now you use `sqlite` as the database.
> ##### Don't believe it?
>
> You can see the actual sql's executed by remult, by adding the following line
>
> ```ts
> SqlDatabase.LogToConsole = 'oneLiner'
> ```
>
> And click on `Toggle Terminal` button to see the sql's that execute with the operations you perform
> Just don't forget to turn it off once you're done, to improve performance
# Interactive Tutorial - In Depth - Relations - Many to One
# Relations
In this chapter, we’ll explore how to work with entity relations in Remult using customers and orders as our example.

## Many-to-One Relation
To create a many-to-one relation in Remult, we use the `@Relations.toOne` decorator. This decorator establishes a connection between the `Order` entity and the `Customer` entity, where multiple orders can be associated with a single customer.
For instance, in our project, the `Order` entity includes a reference to the `Customer` entity. The highlighted lines below in `Order.ts` show how this relation is defined:
```file:/shared/Order.ts ins={8-9} collapse={1-3} title="shared/Order.ts"
```
This setup creates a many-to-one relationship where each `Order` is connected to a `Customer`.
### Seed Data
In the `SeedData` file, you can see how this relationship is leveraged. While inserting data into the `Order` table, the `customer` field is populated with a customer object that was previously inserted:
```file:/shared/SeedData.ts title="shared/SeedData.ts" collapse={1-4} add=/customer:\s*\w+/
```
This snippet shows how orders reference existing customer objects, creating a meaningful connection between the two entities.
### Fetching Relational Data
When querying `Order` data, we can use the `include` option to retrieve the associated customer data. By default, relations are not automatically included in queries unless explicitly requested.
Here’s how to include the `Customer` info when fetching orders:
```ts title="frontend/Page.tsx" add={2-4}
const orders = await repo(Order).find({
include: {
customer: true,
},
})
```
This will return the `Order` data along with the related `Customer` data. If you set the `include` value to `false`, the `customer` field will be `undefined` in the result.
You can experiment by toggling the `include` value between `true` and `false` to observe how the results change.
### Always Including a Relation
If you want the related `Customer` data to be automatically included in every query, you can set the `defaultIncluded` option when defining the relation. This ensures the relation is always loaded unless explicitly excluded:
```ts add=/defaultIncluded: true,/
@Relations.toOne(() => Customer, {
defaultIncluded: true,
})
customer?: Customer
```
This setting saves you from having to manually include the relation in each query, ensuring the related data is always available when you need it.
By using relations effectively, you can create more sophisticated and connected data models, enhancing the power and flexibility of your applications built with Remult.
Here’s a polished version of the paragraph:
### Relations in Remult Admin
Relations are seamlessly integrated into the [Remult Admin UI](https://remult.dev/docs/admin-ui). To explore how relations are displayed, simply click the "Remult Admin UI" link at the bottom.
# Interactive Tutorial - In Depth - Relations - One to Many
# One to Many
In this lesson, we'll explore how to set up and work with a one-to-many relation in Remult, where one `Customer` can have many `Order` records.
## Defining the Relation
We begin by setting the relation in the `shared/Customer.ts` file. This one-to-many relation will allow a customer to be linked to multiple orders.
```file:/shared/Customer.ts title="shared/Customer.ts" collapse={1-3} ins={12-13}
```
This creates a one-to-many relation where each `Customer` can have multiple `Order` records. The `orders` field is now an array of `Order` objects.
## Fetching Related Data
Just like with many-to-one relations, you can use the `include` option in the `find` method to fetch related `Order` data for each `Customer`. This ensures that the associated orders are included in your query results.
```ts title="frontend/Page.tsx" add={2-4}
const customers = await repo(Customer).find({
include: {
orders: true,
},
})
```
This query fetches customers and includes their related orders.
You can experiment by toggling the `include` value between `true` and `false` to observe how the results change.
## Inserting Child Entities (Orders) into a Parent (Customer)
You can also insert related `Order` items directly into a `Customer` repository. For example, in the `shared/SeedData.ts` file, you can insert customer records and their corresponding orders as shown below:
```file:/shared/SeedData.ts title="shared/SeedData.ts" add={12-26}
```
Here’s what’s happening:
- First, we create three customer records using `cRepo.insert()`.
- Then, we use `cRepo.relations(c1).orders.insert()` to insert orders related to `Customer 1`.
- Similarly, we insert related orders for `Customer 2` and `Customer 3`.
By using the `relations` method provided by the repository, you can easily manage the insertion of related child entities (in this case, orders) directly into their parent (customer).
## Repository Methods for Relations
Most repository methods, such as `find`, `insert`, `update`, `updateMany`, `delete`, and `deleteMany`, can be used in this way through the `relations` method. This allows you to perform various operations on related entities within the context of their parent entity.
For example, you can retrieve all orders related to a customer:
```ts
const ordersForCustomer = await cRepo.relations(customer).orders.find()
```
This flexibility makes it easy to manage related data within Remult, simplifying many common data manipulation tasks.
---
In this lesson, we've learned how to define a one-to-many relation between `Customer` and `Order`, and how to query and insert related data using Remult. These techniques give you the power to effectively model and work with complex data relationships in your applications.
Here’s a polished version of the text:
---
### Relations in Remult Admin
In the Remult Admin UI, `one-to-many` relations are displayed directly within the table view. For example, you can see all the orders associated with a customer right from the `Customer` table view.

To explore how this works, click the "Remult Admin UI" link at the bottom left of the interface.
# Interactive Tutorial - In Depth - Relations - Id Based Relations
# ID-Based Relations
ID-based relations provide more control over how related entities are managed. By explicitly including the foreign key (such as `customerId`) in the entity, you gain more flexibility and can optimize performance by reducing the need to load the related entity in some cases.
## Defining an ID-Based Relation
In the `Order` entity, we add a `customerId` field to store the ID of the related `Customer`. We then reference this field in the `@Relations.toOne` decorator to establish the relationship between `Order` and `Customer`.
It's important to use the correct type arguments, ``, to ensure proper type checking for this relation.
```file:/shared/Order.ts ins={8-10} collapse={1-3} title="shared/Order.ts"
```
In this setup, the `customerId` field holds the reference to the customer, and the `@Relations.toOne` decorator connects the `Order` entity to the `Customer` entity.
## Defining the Inverse Relation
On the `Customer` entity, we define the inverse of the relation using `@Relations.toMany`. This decorator links a `Customer` to multiple `Order` records, allowing us to retrieve all orders related to a specific customer.
```file:/shared/Customer.ts title="shared/Customer.ts" collapse={1-3} ins={12-13}
```
Now, the `Customer` entity has an `orders` array, representing all the orders associated with that customer.
## Try it out
Check out the output and see that the `customerId` is included even if you do not explicitly include the relation. This gives you the flexibility to work directly with the ID without always needing to load the related entity.
## Working with Existing Data
If you already have existing data in your database where the foreign key column is named `customer`, but you want to use `customerId` in your code, you can use the `dbName` property to map the `customerId` field to the `customer` column in the database.
```ts
@Fields.integer({ dbName: 'customer' })
customerId = 0
```
This ensures that your code uses `customerId` while mapping it correctly to the `customer` column in the database, allowing for seamless integration with existing data.
---
By using ID-based relations, you have greater control over your data models and can optimize performance by limiting unnecessary entity loading. This approach also provides a clean and efficient way to manage relations in your Remult applications.
# Interactive Tutorial - In Depth - Relations - Many to Many
# Many-to-Many Relations
In some applications, an entity might need to have a relationship with multiple entities from another table, and vice versa. In our case, an `Order` can contain many `Products`, and the same `Product` can appear in many `Orders`. This is a classic **many-to-many** relationship.
To implement this relationship, we use an intermediate entity called `ProductInOrder`, which serves as a bridge between `Order` and `Product`. This intermediate entity stores the association between an order and a product, along with additional details that pertain to the relationship, such as quantity or price, if needed.

### Defining the Many-to-Many Relation
Let's define the `ProductInOrder` entity, which establishes the many-to-many relation between `Order` and `Product`.
```file:/shared/ProductInOrder.ts title="shared/ProductInOrder.ts"
```
### Key Points
1. **Composite Primary Key**:
We define the composite primary key using both `orderId` and `productId` (`id: ['orderId', 'productId']`). This ensures that the combination of these two fields uniquely identifies each record in `ProductInOrder`. Using a composite key improves performance when querying or joining tables because it provides a direct and efficient way to locate specific rows.
2. **Relation to `Product`**:
The `@Relations.toOne()` decorator establishes a relationship between `ProductInOrder` and the `Product` entity. This allows us to easily fetch the related `Product` information (such as the name or price) when querying `ProductInOrder`.
### Defining the `Order` Entity
In the `Order` entity, we use a `toMany` relation to link each order to its products through the `ProductInOrder` entity. This allows us to keep track of all the products in a particular order.
```file:/shared/Order.ts title="shared/Order.ts" collapse={1-4,8-13} add={15-16}
```
### Querying the Data
When you want to fetch the data, including the related products, you can use the `include` option to fetch not only the `ProductInOrder` records but also the corresponding `Product` details.
```ts title="frontend/Page.tsx"
repo(Customer).find({
include: {
orders: {
include: {
products: {
include: {
product: true, // Fetch product details such as name, price, etc.
},
},
},
},
},
})
```
### Why Not Use a Built-in Many-to-Many Feature?
A natural question arises: why not create a built-in many-to-many relation directly between `Order` and `Product` without an intermediate table?
The reason is that most **many-to-many relationships** in real-world applications are not that simple. Typically, you will need to store additional information about the relationship itself, such as **quantity**, **pricing**, **discounts**, or **status**. By using an intermediate entity like `ProductInOrder`, you have the flexibility to store these additional attributes alongside the relationship. This approach is much more versatile and better suited to real-world use cases than a basic many-to-many relation, which can be too limited for most scenarios.
### Summary
In this lesson, we've learned how to model many-to-many relationships using an intermediate table. By creating the `ProductInOrder` entity, we've enabled a flexible many-to-many relationship between `Order` and `Product`. This approach allows us to include additional fields, such as quantity, in the relationship while maintaining optimal performance through the use of composite keys.
# Interactive Tutorial - In Depth - Advanced Filtering - Custom Filter
# Custom Filter
In this lesson, we'll explore how to simplify and reuse filtering logic in your application using **Custom Filters**.
Consider the following scenario where we need to filter `Order` records by status and a specific year:
```file:/frontend/Page.tsx title="frontend/Page.tsx" collapse={1-5,21-100} {11-17}
```
If you need to apply this same filter in multiple places throughout your application, this can lead to repetitive code. Rewriting this filter over and over not only increases the likelihood of errors but also makes the code harder to maintain and less readable.
This is where **Custom Filters** come in handy. Custom Filters allow you to encapsulate and reuse filtering logic, simplifying your code and improving maintainability.
## Benefits of Custom Filters
Custom Filters offer several advantages:
1. **Executes on the Server**: The filter is processed on the server, meaning it has the full power of the backend. This allows for more complex operations, such as database queries, and offloads the filtering from the client, improving performance.
2. **Reusability**: You can reuse the same filtering logic in different parts of your application without rewriting it each time.
3. **Maintainability**: If you need to update your filtering criteria, you can do it in one place, ensuring consistency throughout your app.
4. **Readability**: By encapsulating the filter logic, your code becomes cleaner and easier to understand.
5. **Flexibility**: Custom Filters allow you to pass dynamic parameters, making them adaptable to various scenarios.
## Defining a Custom Filter in the Order Entity
In the `Order` entity, we'll define a custom filter to encapsulate the filtering logic for active orders within a given year.
```solution:/shared/Order.ts title="shared/Order.ts" collapse={1-9,11-28} add={30-40}
```
### Breakdown of the Code
1. **Custom Filter Definition**:
- `Filter.createCustom()` defines a custom filter for the `Order` entity.
- The filter accepts an argument object with a `year` property and returns an object representing the filter criteria.
- In this case, the filter checks for `Order` records with specific statuses and filters orders within the specified year.
2. **Static Method**:
- The `activeOrdersFor` is a static method, meaning it belongs to the class itself and can be used without creating an instance of the `Order` class.
- This method dynamically generates the filter based on the `year` parameter passed in by the user.
3. **Status and Order Date Filters**:
- The filter checks if the order's status is one of the following: `'created', 'confirmed', 'pending', 'blocked', 'delayed'`.
- It also filters the orders by their `orderDate`, ensuring only orders from the specified year are included in the results.
## Using the Custom Filter
Once the custom filter is defined, you can use it in your code as follows:
```solution:/frontend/Page.tsx title="shared/Page.tsx" collapse={1-5,15-100} add={11}
```
### Explanation of Usage
- **Simplified Code**: By using `Order.activeOrdersFor({ year })`, you're applying the filtering logic in a clean and reusable manner. You no longer need to duplicate the filtering conditions wherever this logic is required.
- **Dynamic Parameters**: The `{ year }` argument allows the filter to be used with different years, making it adaptable to different contexts.
- **Backend Evaluation**: The filtering is handled on the backend, meaning that you avoid sending large datasets to the client and applying the filters there, which optimizes performance.
## Composability: Combining Filters
One of the powerful features of custom filters is their **composability**. You can combine a custom filter with other filters to create more complex query logic. This is useful when you want to add additional filtering conditions on top of your custom filter.
### Example: Combining with an `amount` Filter
Let’s say you want to find active orders for a given year, but you also want to filter the orders based on their total `amount`. You can easily combine filters using the `$and` operator:
```tsx
repo(Order).find({
where: {
$and: [
Order.activeOrdersFor({ year }),
{
amount: { $gt: 100 },
},
],
},
}),
```
### Explanation
1. **Custom Filter (`activeOrdersFor`)**: Filters the orders by their status and order date for the specified year.
2. **Additional Filter (Amount)**: The second filter adds an extra condition that only includes orders where the total amount is greater than 100.
3. **Combining with `$and`**: The `$and` operator combines both filters, ensuring that only orders that satisfy both the `activeOrdersFor` filter and the `amount` filter are included in the results.
### Recap
With composable custom filters, you can build modular, reusable filters that combine seamlessly with other conditions, making your code more flexible and maintainable. Whether you're filtering by status, date, or custom logic like order amount, custom filters allow you to easily manage complex queries with less effort.
# Interactive Tutorial - In Depth - Advanced Filtering - Filter Based on Relation
# Filter Based on Relation
When working with relational data, you might encounter scenarios where you need to filter records based on data from related entities. A common example is retrieving all orders for customers located in specific cities, such as London or New York.
In this lesson, we'll explore how to achieve this by utilizing **custom filters** that apply conditions to related entities. This approach makes it easier to handle complex filtering requirements while keeping your code clean and reusable.
## Scenario: Filtering Orders by Customer's City
Imagine we want to display all orders from customers who live in either London or New York. To accomplish this, we need to filter the `Order` entity based on a related field (`city`) from the `Customer` entity.
We'll define a **custom filter** in the `Order` entity that allows us to query orders based on the city of the related customer.
## Step 1: Define the Custom Filter
In the `Order` entity, we will create a custom filter called `fromCity` that will filter orders based on the city of the related customer. This filter will retrieve the customers from the specified city and then use their `id` values to filter the corresponding orders.
```file:/shared/Order.ts title="shared/Order.ts" collapse={1-8,10-21} {23-35}
```
### Explanation of the Code
1. **Customer and Order Entities**: The `Order` entity is related to the `Customer` entity via the `customerId` field. The `@Relations.toOne` decorator establishes this relation.
2. **Custom Filter (`fromCity`)**:
- This custom filter queries the `Customer` repository to find customers whose `city` contains the specified string (e.g., "New York" or "London").
- Once the customers are retrieved, their `id` values are used to filter orders by `customerId`. This approach allows us to query orders based on data from the related `Customer` entity.
3. **Backend Execution**: The custom filter logic is executed on the server, meaning the customer retrieval and the subsequent filtering happen on the backend, ensuring efficient data handling.
---
## Step 2: Using the Filter on the Frontend
To apply the `fromCity` custom filter in our frontend component, we'll use it in a `find` method to retrieve the relevant orders. Additionally, we will combine this filter with an extra condition to only include orders with an `amount` greater than 5.
Here’s the implementation in the frontend:
```file:/frontend/Page.tsx title="/frontend/Page.tsx" collapse={1-6,23-37} add={12}
```
### Explanation of the Frontend Code
1. **Combining Filters**:
- We use the `fromCity` custom filter to get all orders from customers living in New York.
- The `$and` operator combines this filter with an additional condition, ensuring that only orders with an `amount` greater than 5 are included.
2. **Including Related Data**:
- The `include` option is used to include customer data (e.g., city, name) in the result, allowing us to display the customer's city alongside the order information.
3. **Displaying the Data**:
- The fetched data is displayed in the component, with each order showing its ID, order date, customer city, and amount.
---
## Benefits of Using Custom Filters with Relations
### 1. Flexibility in Filtering
Custom filters allow you to define dynamic filtering logic that can be reused across your application. In this example, the `fromCity` filter can be applied in any scenario where you need to retrieve orders based on the customer's city, making the filtering logic more flexible and reusable.
### 2. Backend Efficiency
By executing the filter on the server, custom filters can take full advantage of backend resources, such as querying a database. This offloads the data processing from the frontend, resulting in faster performance and reduced data transfer.
### 3. Composability
Custom filters can be combined with other conditions (e.g., filtering by order amount) to create complex and nuanced queries. This composability ensures that you can handle a wide variety of filtering needs without duplicating logic.
### 4. Cleaner Code
By encapsulating the filtering logic in the `Order` entity, we avoid cluttering the frontend code with complex query conditions. This makes the frontend code cleaner and easier to maintain.
---
### Summary
Filtering based on relations is a common requirement in web applications, and custom filters provide an elegant way to handle it. By encapsulating the filtering logic in reusable components, we can efficiently query data based on related entities while keeping the code clean, readable, and maintainable.
The flexibility, efficiency, and composability of custom filters make them an essential tool for managing complex filtering scenarios in your applications.
# Interactive Tutorial - In Depth - Advanced Filtering - Filter Based on Relation Using SQL
# Filter Based on Relation Using SQL
In this lesson, we'll explore how to perform advanced filtering using SQL directly within custom filters. While Remult allows us to define filters using high-level syntax, there are cases where SQL queries can provide even more control, flexibility, and performance for filtering based on related entities.
Imagine a scenario where you want to filter orders based on the city of the customer, but this time, we'll leverage raw SQL to enhance performance, handle more complex conditions, and directly access the underlying database features.
## Why Use SQL in Custom Filters?
- **Performance**: SQL-based filters allow you to use the full power of the database's query optimizer, ensuring that complex joins and subqueries are handled efficiently.
- **Advanced Capabilities**: SQL provides access to advanced features like joins, aggregate functions, and subqueries, which can be harder to express in high-level filtering syntax.
- **Flexibility**: SQL filters allow for precise control over how your queries are executed, including optimizations like using indexes or specific execution plans.
- **Backend Execution**: Since these filters run on the server, they take advantage of server-side resources and avoid transferring unnecessary data to the frontend.
## Scenario: Filtering Orders by Customer's City Using SQL
Let's revisit our previous example where we filtered orders based on the customer's city. This time, we'll implement the filter using raw SQL for maximum control and efficiency.
In the `Order` entity, we'll define a custom filter using `SqlDatabase.rawFilter` to filter orders by the `city` field from the related `Customer` entity.
```file:/shared/Order.ts title="shared/Order.ts" collapse={1-15,17-27} {29-47}
```
### Explanation of the Code
1. **Using `dbNamesOf`**:
- The `dbNamesOf` utility is used to dynamically generate the correct column names for the `Order` and `Customer` entities, including the table name prefixes. This ensures that the generated SQL query matches the database schema and avoids potential naming conflicts.
- For the `Customer` entity, we specify an alias (`'c'`) for the table to make the SQL query more readable.
2. **SQL-Based Filter**:
- The `SqlDatabase.rawFilter` function allows us to define a custom SQL query for filtering. We use a subquery to select the `id` values of customers whose `city` matches the provided value. These `id` values are then used to filter orders based on the `customerId` field.
- The `param` function ensures that the city parameter is properly escaped, protecting against SQL injection and improving security.
3. **Efficiency**: By using SQL directly, we ensure that the filtering is performed in the database, leveraging its optimized querying capabilities. This is particularly useful for large datasets or complex conditions.
---
## Step 2: Using the SQL Filter on the Frontend
Now, let's use the `fromCity` SQL-based custom filter in the frontend component to fetch orders where the customer's city matches "London" or "New York".
```file:/frontend/Page.tsx title="/frontend/Page.tsx" collapse={1-6,23-37} add={12}
```
### Explanation of the Frontend Code
1. **Using the SQL Filter**:
- We use the `fromCity` custom filter to retrieve orders from customers whose city contains "New York". This filter is applied as part of the `find` query, **just like using any other filter**. The fact that this filter is SQL-based is abstracted away in the frontend code, making it seamless for developers to use without needing to worry about the underlying SQL logic.
- We also apply an additional condition to filter orders where the `amount` is greater than 5, further showcasing how custom filters can be combined with standard filters for flexible data retrieval.
2. **Combining Filters**:
- The `$and` operator is used to combine the SQL-based filter with other conditions, such as filtering by order `amount`. This demonstrates the **composability of filters**, where you can easily build more complex queries by combining different filtering logic together.
3. **Displaying the Data**:
- The customer details (including the city) are included in the result and displayed alongside the order information in the frontend. The SQL filter seamlessly integrates into the data retrieval process, with the **SQL being evaluated on the backend** to maximize security and efficiency. By keeping the SQL processing on the server, the risk of exposing sensitive logic or data manipulation vulnerabilities on the client side is greatly reduced.
This approach allows you to write highly performant and secure filters while maintaining a clean and familiar syntax on the frontend. The backend handles the complexity and ensures that only the necessary data is passed to the frontend, without exposing raw SQL queries or internal database structures.
---
## SQL Query Logging
To help debug and optimize your queries, you can enable SQL query logging in Remult. This will print the actual SQL queries being executed to the terminal, allowing you to inspect the generated SQL and ensure it's behaving as expected.
To enable SQL logging, simply add the following line to your code:
```ts
SqlDatabase.LogToConsole = true
```
With this enabled, the SQL queries executed by Remult will be logged to the console, giving you insight into how your filters are being translated into SQL.
---
### Translating Standard EntityFilter to SqlFilter Using `filterToRaw`
One of the powerful features of Remult is the ability to translate standard `EntityFilter` objects into SQL queries using `filterToRaw`. This allows you to define filters in a more declarative, high-level way while still taking advantage of SQL's performance and flexibility on the backend. In this section, we'll demonstrate how using `filterToRaw` within a custom filter can enhance flexibility and reduce complexity.
#### Example: `fromCity` Filter with `filterToRaw`
In this example, we enhance the `fromCity` custom filter by using `filterToRaw` to dynamically translate a standard `EntityFilter` into a SQL query. This approach combines the declarative nature of `EntityFilter` with the efficiency of SQL-based filtering.
```solution:/shared/Order.ts title="shared/Order.ts" collapse={1-15,17-28} {42,44-46}
```
### Breakdown of the Code
1. **Declarative Filter with `EntityFilter`**:
- Instead of manually crafting a SQL filter for the customer's `city` field, we define a standard `EntityFilter` using `{ city: { $contains: city } }`. This makes the filter more flexible, readable, and consistent with how you would typically filter data using Remult.
2. **Dynamic SQL Translation with `filterToRaw`**:
- The `filterToRaw` function takes the `EntityFilter` and translates it into a SQL condition. This SQL condition is then inserted directly into the larger SQL query that filters orders based on their associated customers' cities.
- In this case, we are dynamically generating the `WHERE` clause for the `Customer` table to match records where the `city` contains the specified string.
3. **Efficient SQL Query Generation**:
- The final SQL query is generated based on both the `EntityFilter` for the `Customer` and the overall filter for the `Order`. This ensures that the query is executed efficiently on the backend, leveraging the power of SQL to perform the filtering operation.
- By relying on `filterToRaw`, the SQL translation is handled automatically, ensuring that the query is optimized and preventing potential errors when manually crafting SQL conditions.
### Advantages of Using `filterToRaw`
1. **Simplified Code**:
- Using `filterToRaw` allows you to avoid manually writing raw SQL conditions for each filter. Instead, you can rely on the higher-level, declarative `EntityFilter` syntax, which is easier to read, maintain, and reuse.
2. **Consistency Across Filters**:
- `filterToRaw` ensures that your filters are consistent with how filtering is typically done in Remult. Whether you are using the standard `find` method or a custom SQL-based filter, the filter logic remains the same, reducing duplication and potential errors.
3. **Leverage SQL Efficiency**:
- While the filter is written in a declarative form, it is translated into highly efficient SQL that runs on the backend. This ensures that complex filtering logic can still take advantage of SQL's performance and indexing capabilities.
4. **Flexibility**:
- With `filterToRaw`, you can easily apply other standard Remult filters in conjunction with SQL-based filters. This allows you to build complex filtering logic without losing the benefits of either approach.
### Example of Generated SQL Query
When using the `fromCity` filter with `filterToRaw`, the following SQL query might be generated:
```sql
SELECT "id", "status", "customerId", "orderDate", "amount"
FROM "orders"
WHERE "customerId" IN (
SELECT "c"."id"
FROM "customers" AS c
WHERE c."city" LIKE '%New York%'
)
ORDER BY "orderDate" ASC
```
In this example:
- The `filterToRaw` function dynamically translates the `{ city: { $contains: city } }` filter into the SQL condition `c."city" LIKE '%New York%'`.
- This SQL is then combined with the main query that retrieves the orders, ensuring that the filter is efficiently executed on the backend.
### Conclusion
By using `filterToRaw`, you can combine the best of both worlds: the simplicity and readability of declarative filters with the power and performance of SQL-based filtering. This approach not only simplifies your code but also ensures that your filters are executed efficiently on the server, making it ideal for complex data retrieval scenarios.
## Benefits of SQL-Based Filters
### 1. Performance
SQL-based filters allow you to take full advantage of the database's query optimizer, which can significantly improve the performance of complex filtering operations. By offloading the filtering to the database, you can reduce the amount of data that needs to be transferred to the frontend and improve response times.
### 2. Full Control Over SQL Queries
When using SQL-based filters, you have full control over the generated SQL queries. This allows you to fine-tune the queries for specific use cases, optimize performance, and handle complex conditions that may be difficult to express using high-level filtering syntax.
### 3. Handling Complex Relations
With SQL, you can handle complex relational queries that involve multiple entities, joins, subqueries, and more. This is especially useful when working with large datasets or when you need to perform operations that go beyond simple filtering.
### 4. Backend Execution
By executing the SQL queries on the backend, you leverage the full power of the server's database, ensuring efficient data processing. This also minimizes the load on the frontend and reduces data transfer, leading to better performance and scalability.
---
## Summary
In this lesson, we've explored how to use raw SQL within custom filters to perform advanced filtering based on relations. By leveraging SQL, you can take full advantage of the database's querying capabilities, handle complex relational logic, and improve the performance of your application.
By combining SQL-based filters with the power of Remult, you can create highly efficient and flexible filtering logic that runs on the backend, making it a powerful tool for building scalable and performant web applications.
# Interactive Tutorial - In Depth - Advanced Filtering - Sql Relations Filter
### SQL Relations Filter
:::warn
**Experimental Feature:** This API is subject to change in future versions of Remult.
:::
Filtering based on relations can be a powerful tool when querying data that involves multiple interconnected entities. The new `sqlRelationsFilter` function is designed to simplify and streamline filtering data based on relational information while utilizing the power of SQL for performance.
### What is `sqlRelationsFilter`?
`sqlRelationsFilter` is a utility designed for simplifying the process of filtering entities based on relational data by using SQL's capabilities to execute the filtering on the backend. It leverages Remult’s entity relations and generates SQL queries that optimize how you query data.
Let's consider an example where we want to filter orders based on their related customer’s city:
```file:/shared/Order.ts title="shared/Order.ts" collapse={1-9,11-22} {26-30}
```
### Breakdown of the Code
1. **Filter Definition**:
- The `fromCity` filter is defined as a custom filter using `Filter.createCustom`. It takes a single argument, `city`, which will be used to filter orders based on the related customer’s city.
2. **Using `sqlRelationsFilter`**:
- `sqlRelationsFilter(Order)` is called to set up a filter for the `Order` entity. This function simplifies the task of querying orders based on their relationships (in this case, the `customer` relation).
3. **`customer.some()`**:
- The `.some()` method is applied to the `customer` relation. It allows you to define a condition that checks whether any related `Customer` entity satisfies the condition. In this case, we are looking for customers whose city contains the specified string (`$contains: city`).
4. **SQL Efficiency**:
- Behind the scenes, `sqlRelationsFilter` translates this logic into an optimized SQL query that performs the filtering on the backend. This ensures that even complex relation-based filters are executed efficiently at the database level.
### Why Use `sqlRelationsFilter`?
- **Simplified Syntax**: `sqlRelationsFilter` reduces the complexity of writing relation-based queries by abstracting away the SQL translation. You define the filter conditions declaratively, and the utility handles the SQL generation.
- **SQL Power**: While the filter is defined in a high-level, declarative way, it leverages the full power of SQL for execution. This ensures that your relation-based filters are as performant as possible.
- **Optimized for Relations**: Filtering based on relations (e.g., orders based on customer data) can be tricky when working with large datasets. `sqlRelationsFilter` optimizes this process by generating SQL that efficiently queries relational data, preventing performance bottlenecks in your application.
### Example of How to Use It in Your Application
Let’s say you have a frontend application where you want to display orders based on the customer’s city. You can use the `fromCity` filter directly in your component or page like this:
```file:/frontend/Page.tsx title="/frontend/Page.tsx" collapse={1-6,23-37} add={12}
```
### SQL Efficiency and Security
- **Efficient Backend Execution**: Using `sqlRelationsFilter`, the filter is executed directly on the backend. This ensures that the heavy lifting of filtering large datasets is done by the database, not the frontend, improving performance and reducing load times.
- **Security**: Since the filter is executed on the backend, it mitigates risks such as SQL injection. Additionally, all parameters are properly sanitized, ensuring a secure and efficient query execution.
### Example of Generated SQL
Using `sqlRelationsFilter`, a query like the one above may generate the following SQL:
```sql
SELECT "orders"."id", "orders"."orderDate", "orders"."amount", "orders"."customerId"
FROM "orders"
WHERE "orders"."customerId" IN (
SELECT "customers"."id"
FROM "customers"
WHERE "customers"."city" LIKE '%New York%'
);
```
This SQL query:
- Selects orders where the related customer is from a city that contains "New York".
- Uses an efficient `IN` clause to find matching customer IDs and returns the associated orders.
### Summary of Benefits
- **Simple Syntax**: `sqlRelationsFilter` provides a clean, declarative way to filter based on relations.
- **Performance**: The filter is translated to efficient SQL that is executed on the backend, leveraging the power of the underlying database.
- **Security**: By handling filters on the server, it ensures that queries are properly sanitized and secure.
- **Optimized for Relations**: Specifically designed for cases where you need to filter entities based on related entities, such as filtering orders based on customer information.
---
With `sqlRelationsFilter`, handling relation-based filtering in Remult becomes simpler, more efficient, and more powerful. Whether you’re working with large datasets or complex relational models, this utility helps you build queries that are both performant and easy to maintain.
# Interactive Tutorial - In Depth - Sql Expression Entity Field - Introduction
### SQL Expressions for Entity Fields
In Remult, `sqlExpression` fields provide a convenient way to bring SQL’s computational power directly into your entity fields. This allows you to define fields based on SQL expressions, which perform calculations on the backend and can be easily used for sorting and filtering, making your application more efficient and reducing the need for additional queries.
---
## Example: Total Order Amount for Each Customer
In this example, we’ll add a `totalAmount` field to the `Customer` entity. This field calculates the total order amount for each customer using a SQL sum function, which aggregates the `amount` field from the `Order` table.
```file:/shared/Customer.ts title="shared/Customer.ts" collapse={1-4,6-13} add={15-26}
```
### Explanation of the Code
- **`sqlExpression`**: The `sqlExpression` option allows you to define a SQL-based calculation as an entity field. Here, it’s used to sum up the `amount` values in the `Order` table where the `customerId` matches the current customer’s ID.
- **`dbNamesOf` Utility**: This function ensures that the table and column names align with the database schema, providing consistency and accuracy when constructing SQL queries.
- **Dynamic Calculation**: The `totalAmount` field dynamically calculates the sum of order amounts for each customer, offering real-time insights into customer spending.
### Using `totalAmount` in Queries
With `sqlExpression`, you can treat `totalAmount` like a standard field, enabling advanced filtering and sorting directly within your queries.
#### Sorting by `totalAmount`
To retrieve customers ordered by the total amount they’ve spent, in descending order:
```ts
const customersSortedByAmount = await repo(Customer).find({
orderBy: {
totalAmount: 'desc',
},
})
```
#### Filtering by `totalAmount`
You can also filter customers based on their total spending. For example, to find customers who have spent more than $50:
```ts
const highSpendingCustomers = await repo(Customer).find({
where: {
totalAmount: { $gt: 50 },
},
})
```
In this query:
- The `where` condition filters customers based on their `totalAmount`, letting you retrieve only those who meet the specified spending criteria.
- As the calculation is performed on the backend, it remains efficient even with large datasets.
---
## Benefits of `sqlExpression`
1. **Backend Efficiency**: By offloading calculations to the database, `sqlExpression` fields enable faster query performance, especially for large datasets.
2. **Single Query**: Aggregation and calculations happen in the same query, reducing code complexity and minimizing client-server communication.
3. **Real-time Values**: Fields like `totalAmount` reflect the latest data, as they’re calculated each time the field is accessed.
4. **Sorting and Filtering**: You can seamlessly sort or filter based on `sqlExpression` fields, making it easier to create complex queries without additional backend logic.
---
With `sqlExpression` fields, you can incorporate powerful SQL computations into your entities, simplifying data aggregation and improving application performance. This feature is ideal for cases like summing order totals, calculating averages, or performing other backend-based calculations, all while keeping your code clean and efficient.
# Interactive Tutorial - In Depth - Sql Expression Entity Field - Getting a field from a relation
### SQL Expressions for Fields Based on Relations
With Remult’s `sqlExpression` feature, you can create fields that pull data from related entities. This approach is especially useful when you want to sort, filter, or display information from a related entity directly within the current entity’s context.
---
## Example: Adding Customer City to the Order Entity
Suppose you want to display and sort orders based on the city of each order’s customer. Instead of loading each customer’s data separately, you can add a `customerCity` field to the `Order` entity, which will retrieve the customer’s city information directly from the database.
```file:/shared/Order.ts title="Shared/Order.ts" collapse={1-4,6-13} add={14-23}
```
### Explanation of the Code
- **SQL Expression as a Related Field**: The `sqlExpression` for `customerCity` pulls the `city` field from the `Customer` entity, using a subquery to fetch the value based on the `customerId` in the `Order` entity.
- **`dbNamesOf` Utility**: Ensures that table and column names match the schema, reducing errors and improving consistency.
- **Dynamic Data**: The `customerCity` field provides real-time data from the related `Customer` entity, allowing you to view the customer’s city alongside order information.
### Using `customerCity` for Sorting and Filtering
With `customerCity` as a field in the `Order` entity, you can now sort and filter orders by their customer’s city without needing to load or query the `Customer` entity directly.
#### Sorting by `customerCity`
To sort orders by the customer’s city in ascending order:
```ts
const ordersSortedByCity = await repo(Order).find({
orderBy: {
customerCity: 'asc',
},
})
```
#### Filtering by `customerCity`
To retrieve orders where the customer’s city is "London":
```ts
const ordersFromLondon = await repo(Order).find({
where: {
customerCity: 'London',
},
})
```
In this query:
- Sorting and filtering directly by `customerCity` keeps your code cleaner and reduces the need for extra joins or nested queries.
- By leveraging `sqlExpression`, you optimize performance as the field data is retrieved from the database in a single query.
---
## Benefits of Using `sqlExpression` for Related Fields
1. **Efficient Data Retrieval**: Fetch data from related entities without additional queries or client-server communication.
2. **Improved Performance**: Since the database performs the subquery, it remains efficient even with large datasets.
3. **Simplified Code**: Sorting and filtering by related fields becomes as simple as using any other field.
4. **Real-time Information**: The related field’s data remains current, reflecting any changes to the related entity.
---
In this lesson, you’ve seen how `sqlExpression` can transform your data handling by enabling seamless access to fields from related entities. This feature is ideal for situations where you need to use related data for sorting, filtering, or displaying, all while keeping your code efficient and streamlined.
# Interactive Tutorial - In Depth - Sql Expression Entity Field - Sql Relations
### Leveraging `sqlRelations` for Advanced SQL-Based Relationships
:::warn
**Experimental Feature:** This API is subject to change in future versions of Remult.
:::
The `sqlRelations` API (currently experimental) enhances the way you handle relationships in Remult by enabling SQL-like expressions directly on related entities. This allows for the seamless use of fields from related entities, simplifying complex queries and calculations. Let’s explore its use in a few examples that demonstrate the power of `sqlRelations`.
---
## Example 1: Adding Customer City to the Order Entity
In many cases, you may want to display information from a related entity, such as a customer’s city, directly within the `Order` entity. With `sqlRelations`, you can do this using a straightforward syntax.
```file:/shared/Order.ts title="shared/Order.ts" collapse={1-5,7-14} add={16-19}
```
### Explanation
- **Direct Relation Field**: `sqlRelations(Order).customer.city` pulls the `city` field from the `Customer` entity, eliminating the need for a join.
- **Dynamic Data**: The `customerCity` field within `Order` automatically updates whenever the related `Customer` data changes.
---
## Example 2: Counting Related Records in Customer
To show the number of orders a customer has, you can define a `orderCount` field in the `Customer` entity using `sqlRelations`.
```file:/shared/Customer.ts title="shared/Customer.ts" collapse={1-5,7-14,21-100} add={16-19}
```
### Explanation
- **Counting Relations**: `sqlRelations(Customer).orders.$count()` counts the number of related `Order` records for each customer.
- **Efficient Aggregation**: This aggregation is done directly in SQL, making it highly efficient for large datasets.
---
## Example 3: Counting Orders with Specific Conditions
Suppose you want to count only the customer’s orders where the amount is over a certain threshold (e.g., greater than 50). You can add a `bigOrderCount` field to the `Customer` entity.
```file:/shared/Customer.ts title="shared/Customer.ts" collapse={1-5,7-20,28-100} add={21-27}
```
### Explanation
- **Conditional Counting**: This field uses `$count` with a filter condition to count only orders with an amount greater than 50.
- **Dynamic Filtering**: You can specify any criteria here, providing flexibility for conditional counts within the related entity.
---
## Example 4: Dynamic SQL Aggregation
For advanced calculations, such as summing up the total order amount for each customer, you can use `$subQuery` to create custom SQL aggregations.
```file:/shared/Customer.ts title="shared/Customer.ts" collapse={1-5,7-28} add={29-33}
```
### Explanation
- **Custom Aggregations**: The `$subQuery` method allows you to define a custom SQL expression for advanced calculations. Here, it calculates the total order amount for each customer.
- **Dynamic Syntax**: `sqlRelations` provides flexibility for creating any kind of SQL-based aggregation, allowing you to customize the expression to fit your needs.
---
## Summary of `sqlRelations` Benefits
1. **Efficiency**: By generating SQL expressions directly within entity fields, `sqlRelations` minimizes database calls and performs calculations in SQL, improving performance.
2. **Simplified Code**: Directly including related entity fields and aggregations within your entity definitions streamlines code and enhances readability.
3. **Dynamic Aggregations**: With `$subQuery`, you can create complex aggregations based on related data, enabling powerful data insights with minimal effort.
This approach provides a powerful way to manage complex relationships and aggregations in Remult, bringing the flexibility of SQL into the realm of structured, type-safe TypeScript fields.
# Interactive Tutorial - In Depth - Access Control - Intro & Field-Level Authorization
# Field-Level Authorization in Remult
This lesson builds upon the foundational [Authentication & Authorization](../../../1-basics/7-auth/1-introduction/) article, so please review that if you haven't yet. Now, let’s dive into adding fine-grained access control by managing authorization on a field-by-field basis within your entities.
### Adding `ownerId` Field with Controlled Updates
To start, we want each task to record the `ownerId`, which tracks who created or owns the task.
Here’s how to add the `ownerId` field to the `Task` entity:
```file:/shared/Task.ts title="shared/Task.ts" collapse={1-5,7-17} add={21-24}
@Fields.string({
allowApiUpdate: false, // Prevents updates via API
})
ownerId = remult.user?.id || ''
```
Setting `allowApiUpdate: false` ensures that once set, the `ownerId` cannot be modified through the API. This is useful for data fields you want to update only on the backend, while still allowing API updates for other fields.
:::warn
### API Rules Apply Only to API Access
The `allowApiUpdate`, `includeInApi`, and other access control options only apply to requests made through the API. They do not restrict access to data within backend methods or any code that directly interacts with the database on the backend - **including SSR (Server Side Rendering) scenarios**.
If you execute code directly on the backend, such as through a backend method or non-API route, you will still be able to view and modify all fields, regardless of the access restrictions defined for the API.
**Be mindful** of this distinction, as it is crucial for securing your application. Backend operations should be handled with caution, especially when dealing with sensitive or restricted data.
:::
### Controlling Field Access by Role
With Remult, the `allowApiUpdate` option lets you control which users or roles can update a specific field. For example:
```ts
@Fields.boolean({
allowApiUpdate: 'admin', // Only users with the 'admin' role can update
})
completed = false
```
This configuration restricts updates to users with the `admin` role only. To see this in action, try signing in as "Alex" (non-admin) and "Jane" (admin), and notice how the ability to change the `completed` status differs.
#### Tip: Try it out in the Admin UI
The same authorization rules apply to fields in the Remult Admin UI. You can experiment further by navigating to the `Remult Admin UI` link, where you’ll see that updates follow the same API restrictions set in the code.
### Conditional Authorization with Arrow Functions
Authorization can also be controlled using more dynamic conditions through arrow functions. For example, suppose we want either an `admin` or the task `owner` to be able to update the `completed` field. We could define the field like this:
```ts
@Fields.boolean({
allowApiUpdate: task => remult.isAllowed("admin") || task.ownerId === remult.user?.id,
})
completed = false
```
- `allowApiUpdate` is set to an arrow function that takes the `task` entity as a parameter.
- **Condition 1**: `remult.isAllowed("admin")` checks if the current user has the "admin" role. If they do, they can update the field.
- **Condition 2**: `task.ownerId === remult.user?.id` checks if the current user is the task owner by comparing the `ownerId` field in the task to the current user’s ID.
If either condition is true (i.e., the user is an "admin" or the task owner), the `completed` field can be updated. If both are false, the update is blocked.
This conditional approach allows flexible, role-based, and ownership-based control over specific fields in an entity.
### Allowing Updates Only on New Rows
Another useful pattern is to restrict updates to a field when a task is first created but disallow changes afterward:
```ts
allowApiUpdate: (task) => getEntityRef(task).isNew()
```
This ensures the field is set initially but prevents further modifications.
## Hiding Fields with `includeInApi`
The `includeInApi` option allows you to prevent specific fields from appearing in the API response altogether. This is particularly useful for sensitive data like passwords or other restricted fields.
```ts
@Fields.string({
includeInApi: false, // Omits this field from API responses
})
password = ''
```
### Versatile Options for `includeInApi`
Just like `allowApiUpdate`, the `includeInApi` option offers versatility. You can set it to `true`, `false`, specific roles, or an arrow function for dynamic control over who can access the field in the API response. This makes `includeInApi` highly adaptable to various access requirements.
Examples:
1. **Role-Based Access**:
```ts
@Fields.string({
includeInApi: 'admin', // Only users with 'admin' role see this field
})
privateInfo = ''
```
2. **Conditional Access with an Arrow Function**:
```ts
@Fields.string({
includeInApi: task => remult.isAllowed("admin") || task.ownerId === remult.user?.id,
})
privateNotes = ""
```
In this example:
- **Admin Access**: If the user has the "admin" role, they see the `privateNotes` field.
- **Owner Access**: The task owner can also see `privateNotes`.
This flexibility with `includeInApi` allows you to apply fine-grained control over which users can access specific data, enhancing security and providing precise control over your API’s data exposure.
### Summary
By using `allowApiUpdate` and `includeInApi`, you have fine-grained control over which fields users can modify or view based on roles, data ownership, and custom conditions.
# Interactive Tutorial - In Depth - Access Control - Row-Level Authorization
# Row-Level Authorization
Row-level authorization enables control over specific rows of an entity based on user roles, ownership, or custom logic. This feature is essential for applications that need fine-grained permissions.
Consider the following example:
```file:/shared/Task.ts title="shared/Task.ts" collapse={13-30} add={4-8}
```
### Understanding Each Authorization Option
1. **`allowApiRead: true`**
- `allowApiRead` controls whether rows are accessible for reading through the API, and it defaults to `true`, unlike other options that default to `false`.
- Although you cannot use an arrow function with `allowApiRead` to restrict specific rows, this can be achieved using row-level filters, which we’ll cover in the next lesson, **"Filtering Rows Based on User Permissions"**.
2. **`allowApiInsert: remult.authenticated`**
- Restricts the ability to create new tasks to authenticated users. Any user who is not logged in will be denied insert access.
3. **`allowApiDelete: 'admin'`**
- Limits deletion of tasks to users with the `admin` role, preventing other users from deleting tasks through the API.
4. **`allowApiUpdate` with Conditional Logic**
- The `allowApiUpdate` option here uses an arrow function to set conditional update access based on role and ownership:
```typescript
allowApiUpdate: (task) =>
remult.isAllowed('admin') || task.ownerId === remult.user?.id,
```
- This configuration allows:
- Admin users to update any task, and
- Non-admin users to update only their own tasks, identified by matching `task.ownerId` to the current user’s ID.
- Such logic provides flexibility for controlling access at a granular level, aligning permissions with both general access and specific ownership.
### Versatility Across Options
Each of these options—`allowApiRead`, `allowApiInsert`, `allowApiDelete`, and `allowApiUpdate`—can accept different inputs to define permissions:
- **Boolean values** (`true` or `false`) for universal access or denial.
- **Role strings** or arrays of roles (e.g., `'admin'` or `['admin', 'manager']`) for access control based on user roles.
- **Arrow functions** for `allowApiInsert`, `allowApiDelete`, and `allowApiUpdate`, providing custom logic based on roles, user IDs, or specific row attributes.
In the upcoming lesson, **"Filtering Rows Based on User Permissions"**, we’ll explore how to apply row-level access control dynamically, allowing each user to view only the rows they are permitted to access using specific filters.
# Interactive Tutorial - In Depth - Access Control - Filtering Rows Based on User Permissions
# Filtering Rows Based on User Permissions
Filtering rows based on user permissions ensures that users only access the rows they are authorized to see, update, or delete. This lesson covers using `apiPrefilter` to define permission-based filters applied to API requests, providing security and data isolation for users.
```file:/shared/Task.ts title="shared/Task.ts" collapse={12-30} add={4-8}
```
### Code Explanation
1. **Admin Access**
- If the user has an `admin` role, `apiPrefilter` returns an empty filter (`{}`), allowing access to all rows without restriction.
2. **Authenticated User Access**
- For authenticated users who are not admins, `apiPrefilter` restricts access to rows where the `ownerId` matches the current user's ID, allowing users to view only their own tasks.
3. **Unauthorized Access**
- If the user is not authenticated or doesn’t meet any conditions, `apiPrefilter` raises a `ForbiddenError`, blocking access entirely.
### Authorization Beyond Read Access
`apiPrefilter` not only restricts read access but also applies to `update` and `delete` operations. Users can only update or delete rows they have permission to access, adding a layer of security to ensure data isolation across user roles.
### Important Considerations
- **API Scope**
- `apiPrefilter` applies only to API rules. This means it governs only API-based access, so backend methods or direct backend queries bypass this filter. To apply similar restrictions to backend access, use `backendPrefilter`.
- **Consistent Rules with `backendPrefilter`**
- In cases where you need uniform access control across both API and backend, adding a `backendPrefilter` alongside `apiPrefilter` helps ensure that both API and backend methods adhere to the same filtering logic. This is essential in scenarios where sensitive data could be exposed or modified directly within backend logic.
### Try It Out!
To see `apiPrefilter` in action, try signing in as different users:
- **Sign in as Alex** (non-admin): Alex can only see, update, and delete tasks he owns.
- **Sign in as Jane** (admin): Jane, as an admin, can access, update, and delete all tasks.
By switching between these accounts, you’ll observe how `apiPrefilter` limits access based on user roles, ensuring that each user only interacts with rows they're authorized to see and modify.
---
By combining `apiPrefilter` with row-specific rules in `allowApiUpdate`, `allowApiDelete`, and `allowApiInsert`, you gain a powerful framework for dynamic, row-level security based on user permissions. This approach protects data integrity and enhances security across various layers of application logic.
# Interactive Tutorial - In Depth - Access Control - Filtering Related Rows Based on User Permissions
# Filtering Related Rows Based on User Permissions
In this lesson, we’ll explore how to apply user-based access controls to related rows in your data model. Specifically, we’ll filter the `TimeEntry` API to ensure that only entries for tasks the user is allowed to view are accessible. This involves reusing the `apiPrefilter` logic from the `Task` entity and applying it to related entities like `TimeEntry`.
## Step 1: Refactor `apiPrefilter` into a Custom Filter
First, we’ll refactor the `apiPrefilter` logic in `Task` into a reusable custom filter. This allows us to apply the same filtering logic in multiple places, ensuring consistency.
### Task Entity
In `Task`, we define a static custom filter, `allowedTasks`, which checks the user's role:
```file:/shared/Task.ts title="shared/Task.ts" {4} add={23-28} collapse={8-21}
```
### Explanation of the Code
- **`allowedTasks` Custom Filter**: This filter uses `remult.isAllowed` to check if the user has the `admin` role. Admins can access all tasks, while other authenticated users can only access their own tasks.
- **`apiPrefilter` in Task**: We then use `allowedTasks` within `apiPrefilter`, ensuring that only allowed tasks are accessible through the API.
## Step 2: Apply the Custom Filter in `TimeEntry`
Now that we have the `allowedTasks` filter, we can use it in the `TimeEntry` entity to restrict access based on the user’s permissions for related tasks.
### TimeEntry Entity
In `TimeEntry`, we apply the `allowedTasks` filter to only show time entries associated with tasks the user is permitted to view:
```file:/shared/TimeEntry.ts title="shared/TimeEntry.ts" add={6-10} collapse={13-26}
```
### Explanation of the Code
- **`apiPrefilter` in TimeEntry**: This prefilter checks `TimeEntry` rows by filtering based on the tasks the user can access. First, we fetch the IDs of tasks allowed for the user by calling `Task.allowedTasks()`. We then use these IDs to filter the `TimeEntry` API, ensuring that only time entries related to accessible tasks are visible.
### Try It Out!
- **Sign in as Alex** (non-admin): Alex can only see time entries for tasks he owns.
- **Sign in as Jane** (admin): Jane can access all time entries, regardless of the task owner.
This setup demonstrates how to efficiently apply consistent access control across related entities using a reusable custom filter.
---
### Improving Performance with SQL-Based Filtering
Below, we modify `apiPrefilter` in `TimeEntry` to use `SqlDatabase.rawFilter`. This lets us directly create a SQL-based filter that leverages the related `Task` entity filter without fetching task data in advance:
```solution:/shared/TimeEntry.ts title="shared/TimeEntry.ts" add={6-18} collapse={21-36}
```
### Explanation of the Code
1. **SQL-Based Filter for Task Access**: Instead of fetching allowed tasks and filtering in memory, we use `SqlDatabase.rawFilter` to create a dynamic SQL subquery that applies `Task.allowedTasks()` directly in the database.
2. **Roles of `dbNamesOf`, `rawFilter`, and `filterToRaw`**:
- **`dbNamesOf`**: This function retrieves database-specific names for entity fields and tables, which helps build queries compatible with the database schema. In this example, we use `dbNamesOf` to get the table names and field references for `Task` and `TimeEntry`, ensuring SQL compatibility.
- **`rawFilter`**: The `SqlDatabase.rawFilter` function enables direct SQL manipulation for custom filters. This bypasses the usual in-memory filtering, allowing filters to execute within the database. Here, it constructs an SQL `IN` query that checks if the `taskId` in `TimeEntry` exists in a filtered list of `Task` IDs.
- **`filterToRaw`**: This helper translates a standard filter (like `Task.allowedTasks()`) into a raw SQL condition. It processes the custom filter defined in `allowedTasks()` and converts it into SQL, ensuring that our `Task` filtering rules are directly translated into the SQL subquery.
3. **Efficient Filtering**: By translating the `allowedTasks` filter to SQL, we ensure that all filtering happens within the database, reducing memory usage and improving query speed for better performance.
### Try It Out!
To see this SQL-based filtering in action:
1. Click **Solve** button to see the try the sql based implementation.
2. Sign in as different users (e.g., Alex and Jane) to observe how access to `TimeEntry` records changes based on the user's roles and permissions.
Using SQL-based filters provides an optimized way to manage related access control by leveraging the database’s capabilities, especially useful when dealing with large datasets or complex access rules.
# Interactive Tutorial - In Depth - Access Control - Sql Relations Filter for User Permissions
### SQL Relations Filter for User Permissions
:::warn
**Experimental Feature:** This API is subject to change in future versions of Remult.
:::
The `sqlRelationsFilter` function provides an efficient way to apply row-level filters across related entities directly within SQL, streamlining access control for related rows. In this lesson, we’ll use `sqlRelationsFilter` to apply permissions based on user access to `Task` entities in the `TimeEntry` entity.
### Defining User Permission Filters
In this example, we want to ensure that users can only access `TimeEntry` rows associated with `Task` entities they have permission to view.
#### TimeEntry Entity Setup
```file:/shared/TimeEntry.ts title="shared/TimeEntry.ts" add={7-8} collapse={11-25}
```
### Explanation of the Code
1. **Using `sqlRelationsFilter`**:
- The `sqlRelationsFilter` function is designed to apply row-level filtering logic directly within the database.
- Here, we use it to filter `TimeEntry` rows based on the associated `Task` rows that meet certain user permissions.
2. **Relation-Specific Filtering with `.some()`**:
- The `.some()` method is used to match `TimeEntry` rows with related `Task` rows that satisfy the filter in `Task.allowedTasks()`.
- By passing `Task.allowedTasks()` to `.some()`, we enforce permissions on `TimeEntry` rows linked to tasks the user is authorized to view.
3. **Simplified Filtering Logic**:
- `sqlRelationsFilter` enables us to express complex filtering conditions for related entities with a clear and concise API.
- This approach is not only efficient but also significantly reduces code complexity by handling filtering at the SQL level.
### Try It Out
1. **Sign in as Different Users**: Test with various users (e.g., users with and without admin roles) to observe how access to `TimeEntry` records changes based on the user’s permissions for related `Task` entities.
2. **Experiment with Permissions**: Modify the `allowedTasks` filter logic in `Task` to see how different rules impact the visibility of `TimeEntry` entries.
By leveraging `sqlRelationsFilter`, you can create highly performant and intuitive access control that directly uses SQL to enforce row-level permissions across related entities.
# Interactive Tutorial - In Depth - Entities as a single source of truth - Field Metadata
# Field Metadata
Entities in Remult are not just a single source of truth for storage, APIs, and authentication—they can serve as a central point for managing any entity-related aspect across your application. Let’s explore how to utilize field metadata for consistent UI labeling and data formatting.
### Setting Labels
To ensure consistent labels across your app, set the `label` attribute directly in the field definition. This way, the same label is automatically used wherever the field appears.
```file:/shared/Task.ts title="shared/Task.ts" collapse={1-6,16-100} add={12}
```
### Accessing Labels
Field metadata, like `label`, can be accessed using the `fields` property of a repository:
```typescript
const titleLabel = repo(Task).fields.title.label
console.log(titleLabel) // Outputs: "The Task Title"
```
Using labels this way allows for a unified UI. For example, in `TodoItem.tsx`:
```file:/frontend/TodoItem.tsx title="frontend/TodoItem.tsx" collapse={15-100} add={6,13}
```
Try changing the label of `title` in `Task` and observe how the UI updates automatically!
## Display Consistency with `displayValue`
To ensure consistent display formatting, especially for literals or dates, use the `displayValue` property.
### Example 1: Displaying a Literal Field
For fields with literal values, like `priority`, `displayValue` can ensure consistent capitalization:
```file:/shared/Task.ts title="shared/Task.ts" collapse={1-6,8-14,23-100} add={18-19}
```
In `TodoItem.tsx`, access and use this display formatting:
```file:/frontend/TodoItem.tsx title="frontend/TodoItem.tsx" collapse={1-14,19-100} add={17}
```
### Example 2: Displaying Dates with Reusable `displayValue`
Let’s take a closer look at defining `displayValue` for dates:
```file:/shared/Task.ts title="shared/Task.ts" collapse={1-6,8-25} add={28}
```
In this example, the `displayValue` function is designed to ignore the first parameter (representing the entity) and only use the second parameter, the date value. By focusing on the value alone, this `displayValue` function can be refactored into a standalone utility that works for any date field, not just `createdAt`.
#### Refactoring `displayValue` for Reusability
You can create a reusable `displayDate` function and use it across different date fields:
```typescript
// utils/displayValueHelpers.ts
export const displayDate = (_: unknown, date?: Date) =>
date?.toLocaleDateString()
```
Now, any date field can use this `displayDate` function for consistent date formatting, regardless of the entity:
```typescript
import { displayDate } from './utils/displayValueHelpers'
@Fields.createdAt({
label: 'Task Creation Date',
displayValue: displayDate,
})
createdAt?: Date
```
This approach ensures consistency in date formatting across your application and keeps your code clean and maintainable. You can define similar reusable functions for other field types, ensuring that formatting stays uniform across different entities and fields.
### Extending Field Options with Custom Options
Beyond the standard options, fields can also be enhanced with **custom options** tailored to your application's specific needs. These options allow you to store and access any metadata you might need directly within the field definition, making your entity models even more powerful and adaptable.
For example, you might want to add a custom validation message, tooltip, or any other metadata to a field. This added flexibility helps you centralize and standardize additional properties that can be useful in various parts of your application, from dynamic UI rendering to custom business logic.
To explore more about how to define and use custom options, check out [Enhancing Field and Entity Definitions with Custom Options](https://remult.dev/docs/custom-options#enhancing-field-and-entity-definitions-with-custom-options).
## Leveraging Metadata for Dynamic UI
With field metadata, you can abstract your UI components for consistent display across your app. Here’s an example of a dynamic component that uses field metadata:
```solution:/frontend/TodoItem.tsx title="frontend/TodoItem.tsx" add={6-10,14-19}
```
Click **"Solve"** at the top right of the code editor to see this abstraction in action. This dynamic UI approach ensures your fields are displayed with the same metadata-defined labels and formatting throughout the app.
---
you can use the `getValueList` function to get the values of a literal field
```tsx add=", getValueList" add={8-10}
import { repo, getValueList } from 'remult'
return (
{fields.map((field) => (
{field.label}: {field.displayValue(task)}{' '}
{getValueList(field as any)
? `(options: ${getValueList(field as any)})`
: ''}
))}
)
```
You can use these capabilities, together with the structured error model to create dynamic forms, dynamic grid and other dynamic uis that leverage
# Interactive Tutorial - In Depth - Entities as a single source of truth - Forms and Validation
### Forms and Validation
This lesson will guide you through creating a form with **field-level error handling** and **dynamic field labels** using metadata. You’ll learn how to capture validation errors, display custom field labels, and dynamically reflect error messages for specific fields.
### Code Example: TodoItem Component
Here’s the initial code for the `TodoItem` component:
```file:/frontend/TodoItem.tsx title="frontend/TodoItem.tsx" add={8,11-16,36} collapse={18-29,38-100}
```
### Code Explanation
1. **ErrorInfo Type**:
- `ErrorInfo` captures errors specific to each field in the `Task` entity. If validation errors occur, they populate `modelState`, which contains error messages for each field.
- **Example Validation Error Payload**:
```json
{
"modelState": {
"title": "Should not be empty",
"priority": "Value must be one of: low, medium, high"
},
"message": "The Task Title: Should not be empty"
}
```
- Each error message in `modelState` corresponds to a specific field, allowing targeted error display beside the relevant form inputs.
- The validations themselves are defined within the entity as part of our single source of truth, ensuring consistent rules and messages across the entire application.
- Check out the [validation options in the validation article](https://remult.dev/docs/validation) to see how you can define and extend these validations directly in your entity.
2. **The `save` Function**:
- `save` is triggered when the "Save" button is clicked:
- It starts by clearing previous errors with `setError(undefined)`.
- Then, it tries to save the `state` using `taskRepo.save(state)`.
- If an error occurs, `setError(error)` captures it, with field-specific messages provided by `ErrorInfo`.
3. **Displaying Field-Level Errors**:
- Error messages are shown directly below each field using `error?.modelState?.title` and `error?.modelState?.priority`.
- Optional chaining (`?.`) ensures the UI is protected from undefined values, making error handling efficient and safe.
### Try it Out
Clear the `title` field or set an invalid value for `priority` (anything other than "low," "medium," or "high") and see how validation messages appear in real-time, guiding users to correct their inputs.
### Expanding with Field Options
To enhance the user experience, let’s switch the `priority` input to a dropdown using the priority options defined in the entity.
1. First, add options to `priority`:
```tsx title="frontend/TodoItem.tsx" add={3}
import { getValueList } from 'remult'
//...
const options = getValueList(priorityField)
```
2. Use the `options` list to render a dropdown:
```tsx title="frontend/TodoItem.tsx" add={3-12}
```
This approach allows you to keep the `priority` options in the entity as a single source of truth, ensuring consistency across the application.
### Dynamic and Scalable Forms
To create a more dynamic form, you can loop through fields directly from the entity, easily building long or short forms without hardcoding field values:
```tsx
import { repo, ErrorInfo, getValueList } from 'remult'
import { Task } from '../shared/Task.js'
import { useState } from 'react'
const taskRepo = repo(Task)
export function TodoItem({ task }: { task: Task }) {
const [state, setState] = useState(task)
const [error, setError] = useState>()
async function save() {
try {
setError(undefined)
await taskRepo.save(state)
} catch (error: any) {
setError(error)
}
}
function reset() {
setError(undefined)
setState(task)
}
const fields = [taskRepo.fields.title, taskRepo.fields.priority]
return (
{fields.map((field) => {
const options = getValueList(field)
return (
)
})}