Admin UI
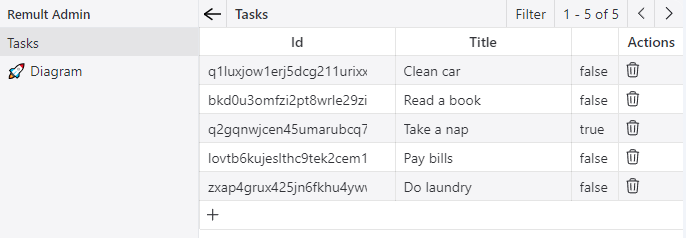
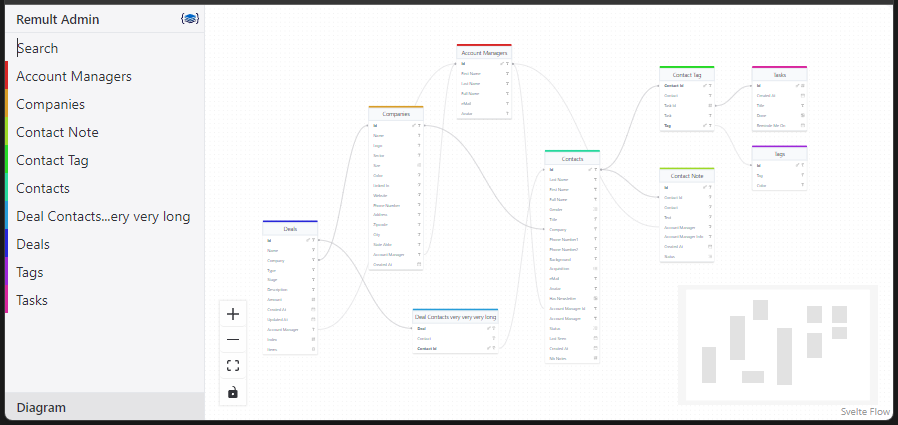
Enjoy a fully featured Admin UI for your entities, you can do CRUD operations on your entities, view their relationships via the Diagram entry, and ensure secure management with the same validations and authorizations as your application.
Enabling the Admin UI
Add the Admin UI to your application by setting the admin option to true in the remult configuration.
export const api = remultApi({
  entities: [],
  admin: true, // Enable the Admin UI
})
Tunning the Admin UI
You can pass some options to admin as well:
allow, using allowed.true,"admin", ...customHtmlHead, to add custom html to the head of the admin page. It's a function that receives remult as an argument.requireAuthToken, this will open settings dialog to set the bearer token directly.disableLiveQuery, this will disable live query for the admin ui. (can be overridden in the admin ui settings)
Example:
export const api = remultApi({
  entities: [],
  admin: {
    allow: 'admin', // Only for user having the "admin" role
    customHtmlHead: (r) =>
      `<title>Nice Admin! (${r.user?.name ?? 'Anonymous'})</title>
       <link href="https://remult.dev/favicon.png" rel="icon" type="image/png">`,
  },
})
Accessing and Using the Admin UI
Navigate to /api/admin to access the Admin UI. Here, you can perform CRUD operations on your entities, view their relationships via the Diagram entry, and ensure secure management with the same validations and authorizations as your application.

Features
Entity List: On the left side of the screen you have the entity list, you can use the search field to search for entities.
Entity Details: Clicking on an entity in the menu will open the entity details screen (in the middle), here you can view filter & paginate your data (top right). You can also see all relations of entity by clicking on the arrow on the left of each row. The last column is dedicated for actions where you can edit or delete an entity. On top left you can also add a new entity by clicking on the
+.Entity Diagram: Clicking on the Diagram entry will open the entity diagram screen, here you can see the entity relationships.

- Settings: On top left, you have a menu (remult logo) where you can find various settings for your admin ui.
- You want to confirm a delete all the time?
- You want to display Labels or Keys?
- Multiple options for automatic diagram layout (you want also do your own layout)
- You don't use cookies? No problem, you can set your bearer token (it will only be in session)
Demo in video
Watch this quick demo to see the Remult Admin UI in action:
This video showcases the key features and functionality of the Remult Admin UI, giving you a practical overview of how it can streamline your entity management process.